The fastest way to find air leaks in a house is to make the house pull outdoor air through its weak spots, then test the usual leak areas in a calm, repeatable order. Random caulking feels productive, but it often misses the bigger leaks hiding in attics, basements, crawl spaces, and service penetrations.
Start with the building shell, not the paint line around a window. A cold draft on your ankle may be coming from a rim joist, a recessed light, an attic hatch, or a plumbing chase several feet away. That is why learning how to find air leaks in a house starts with pressure and pattern, not with the first cold spot you notice. Air is annoying like that. It rarely enters where you first feel it.
Start by making the house easier to test
Air leaks show up more clearly when indoor and outdoor air are moving through pressure differences, so create a simple test condition before you walk around with smoke, tissue, or your hand.
Pick a windy or cold day if you can. Close exterior doors and windows. Turn off ceiling fans and forced-air HVAC for a few minutes so you are not chasing supply-register movement. Then turn on bathroom fans, the kitchen range hood, or a clothes dryer for a short test window. Exhaust fans pull air out of the house, which can make outside air enter through leaks.
Do not use an open flame near curtains, insulation, dusty attic areas, or combustible materials. A smoking incense stick is common because it gives a visible stream, but a thin strip of tissue taped to a pencil can be safer in tight corners. The goal is movement, not drama.
- Close all exterior doors and windows.
- Turn off HVAC blowers and ceiling fans for the test.
- Switch on one or two exhaust fans for several minutes.
- Test suspected areas slowly with smoke, tissue, a damp hand, or a thermal camera.
- Mark confirmed leaks with painter’s tape before you seal anything.
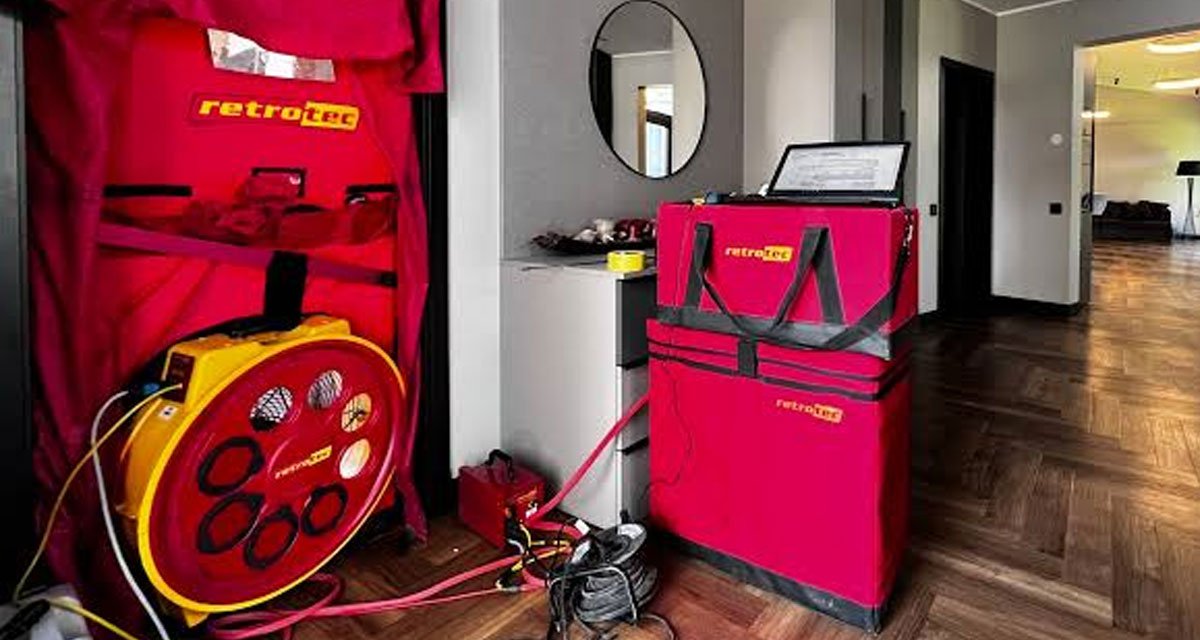
The U.S. Department of Energy says a qualified technician can use a blower door test to depressurize a home and reveal many leak locations, while simple DIY checks can still find some leaks without that equipment. That distinction matters: DIY testing is useful, but it is not a full measurement of home leakage.
Check the highest-probability leak sites first
The biggest useful finds are often not the obvious window drafts. Prioritize attic and basement pathways first, then move to doors, windows, outlets, and small trim gaps.
Warm air rises and escapes through upper leaks in winter. Replacement air then gets pulled in through lower leaks. That stack effect is why a cold first floor can be caused by attic bypasses, not just a leaky front door. In summer, the same leakage can pull humid outdoor air into cooled spaces and make rooms feel sticky even when the thermostat looks fine.
| Area to inspect | Common leak points | Best quick test | What the clue looks like |
|---|---|---|---|
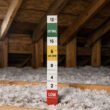
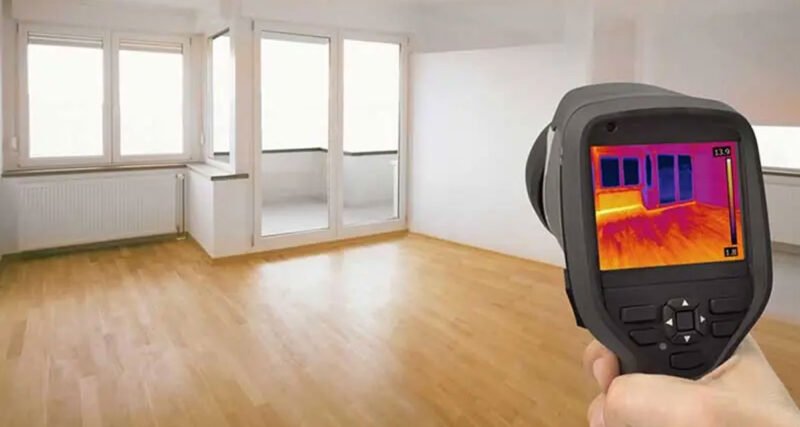
| Attic | Attic hatch, recessed lights, plumbing stacks, wiring holes, chimney chase, dropped soffits | Visual inspection, smoke from below, thermal camera on a cold day | Dirty insulation, frost, stained gaps, cold streaks near ceiling lines |
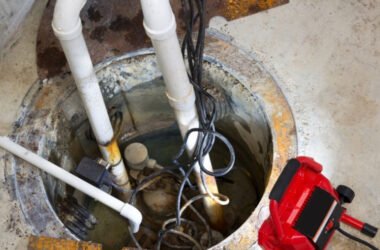
| Basement or crawl space | Rim joists, sill plates, band joists, pipe penetrations, cable entries | Hand test, tissue strip, flashlight from the opposite side | Cold edges, moving tissue, cobwebs that flutter |
| Windows and doors | Weatherstripping, sash locks, door sweeps, casing gaps | Smoke, paper pull test, flashlight at night | Smoke bends, paper slides out easily, visible light at the threshold |
| Interior walls connected to attic or garage | Electrical boxes, switches, baseboards, bath fans, duct chases | Smoke or tissue while exhaust fans run | Air movement around plates or trim even with windows shut |
| Ducts and registers | Disconnected ducts, return leaks, boot gaps, panned returns | Visual inspection while HVAC runs | Dust streaks, whistling, rooms that never catch up |
Dirty insulation is one of the better clues in an attic. Air moving through fiberglass often leaves gray or black filtering marks because the insulation catches dust like a rough air filter. A perfectly clean gap is not always good news either; sometimes air has washed a path through dust or loose fill.
By the time you are kneeling near a basement rim joist with a flashlight, the problem becomes very ordinary. Cold concrete smell. A line of dust on top of the sill. A small cobweb moving when everything else is still. That is usually where the useful evidence is.
Use the right DIY test for the clue you already have
No single DIY test finds every air leak. Use smoke for direction, tissue for subtle movement, touch for comfort clues, light for obvious gaps, and thermal tools for temperature patterns.
A smoke test works best when the air is moving gently. Hold the smoke source an inch or two from the suspected gap and move slowly. If the smoke pulls into the crack or blows away from it, you likely have air movement. If the smoke only wobbles because your hand moved too fast, repeat the test.
A tissue strip is low-tech but surprisingly useful. Tape a narrow strip of tissue or lightweight paper to a pencil and hold it near baseboards, outlet covers, attic hatches, and window trim. It responds to tiny airflow without the fire risk of incense. This is the same practical idea that maintenance workers use in industrial settings when they do not have fancy tools available.
“I usually sprinkle some dust or very thin pieces of light paper in the general area, then observe the movement of them to narrow down the leak. Gotta get creative on a machine with 0 budget.”
– r/IndustrialMaintenance, March 2026
| Test | Best for | Weak point | Good next step |
|---|---|---|---|
| Hand or damp hand | Obvious cold drafts near doors, windows, baseboards, and rim joists | Misses small leaks and can confuse cold surfaces with moving air | Confirm with smoke or tissue |
| Smoke or incense | Seeing the direction of airflow around cracks and trim | Unsafe in dusty or combustible areas; sensitive to hand movement | Move slowly and repeat with fans off and on |
| Tissue strip | Small leaks near outlets, weatherstripping, and attic hatches | Very light paper can react to normal room movement | Hold it still for several seconds before judging |
| Flashlight | Door sweeps, garage entries, basement penetrations, larger cracks | Only finds visible openings | Use at night with someone on the other side |
| Thermal camera or IR thermometer | Cold streaks, missing insulation, attic bypasses, uneven wall temperatures | Shows temperature difference, not always air movement | Confirm with smoke or blower door pressure |
| Blower door | Whole-house leakage measurement and hidden leaks | Requires a pro or rented equipment and proper setup | Use with smoke or infrared scanning during the test |
For windows, check more than the trim line. Lock the sash first. A slightly open sash can mimic a failed seal. Then test the meeting rail, the side tracks, the top sash, the sill, and the casing where the window unit meets the wall. A paper pull test helps on doors: close the door on a piece of paper. If it slides out with no resistance, the weatherstripping or latch pressure may be weak.
Read the leak signs correctly before sealing
A draft is only confirmed when the clue repeats under controlled conditions. Cold glass, wind gusts, HVAC airflow, and poor insulation can feel like leaks even when air is not moving through a crack.
This is where people waste a Saturday. They feel cold near a window, buy clear caulk, seal the interior trim, and still feel cold the next morning. Sometimes the real issue is radiant cooling from old glass. Sometimes the leak is under the sill. Sometimes the wall cavity is open to the attic. Same symptom, different fix.
Use three checks before you call a leak confirmed:
- Repeat the test. Smoke, tissue, or temperature patterns should show up more than once.
- Change one condition. Turn exhaust fans off, then on. If the movement changes, pressure is involved.
- Look for physical evidence. Dust streaks, stained insulation, daylight, cracked caulk, loose weatherstripping, or moving cobwebs make the case stronger.
ENERGY STAR notes that sealing air leaks and adding insulation can improve comfort and energy efficiency, with the agency estimating average savings of 15% on heating and cooling costs when air sealing is paired with insulation in attics, floors over crawl spaces, and basements. The order is important. Seal first, insulate second. Once loose-fill insulation buries a leak, finding it gets much harder.
Also watch for combustion safety. If the home has a natural-draft furnace, boiler, or water heater, heavy air sealing can change how the house handles makeup air. Do not seal aggressively around combustion appliances without understanding venting and backdraft risk. That is one of the moments when a professional energy assessment earns its keep.
Know when a blower door test is worth it
A blower door test is worth it when drafts are widespread, rooms stay uncomfortable after simple fixes, energy bills seem out of proportion, or you plan insulation work that could bury leaks.
A blower door is a temporary frame, fabric panel, fan, and pressure gauge installed in an exterior doorway. The fan changes the home’s pressure relative to outdoors. The technician can then measure total leakage and walk the house with smoke, infrared, or touch to find where air is entering. The Department of Energy describes blower doors as diagnostic tools for determining how much air enters or escapes from a home.
That does not mean every draft needs a paid test. If you can see daylight under a door, feel air around a hatch, or find a cracked exterior penetration, fix the obvious item first. The test becomes more valuable when the clues conflict or when you need a before-and-after number.
- Hire a pro if multiple rooms have drafts but the leak source is unclear.
- Hire a pro before major attic insulation if you suspect open chases or recessed-light leakage.
- Hire a pro if the home has combustion appliances and you are planning major air sealing.
- DIY first if the problem is an obvious door sweep, loose weatherstrip, open attic hatch, or visible pipe gap.
Field pros often pair blower doors with infrared cameras or smoke because the blower door tells you the house is leaking and exaggerates the leak paths. The visual tools show where. Without the pressure difference, a tiny leak may sit there politely and refuse to reveal itself.
Mark leaks, then fix them in the right order
Do not seal the first draft you find and call the job done. Mark every confirmed leak, group them by location and material, then seal the highest-impact paths first.
Use painter’s tape, a phone note, and quick photos. Label the area, test method, and likely fix: weatherstrip, caulk, foam, rigid blocking, metal flashing, or professional duct repair. This feels fussy for about ten minutes. Then it saves you from making three hardware store trips with the wrong tube of sealant.
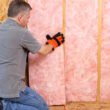
Use caulk for narrow stationary cracks, especially around trim or small penetrations. Use weatherstripping for moving parts such as doors, operable windows, and attic hatches. Use low-expansion foam around larger gaps where foam is appropriate. Use sheet metal, high-temperature sealant, or code-approved materials near chimneys, flues, and other hot surfaces. Ordinary foam near a flue is not a clever shortcut. It is a bad idea.
Prioritize in this order:
- Attic bypasses and hatches. These can drive whole-house stack effect.
- Basement rim joists and crawl-space penetrations. Lower leaks feed upper leaks.
- Duct leaks outside conditioned space. These can waste conditioned air directly.
- Doors and windows. Fix obvious comfort problems and visible gaps.
- Outlets, switches, and small trim cracks. Useful, but usually not the first prize.
After sealing, repeat the same test conditions. If you used exhaust fans before, use them again. If the tissue stopped moving and the smoke no longer pulls, the fix probably worked. If the room still feels cold, the leak may be larger, farther away, or partly an insulation problem rather than an air leakage problem.
FAQ
What is the easiest way to find air leaks in a house?
The easiest method is to close windows and doors, run exhaust fans briefly, then hold smoke or a tissue strip near common leak points. Check attic hatches, windows, doors, outlets, baseboards, rim joists, and pipe penetrations.
How do I check windows for air leaks?
Lock the window, then test the sash, meeting rail, side tracks, sill, and casing with smoke or tissue. If the smoke bends or tissue moves repeatedly, the window has airflow at that location.
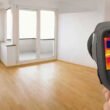
Can a thermal camera find air leaks?
A thermal camera can show cold or warm temperature patterns that suggest leakage, missing insulation, or thermal bridging. It should be confirmed with smoke, tissue, or a blower door because temperature differences are not always moving air.
Where are air leaks most common in a house?
Common air leak locations include attic hatches, recessed lights, plumbing and wiring penetrations, rim joists, crawl-space entries, door sweeps, window weatherstripping, outlet boxes, duct boots, and gaps around chimneys or flues.
Is a blower door test necessary?
A blower door test is not necessary for every small draft, but it is useful when leakage is widespread, hidden, or tied to a larger insulation project. It gives a whole-house leakage reading and helps locate difficult leaks.
The final check
The best leak hunt ends with a map, not a memory. Mark the leaks, fix the big pressure paths first, and retest under the same conditions. Once you know how to find air leaks in a house this way, the work becomes less about guessing and more about confirming what the air is already telling you. A house does not need to be perfectly airtight to feel better, but the leaks you fix should be the ones actually moving air.