



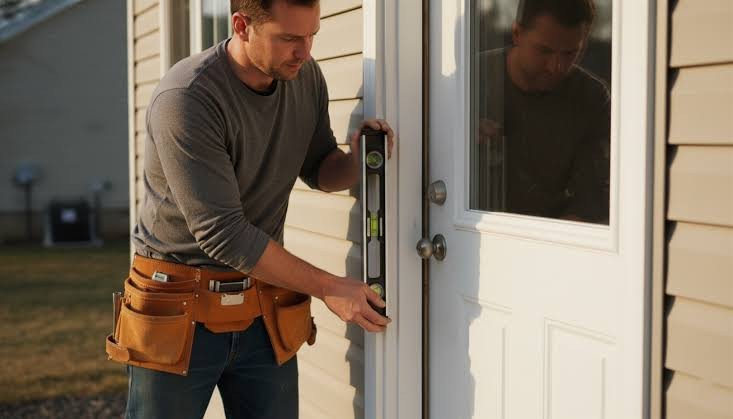
Installing a prehung exterior door is the project that closes the hole in the wall that was cut for the door, explains Real Property Management Partners. The prehung unit arrives as a complete assembly: the door slab hinged to the frame, the threshold attached to the bottom, the weatherstripping installed in the frame, and the brickmold trim attached to the exterior. The entire unit is set into the rough opening, shimmed level and plumb, and fastened through the brickmold and the frame into the framing. The door is already hung in the frame at the factory. The installation is about placing the frame correctly, not hanging the door.
The rough opening for a prehung door is larger than the door unit. The gap between the frame and the rough opening, typically half an inch on each side and at the top, allows the frame to be shimmed into perfect alignment. The shims are the adjustment mechanism. The frame is shimmed until the door slab opens, closes, and latches smoothly, and the gap between the slab and the frame is even on all sides. The shims are then permanently secured, the gap is insulated, and the interior and exterior trim covers the gap. The door is done.
Step 1: Install the Sill Pan Flashing
The sill pan is the most important piece of flashing in a door installation. It sits on the rough opening sill, under the door threshold, and directs any water that penetrates the door opening out over the face of the wall. Without a sill pan, water that gets under the threshold rots the subfloor and the framing below the door. The rot is invisible until the threshold feels soft underfoot, and by then the damage extends into the floor joists.
A sill pan can be a manufactured plastic or metal pan, a piece of adhesive flashing tape formed into a pan shape, or a metal pan fabricated from aluminum coil stock. The manufactured pan is the simplest. It fits over the rough opening sill and has upturned edges on the interior side and the ends to contain water and direct it outward. Install the sill pan over the rough opening sill before the door unit is placed. The pan must extend past the edges of the rough opening and slope slightly toward the exterior. If the rough opening sill is not sloped, shim the pan to create the slope. Water must drain outward. A flat sill pan holds water. A sloped sill pan drains it.
If using flashing tape to form the pan, apply a strip of tape to the rough opening sill that extends several inches up the sides of the opening and out onto the sheathing or house wrap below the opening. Fold the tape at the corners to form a continuous waterproof membrane. The tape is the pan. The door threshold sits on top of it.
Step 2: Set the Door Unit and Shim the Hinge Side
Set the prehung door unit into the rough opening from the outside. Tilt it into place, resting the bottom of the frame on the sill pan. The brickmold, the exterior trim attached to the frame, will bear against the sheathing or siding and determine how far into the opening the door sits. The brickmold should be flush against the wall surface. If the wall surface is uneven, the brickmold will gap. The gap is caulked after installation.
Shim the hinge side first. The hinge side must be plumb and straight. Place shims behind the hinge-side jamb at each hinge location. The shims transfer the weight of the door from the frame to the rough opening framing. Screw through the hinge-side jamb at each shim location into the framing. Use screws long enough to penetrate the shims and at least one and a half inches into the stud. Do not overtighten. The jamb must be straight, not bowed inward by over-tightened screws.
Check the door operation at this point. The door is hanging from the hinge-side jamb. It should swing freely. If it binds at the top or bottom of the hinge side, the jamb is not plumb or the hinges are not seated properly. Adjust the shims behind the hinge-side jamb until the door swings freely. The hinge side is the reference. Every other adjustment references the hinge side.
Step 3: Shim the Latch Side and Top, Then Fasten
Shim the latch-side jamb. The gap between the door slab and the latch-side jamb should be even, roughly an eighth of an inch, from top to bottom. Place shims behind the latch-side jamb at the latch height and at the top and bottom. Adjust the shims until the gap is even. Screw through the latch-side jamb at each shim location. Check the door operation again. The door should close smoothly and the latch should engage the strike plate without rubbing. If the latch scrapes the strike plate, the latch-side jamb is too close to the slab at that point. Adjust the shims.
Shim the top jamb. The gap between the top of the door slab and the head jamb should be even, roughly an eighth of an inch. Place shims at the center and at both ends of the head jamb. Screw through the head jamb at each shim location.
Fasten the brickmold to the wall. Drive galvanized casing nails or screws through the brickmold into the framing at regular intervals, roughly every 12 to 16 inches. The brickmold fasteners are the primary attachment of the door unit to the house on the exterior side. Do not drive the fasteners so tight that they distort the brickmold or pull the frame out of alignment.
Step 4: Insulate, Seal, and Trim
Fill the gap between the door frame and the rough opening with low-expansion window and door foam. Do not use standard expanding foam. The pressure from standard foam can bow the frame inward and prevent the door from closing. Apply the foam in a continuous bead around the entire perimeter. Let it cure. Trim the excess foam flush with the frame after it hardens.
Caulk the exterior perimeter where the brickmold meets the siding or sheathing. The caulk is the exterior water seal. Use a high-quality exterior caulk rated for the materials it is bonding to, typically polyurethane or silicone for most applications. Caulk under the threshold where it meets the sill pan or the finished floor on the exterior side. Leave the interior side of the threshold uncaulked so any water that gets under the threshold can drain outward.
Install the interior trim, casing, and any extension jambs needed to bring the frame flush with the interior wall surface. Adjust the threshold height if the threshold has an adjustable cap. The door should seal against the weatherstripping with light, even contact all around. Adjust the strike plate if the latch does not engage smoothly. Install the door sweep on the bottom of the door if one is not pre-installed.
Frequently Asked Questions
Should I buy a prehung door or a slab door?
A prehung door is the door, frame, hinges, threshold, and weatherstripping assembled at the factory. A slab door is the door only, no frame. A prehung door is easier to install because the door is already hung in the frame. The installation is about placing the frame, not hanging the door. A slab door is used when the existing frame is in good condition and only the door itself needs to be replaced. Hanging a slab door in an existing frame requires mortising the hinges and the strike plate to match the existing frame, which is more difficult than installing a prehung unit.
How do I know if the door is inswing or outswing?
Exterior doors in residential construction are almost always inswing, opening into the house. The hinges are on the interior side. The threshold slopes toward the exterior. Stand outside the house. If the door opens toward you, it is outswing. If it opens away from you, it is inswing. The door packaging will specify the swing direction. Installing an inswing door as an outswing door puts the hinges and the threshold weatherstripping on the wrong side, and the door will leak.
What if the old threshold area is rotted?
Replace the rotted subfloor and framing before installing the new door. Cut out the rotted wood back to sound material. Install new plywood subfloor and framing lumber as needed. The new door requires a solid, flat surface for the sill pan and threshold. Installing a new door over a rotted subfloor guarantees that the new door will fail the same way the old one did.
The Bottom Line
A prehung exterior door is set into the rough opening on a sill pan, shimmed plumb and square starting from the hinge side, fastened through the frame and brickmold, insulated with low-expansion foam, and sealed with caulk around the exterior perimeter. The door is already hung. The installation is about the frame. Shim the hinge side first. Adjust the latch side until the gap is even. Check the door operation at every step. A door that opens and closes smoothly before the trim goes on will operate the same way for years. A door that scrapes or sticks before the trim goes on will only get worse.