



How to paint base trim well comes down to three things: make the old surface clean and dull, protect the floor before paint touches the brush, and use thin coats instead of trying to cover everything at once.
The job looks small until you are kneeling in a hallway, pulling lint off a tacky baseboard, and realizing every drip lands exactly where the floor meets the wall. Slow prep saves more time than fast brushing, especially when learning how to paint base trim in a room that still has furniture, dust, and old caulk in the way says Henderson Management.
Check the Trim Before Sanding or Scraping
Before you sand base trim, decide whether the old paint could contain lead. Homes built before 1978 need more caution because scraping and sanding can turn old paint into hazardous dust.
The U.S. Environmental Protection Agency warns that renovation, repair, and painting work in pre-1978 homes can create dangerous lead dust when lead-based paint is disturbed. If the home is older, test first or hire a lead-safe certified contractor for anything beyond very light cleaning.
If the trim is modern latex paint in good condition, you can usually scuff-sand it lightly. If it is glossy, chipped, or unknown, treat it more carefully: clean first, avoid aggressive dry sanding, and use a bonding primer after the surface is sound.
Choose Tools and Paint That Make the Job Easier
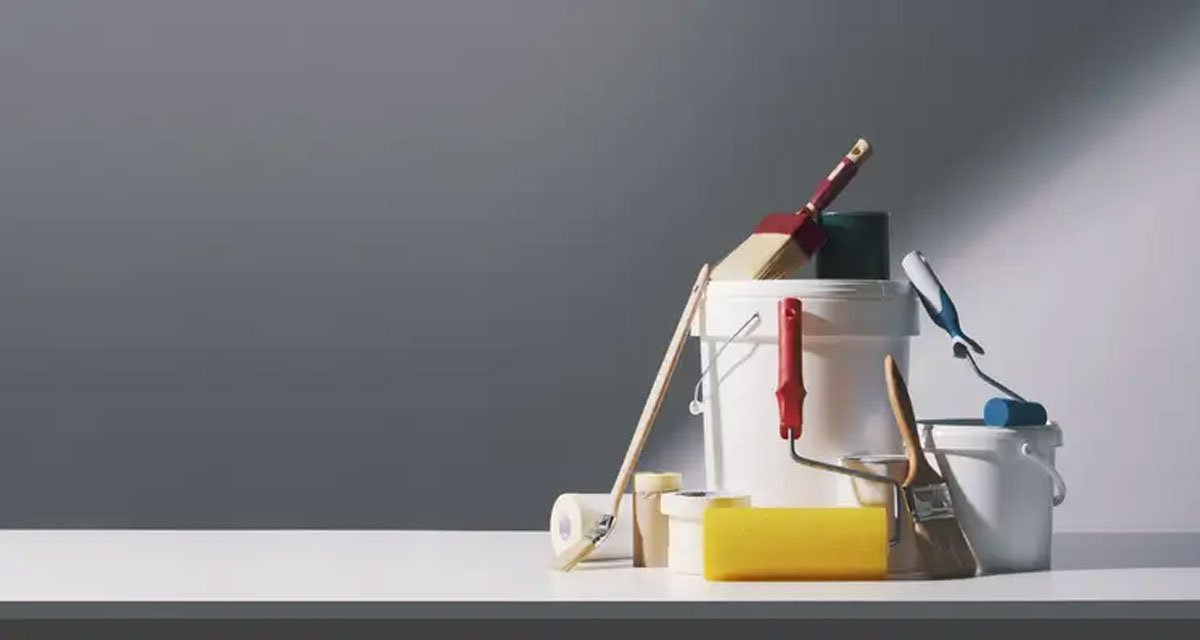
The best setup for base trim is simple: a quality angled sash brush, painter’s tape, a flexible putty knife, a drop cloth, sandpaper, caulk for wall gaps, and durable trim paint.
Use a 1.5-inch to 2.5-inch angled sash brush for most baseboards. Benjamin Moore’s trim-painting advice also favors an angled sash brush and recommends working from upper trim down to baseboards when painting multiple trim areas in a room.
| Item | Best choice | Why it matters |
|---|---|---|
| Brush | 1.5-inch or 2.5-inch angled sash brush | Reaches the top edge cleanly and lays paint flat along narrow trim. |
| Paint finish | Satin, semi-gloss, or trim enamel | Holds up better to vacuum bumps, shoe marks, and wiping. |
| Primer | Bonding or stain-blocking primer when needed | Helps paint stick to glossy trim and blocks old stains from bleeding through. |
| Sandpaper | 180- to 220-grit | Dulls the surface without carving visible scratches into the trim. |
| Caulk | Paintable acrylic latex caulk | Seals the wall-to-trim line, not big flooring gaps. |
Oil-based paint can still be durable, but most homeowners are better served by a modern water-based trim enamel because cleanup is easier and odor is lower. If you suspect old oil paint, scuff the surface and use the primer your paint manufacturer recommends for adhesion.
Prep the Base Trim So Paint Can Stick
Base trim needs to be washed, repaired, caulked where appropriate, sanded, and dusted before painting. Paint cannot hide dust, nail holes, cracked caulk, or a shiny old finish for long.
- Vacuum first. Use a brush attachment along the top ledge and the floor line. That ledge collects the kind of gray dust that turns into grit under wet paint.
- Wash the trim. Wipe with a mild cleaner or a small amount of dish soap in warm water, then wipe again with clean water. Let the trim dry fully.
- Patch nail holes and dents. Use lightweight spackle or wood filler. Overfill slightly, let it dry, then sand flush.
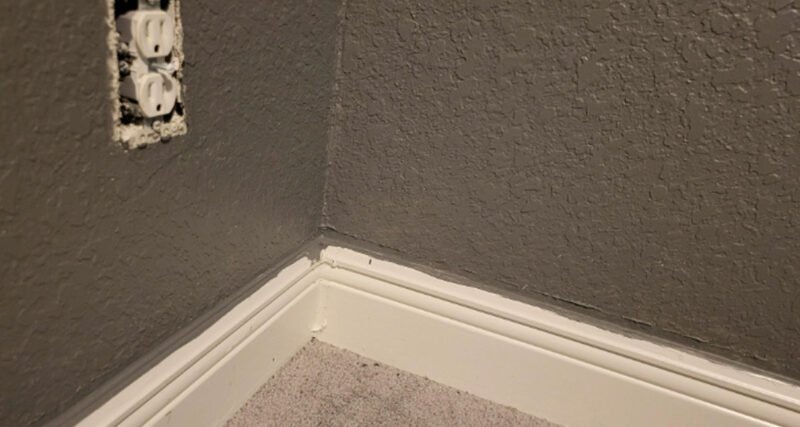
- Caulk only the wall gap. A thin bead where the top of the baseboard meets the wall can make the paint line look intentional. Do not use caulk to fill a large flooring gap.
- Scuff-sand glossy areas. Use light pressure. The goal is a dull surface, not bare wood.
- Remove dust. Vacuum again, then wipe with a barely damp microfiber cloth or tack cloth if your paint system allows it.
Caulk deserves restraint. If the floor has a wide gap, shoe molding or quarter round usually looks cleaner than a thick smeared bead of caulk.
“Add some shoe mold?”
– r/Carpentry, 11 upvotes, comment count unavailable (2025), source
That blunt little suggestion is often right. Paint makes trim cleaner; it does not fix bad trim proportions or a flooring gap that needs a piece of molding.
Protect the Wall, Floor, and Carpet
Clean edges depend on protection before painting, not heroic brush control after the paint is loaded. Tape, shields, drop cloths, and a putty knife each solve a different edge problem.
On hard floors, run painter’s tape along the floor line and press it down with a putty knife. Leave the tiniest reveal near the trim if the old paint line is messy, then keep the brush lightly loaded so paint does not puddle against the tape.
On carpet, the job is fussier. Press the carpet pile down with a paint shield, wide taping knife, or cardboard edge, then brush the lower trim with short strokes. Pull the shield out and wipe it often, because one wet ridge can drag paint into the fibers.
| Surface near trim | Protection method | Watch for |
|---|---|---|
| Wood, vinyl, or tile floor | Painter’s tape plus drop cloth | Paint pooling at the tape edge. |
| Carpet | Paint shield or taping knife pressed into pile | Wet shield marks and paint-soaked fibers. |
| Freshly painted wall | Low-tack tape after the wall paint has cured | Tape lifting soft wall paint. |
| Textured wall | Careful brush cut-in, minimal tape reliance | Tape bridging over texture and letting paint bleed. |
If the wall was painted recently, check the paint can for cure time before taping it. Dry-to-touch and cured are not the same thing. Tape can still peel soft paint days after it feels dry.
Brush the Trim in Controlled Sections
The cleanest way to paint base trim is to prime bare or glossy spots first, brush the top edge carefully, fill the face with thin paint, and lay off each section in one smooth pass.
- Prime problem areas. Spot-prime bare wood, filled patches, stains, and glossy old paint if the finish needs help bonding. Let primer dry as directed.
- Stir paint, then pour a small amount. Working from a separate cup keeps dust and brush debris out of the main can.
- Load only the first third of the brush. Tap the brush against the cup rather than scraping it dry. A starved brush leaves ridges.
- Cut the top edge first. Hold the angled brush so the long bristles ride the wall line. Use steady pressure and move in short sections.
- Paint the face of the trim. Brush with the length of the board. Avoid back-and-forth scrubbing once the paint starts to tack.
- Lay off the section. Before moving on, make one light stroke from dry edge into wet paint. This levels ridges and makes the sheen look even.
- Check the lower edge. Wipe any paint bead that collects near the floor before it skins over.
- Let the first coat dry fully. Rushing the second coat is how trim gets tacky, streaked, and easy to dent.
Work in lengths you can control, usually three to five feet at a time. A hallway might tempt you into painting a long run at once, but trim paint rewards smaller sections.
Not glamorous. Very effective.
If someone asked me how to paint base trim in the least frustrating order, I would rather see them spend ten extra minutes protecting the floor than ten extra minutes chasing a wet drip with a paper towel.
Fix Problems Before the Second Coat
The first coat is where flaws announce themselves. Sand dust nibs, slice off dried drips, spot-prime bleed-through, and repair cracked caulk before adding the final coat.
If you see brush marks, do not keep brushing half-dry paint. Let it dry, sand the ridges lightly with 220-grit paper, wipe clean, and apply a thinner coat with a better-loaded brush.
If old stains bleed through, paint alone may not solve it. Use a stain-blocking primer on the affected areas, let it dry, then recoat.
If the caulk line cracks after painting, the bead was probably too thick, too wet, or applied over dust. Cut out the failed section and redo it. Smearing more caulk on top usually leaves a lumpy edge that catches light.
Pull tape while the final coat is still slightly wet unless the paint manufacturer says otherwise. Score the tape line lightly with a utility knife if the paint has dried hard, especially along textured walls.
A Quick Timing Plan for One Room
A normal bedroom can often be prepped and painted over a weekend. The active work is not huge, but drying time controls the pace more than ambition does.
- Friday evening: vacuum, wash, patch holes, and caulk small wall gaps.
- Saturday morning: sand patches, dust, tape floors, and spot-prime.
- Saturday afternoon: apply the first coat.
- Sunday morning: sand small flaws, wipe clean, and apply the second coat.
- Sunday afternoon: pull tape, touch up edges, and keep furniture away until the finish is firm.
By the second coat, the trim should feel smoother under the brush. If it still drags like chalk, the surface is dusty, the brush is too dry, or the paint is being overworked.
FAQ
Can you paint base trim without sanding?
You can skip sanding only when the trim is clean, dull, and already painted with a compatible finish. Glossy trim, patched holes, bare wood, or chipped areas need scuff-sanding or primer so the new paint bonds.
What kind of paint is best for base trim?
Satin, semi-gloss, or trim enamel is usually best for base trim because these finishes resist scuffs and wipe cleaner than flat wall paint. Semi-gloss shows flaws more, so prep matters.
How long does base trim paint take to dry?
Most base trim paint needs several hours before recoating and longer before it resists scuffs, but the exact timing depends on the product, humidity, and room temperature. Read the can before taping or pushing furniture back.
Should you caulk baseboards before painting?
Caulk the narrow gap between the wall and the top of the baseboard before painting. Do not caulk large gaps between the baseboard and flooring; use shoe molding, quarter round, or a trim repair instead.
How do you avoid brush marks on baseboards?
Avoid brush marks by using a quality angled brush, loading it lightly, painting in short sections, and laying off each section with one gentle final stroke. Sand dried ridges before recoating.
Do you paint trim or walls first?
Many painters prefer painting trim first, then walls, because trim can be sanded and corrected before the wall cut line is finished. If the walls are already perfect, use low-tack tape and paint the base trim carefully.
Final Check Before You Put the Room Back
Good base trim paint should look quiet: no floor smears, no fuzzy carpet edge, no fat caulk bead, no glossy drips catching the light. The room feels cleaner before anyone notices why.
If you are tired, leave the furniture out for one more night. Fresh trim paint is easy to dent, and the last mistake usually happens after the hard part is already done.