



Installing a prehung interior door is the same process as installing a prehung exterior door, minus everything related to weather, notes RENOSY Milwaukee specialists. No sill pan. No flashing. No exterior caulk. No threshold to seal. The door is lighter, the frame is thinner, and the gap under the door is larger to allow air return when the door is closed. The installation sequence is identical: set the door unit into the rough opening, shim the hinge side first, shim the latch side until the gap is even, shim the head, fasten, and trim. The interior door is the simpler version of the project. If you have installed an exterior prehung door, an interior door will feel like the same job with half the steps.
The rough opening for an interior prehung door is typically two inches wider and two and a half inches taller than the door slab. A 30-inch door requires a 32-inch rough opening width. An 80-inch door requires an 82 and a half inch rough opening height. The extra space accommodates the frame thickness, the shims, and the gap at the bottom. The rough opening is framed with a king stud, a trimmer stud, and a header. The subfloor runs through the opening. The prehung door unit is set on top of the subfloor. The finished floor, carpet, tile, or hardwood, is installed after the door and butts up to the door frame. The gap at the bottom of the door accounts for the finished floor thickness plus clearance for air return.
Properly installed interior doors contribute to home energy efficiency by allowing you to close off unused rooms and zone your heating and cooling. ENERGY STAR recommends smart thermostat use with zone-based temperature control, which relies on doors that close fully and seal adequately to maintain different temperatures in different parts of the house.
Step 1: Set the Door and Shim the Hinge Side
Slide the prehung door unit into the rough opening. The door is wrapped in a plastic shipping strap or has temporary nails holding the frame together. Leave these in place until the door is positioned. They keep the frame square during handling. Once the door is in the opening, center it and check which side will be flush with the finished wall surface. The door frame, called the jamb, is typically four and nine-sixteenths inches wide for a two-by-four wall with half-inch drywall on both sides. If the wall is thicker due to paneling, tile, or other finishes, extension jambs will be needed.
Shim the hinge side first. The hinge side must be plumb and straight. Place pairs of shims behind the hinge-side jamb at each hinge location. The shims are tapered wood wedges. Slide them in from both sides until they fill the gap between the jamb and the rough opening framing. Check plumb with a four-foot level. Adjust the shims until the jamb is plumb. Screw through the jamb at each hinge location into the shims and the framing. Use finish screws or casing nails long enough to penetrate at least one inch into the stud. Do not overtighten. The jamb must stay straight.
Check the hinge-side gap between the door slab and the jamb. The gap should be even, roughly the thickness of a nickel, from top to bottom. If the gap is uneven, the hinges may need to be adjusted. The screws holding the hinges to the jamb can be loosened and the hinge shifted slightly. Tighten the screws and recheck. The hinge-side gap is set at the factory and should be correct if the door unit was manufactured properly.
Step 2: Shim the Latch Side, Head, and Fasten
Close the door. Check the gap between the door slab and the latch-side jamb. The gap should be even from top to bottom, roughly the thickness of a nickel. If the gap is wider at the top than the bottom, the latch-side jamb is leaning away from the door at the top. Add shims behind the top of the latch-side jamb to push it inward. If the gap is wider at the bottom, shim behind the bottom. Adjust until the gap is even.
Once the gap is even, check that the door slab is flush with the face of the jamb. The door should not be recessed into the frame or proud of the frame. If the door is recessed at the top, the hinge-side jamb is leaning outward at the top or the latch side is leaning inward. Adjust the shims on the affected side until the door is flush. Install shims behind the latch-side jamb at the latch height, the top, and the bottom. Screw through the jamb at each shim location.
Check the gap at the top of the door. It should be even, roughly the thickness of a nickel. Shim the head jamb at the center and at both ends. Screw through the head jamb at each shim location. Remove the temporary shipping strap or nails. Open and close the door. It should swing freely and latch smoothly. If the latch scrapes the strike plate, the strike plate may need to be adjusted. Slightly loosen the screws, shift the plate, and retighten.
Step 3: Install Casing and Hardware
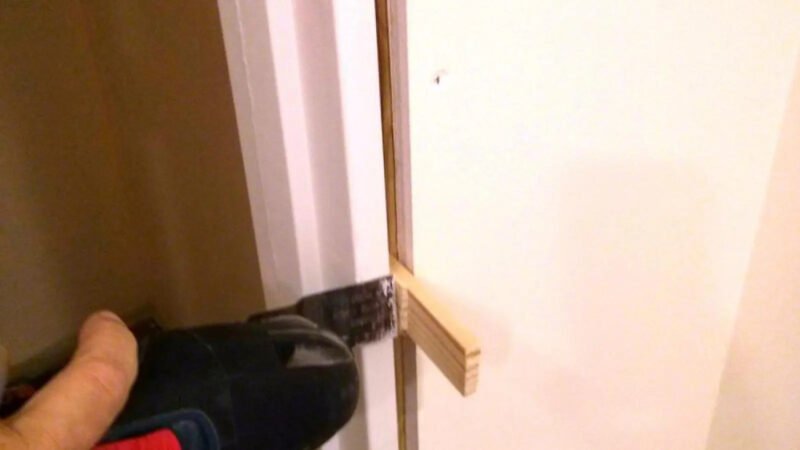
Cut the shims flush with the face of the jamb using an oscillating multi-tool or a handsaw. The shims must not project past the face of the jamb. The casing, the interior trim, will cover the gap between the jamb and the rough opening.
Install the casing on both sides of the door. The casing is typically two and a quarter or two and a half inch wide material, mitered at the corners. The casing is nailed to the jamb and the wall framing. The casing covers the gap and the shims. The reveal, the distance from the inside edge of the jamb to the inside edge of the casing, should be consistent, typically a quarter inch. Install the casing on one side, then the other.
Install the doorstop if it is not pre-installed. The doorstop is the thin strip of wood that the door closes against. It is nailed to the jamb on the hinge side and the head. The latch side is the strike plate. The strike plate is mortised into the jamb and receives the latch. Adjust the strike plate if necessary so the latch engages smoothly without scraping.
Install the lockset or passage set. The hole for the lockset is pre-drilled in the door slab at the factory. The latch mechanism slides into the edge of the door. The two knobs or levers are screwed together through the hole. Tighten the screws. The lockset should operate smoothly.
Frequently Asked Questions
How much gap should be under an interior door?
The gap under an interior door should be roughly half an inch to three-quarters of an inch above the finished floor. The gap allows air to return to the central return when the door is closed. A door with no gap will pressurize the room when the HVAC system is running and the central return is in the hallway. The room will not heat or cool properly. If the gap is larger than three-quarters of an inch, the door was cut too short or the rough opening was framed too tall. The gap can be reduced by adding a door sweep, though sweeps are uncommon on interior doors.
Should I use a hollow-core or solid-core interior door?
Hollow-core doors are lighter, less expensive, and adequate for most interior applications: bedrooms, closets, hallways. Solid-core doors are heavier, provide better sound isolation, and feel more substantial. They are worth the extra cost for bedrooms, bathrooms, and any room where privacy and noise reduction matter. The installation process is the same for both. Solid-core doors require three hinges instead of two because of the additional weight.
What if the rough opening is out of square?
Shim the frame to compensate. The shims allow the jamb to be plumb even when the rough opening studs are not. The gap between the jamb and the stud will be wider on one side than the other. That is what the shims and the casing are for. The casing covers the irregular gap. The door only cares that the jamb is plumb and square. It does not care about the framing behind the jamb.
The Bottom Line
A prehung interior door is set into the rough opening, shimmed plumb and square starting from the hinge side, fastened through the jambs, and trimmed with casing. The process is the same every time. The hinge side is the reference. The latch side is adjusted to create an even gap. The casing hides the shims. The hardware is installed last. A door that is hung correctly opens and closes with one finger and stays in whatever position you leave it. A door that swings open or closed on its own has a jamb that is out of plumb. Adjust the shims. The door will tell you what is wrong if you pay attention to how it moves.