



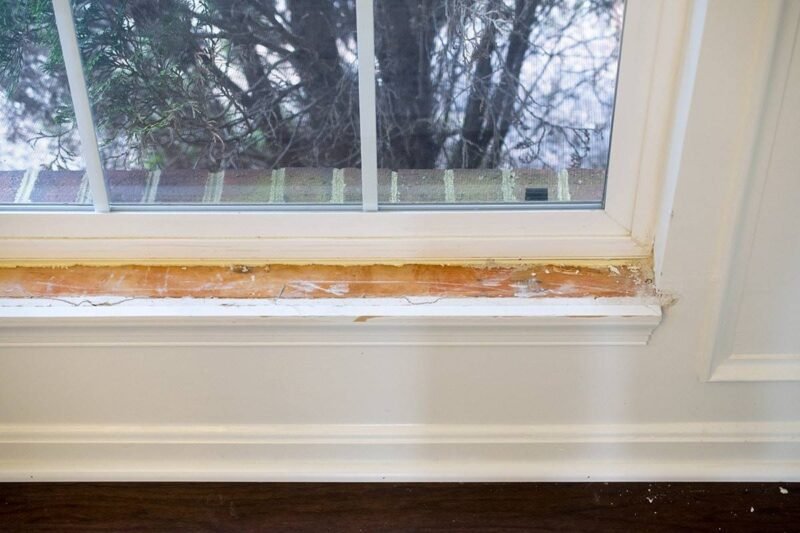
Replacing a window sill is the repair you make when the interior shelf at the bottom of the window is damaged, rotted, or simply outdated. The sill, correctly called the stool in carpentry terminology, is the horizontal board that projects into the room at the base of the window. It is the place where plants sit, where cats perch, and where water from a leaky window or condensation from a cold glass pane eventually causes the wood to soften and rot. The stool is a separate piece of wood from the window frame. It can be replaced without touching the window itself, without cutting into the wall, and without disturbing the exterior of the house, adds Retain Each Syracuse.
The replacement takes an afternoon. The old stool is pried out. A new board is cut to length, notched to fit around the window frame, and nailed into place. The apron, the vertical trim board under the stool, is replaced at the same time because the old apron is almost always damaged during stool removal. The new stool and apron are caulked, painted, and the window looks like it did when the house was new. The materials cost $20 to $50 depending on the wood species and the size of the window.
ENERGY STAR recommends air sealing around windows as a primary method of improving home energy efficiency. When replacing a window stool, the gap between the window frame and the rough opening is exposed. This is an opportunity to inspect the existing insulation and add low-expansion foam if gaps are found before the new stool covers the opening.
Step 1: Remove the Old Stool and Apron
The stool is the horizontal board. The apron is the vertical board underneath it. They are connected. The apron must be removed before the stool can be removed. Score the caulk or paint line where the apron meets the wall and where the apron meets the stool with a utility knife. Cutting the paint line prevents the paint from peeling off the wall in sheets when the apron is pried off. Insert a flat pry bar behind the apron at one end. Pry gently. The apron is nailed to the wall framing. Work along the length of the apron, prying at each nail location. Remove the apron. If the apron breaks, it was going to be replaced anyway.
Score the caulk or paint line where the stool meets the window frame and the wall on both sides. The stool is nailed to the rough opening sill through the top face, and may also be nailed or screwed from underneath through the window frame. Remove any screws or nails visible on the top face of the stool. Insert the pry bar under the front edge of the stool, where the apron was, and pry upward. The stool should lift free. If it resists, check for additional fasteners. The stool may be glued to the rough sill with construction adhesive. If so, work the pry bar underneath and break the adhesive bond. Remove the stool.
Clean the rough sill area. Remove old caulk, adhesive residue, and any loose debris. The rough sill is the framing lumber at the bottom of the rough opening. It should be solid and dry. If the rough sill is rotted, the rot must be repaired before the new stool is installed. Probe it with an awl. Soft wood is rot. Replace rotted sections with new lumber.
Step 2: Cut and Fit the New Stool
The new stool is typically a one-by-four, one-by-six, or one-by-eight board, depending on how far the original stool projected into the room. The new stool should match the original projection. A stool that projects further than the original will look disproportionate. A stool that projects less will leave a gap between the back edge and the window that may not be covered by the casing.
The length of the stool is the distance between the outside edges of the window casing on both sides, plus the projection on each side. The stool extends past the casing by roughly three-quarters of an inch to one inch on each side. The ends of the stool are typically returned to the wall, meaning a small piece of wood is mitered onto each end to finish the exposed end grain. The return is optional but gives the stool a finished, furniture-like appearance.
The stool must be notched to fit around the window frame. The window frame extends down past the rough sill slightly on each side. Measure the distance from the wall surface to the window frame on each side. Transfer these measurements to the stool board. Cut the notches with a jigsaw. The stool should slide into place with a snug fit against the window frame and the wall on both sides. Dry-fit the stool before fastening. Adjust the notches with a file or sandpaper until the stool fits perfectly.
Step 3: Install the Stool, Apron, and Finish
Apply a bead of construction adhesive to the rough sill. Set the stool in place. Press it down firmly. The adhesive holds the stool securely and prevents squeaks. Nail through the top face of the stool into the rough sill with finish nails. Place the nails near the back edge where they will be covered by the window sash or the casing. Countersink the nails with a nail set and fill the holes with wood filler.
Cut the new apron to length. The apron is the same length as the stool minus the returns. The top edge of the apron fits tightly against the underside of the stool. Nail the apron to the wall framing with finish nails. Place nails at the stud locations, which can be found with a stud finder or by tapping on the wall. Countersink and fill the nail holes.
Caulk the joint between the stool and the window frame, and between the stool and the wall on both sides. Caulk the joint between the apron and the stool, and between the apron and the wall. The caulk seals the gaps and prepares the surface for paint. Use paintable interior caulk. Paint the stool and apron to match the existing trim. Two coats of semi-gloss or satin trim paint produce a durable, cleanable surface.
Frequently Asked Questions
What is the difference between a window stool and a window sill?
The stool is the interior horizontal board at the bottom of the window. The sill is the exterior sloped surface that sheds water away from the house. In common usage, the interior stool is often called the sill. In carpentry, they are different parts with different functions. This guide covers the interior stool. The exterior sill is part of the window frame and is replaced as part of a window replacement, not as a separate repair.
What wood should I use for a replacement window stool?
Poplar is the standard for painted interior trim. It is inexpensive, takes paint well, and is available at any home center. Oak or maple are used for stained stools where the wood grain will be visible. If the rest of the trim in the room is painted, use poplar. If the trim is stained, match the wood species to the existing trim. The new stool should look like it belongs with the surrounding trim.
Do I need to replace the apron when I replace the stool?
The apron is almost always damaged during stool removal because the two are nailed together and the pry bar must be inserted between them. If the apron comes off cleanly and is undamaged, it can be reused. In practice, the apron is inexpensive and replacing it with new material that matches the new stool produces a better result. Replace both at the same time.
The Bottom Line
A window stool is replaced by removing the old stool and apron, cutting a new board to length with notches for the window frame, and installing it with adhesive and finish nails. The apron is replaced at the same time. The joints are caulked and painted. The repair takes an afternoon and costs $20 to $50 in materials. The new stool is a small piece of wood that changes the way the entire window looks from inside the room.