


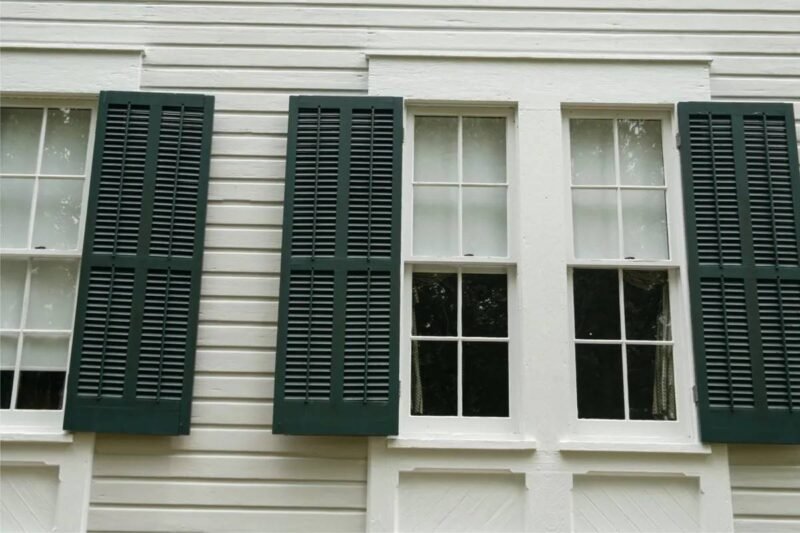
Installing shutters to vinyl siding is a project where the hardware you choose determines how the installation goes. There are three common mounting systems for vinyl shutters on vinyl siding. Shutter spikes, also called shutter loks or push fasteners, are the simplest. They are plastic pins with a barbed shaft that push through a hole in the shutter and into a pre-drilled hole in the siding and wall. They hold by friction. They do not require screws. They do not require access to the inside of the wall. They work well for lightweight vinyl shutters on walls where studs are not conveniently located. Their holding power is adequate for decorative shutters in areas without extreme wind.
Screw-on shutter clips are plastic or metal brackets that screw into the wall through the siding. The shutter snaps onto the clip. The clip holds the shutter with a small gap from the siding surface, allowing the siding to expand and contract. This is the standard system for medium-weight shutters and is more secure than spikes. The screws must hit studs for maximum holding power, or use hollow-wall anchors where studs are not available. Metal shutter brackets, sometimes called shutter dogs or holdbacks, are used for functional shutters that open and close. They are L-shaped brackets that hold the shutter in the open position against the wall. They are fastened with screws into the studs or the window trim and are the most secure mounting system.
Mounting With Shutter Spikes
Shutter spikes are the fastest mounting system and the most common for lightweight decorative vinyl shutters. Each shutter requires four to six spikes depending on the shutter height. The spikes are included with most vinyl shutters sold at home centers.
Position the shutter against the wall at the correct location. Mark the spike locations through the pre-molded holes in the shutter. Remove the shutter. Drill a quarter-inch hole through the siding and sheathing at each mark. The hole must be slightly smaller than the barbed shaft of the spike so the spike grips the hole tightly. Insert the spike through the shutter and push it into the hole. Tap the spike gently with a hammer until the head is flush with the shutter face. The spike expands slightly in the hole and locks in place. Do not overdrive the spike. The shutter should be held firmly but not clamped tight against the siding. The spike head should be flush with the shutter face, not recessed.
The advantage of spikes is that they do not require hitting studs. The barbed shaft grips the sheathing and the friction holds the shutter. The disadvantage is that the holding power is limited. In high-wind areas, spikes can work loose over time. For shutters on a second story where a loose shutter falling could injure someone, use screw-on clips instead of spikes.
Mounting With Screw-On Clips
Screw-on shutter clips are the most secure mounting system for decorative shutters. The clip base screws into the wall. The shutter snaps onto the clip. The clip holds the shutter with a gap from the siding. The installation is more involved than spikes but the result is more durable.
Position the shutter and mark the clip locations. The clips are placed at the same locations as spike holes, typically two clips near the top, two near the bottom, and one or two in the middle for tall shutters. Remove the shutter. At each clip location, drill a pilot hole through the siding and sheathing into the stud if possible. If no stud is available, use a hollow-wall anchor rated for exterior use. Screw the clip base to the wall. Do not overtighten. The clip base must be secure but the siding behind it must still be able to move. A screw driven so tight that it compresses the siding against the sheathing will cause buckling. The screw should be snug, not tight.
Snap the shutter onto the clips. Align the clip receivers on the back of the shutter with the clip heads on the wall. Press the shutter firmly at each clip location until it snaps into place. The shutter should sit flat against the clips with a small gap between the shutter and the siding. The gap allows air circulation behind the shutter and allows the siding to move. If the shutter rocks on the clips, one or more clips are not fully seated or are not aligned. Remove the shutter and adjust the clip positions.
Leveling Over Uneven Vinyl Siding
Vinyl siding is not a perfectly flat surface. The lap joints between panels create a slight ridge every few inches. These ridges can cause a shutter to sit unevenly if the mounting clips land on a ridge. Plan the clip locations so they land between the lap joints, on the flat portion of the siding panel. This is easier with spike-mounted shutters, which can be placed anywhere on the panel. Screw-on clips have fixed positions on the shutter back and may land on a lap joint. If a clip lands on a ridge, shim the clip base with a small plastic washer so the clip face is flush with the surrounding clips. The shutter will sit flat across all the clips.
Level the shutters relative to the window, not relative to the ground or the siding lines. The window is the visual reference. A shutter that is level with the window looks correct even if the ground slopes or the siding lines are slightly off-level. A shutter that is perfectly level but misaligned with the window looks wrong. Use the window trim as the reference. Measure from the top of the window trim to the top of the shutter. Measure from the bottom of the window trim to the bottom of the shutter. The measurements should be equal or very close. The shutter is centered vertically on the window opening.
Frequently Asked Questions
Should I use spikes or screw-on clips for vinyl shutters?
Spikes are faster and do not require hitting studs. Use them for lightweight vinyl shutters in areas without extreme wind. Screw-on clips are more secure and last longer. Use them for heavier shutters, for shutters on upper stories, and in areas with high wind. The clips cost slightly more and take slightly longer to install. The difference in holding power is significant.
How many fasteners per shutter?
Four fasteners minimum for a shutter up to 48 inches tall: two near the top and two near the bottom. Six fasteners for a shutter 48 to 72 inches tall: two near the top, two near the bottom, and two in the middle. The fasteners should be evenly spaced vertically. The top and bottom fasteners should be six to eight inches from the ends of the shutter.
How do I remove shutters mounted with spikes or clips?
For spike-mounted shutters, pry the spike heads out with a flat pry bar. The spikes will pull out of the wall with some resistance. The plastic barbs may break off in the hole. For clip-mounted shutters, pry the shutter off the clips by inserting a flat pry bar between the shutter and the clip and twisting gently. The shutter will pop off the clip. Unscrew the clip bases from the wall.
The Bottom Line
Shutters are mounted to vinyl siding with spikes or screw-on clips that hold the shutter away from the siding surface. Spikes are the fastest and least expensive. Clips are the most secure. The fasteners must allow the siding behind the shutter to move freely. Level the shutters to the window, not the ground. Plan the fastener locations between the siding lap joints. A shutter that is level, centered on the window, and mounted with the right hardware will stay in place for as long as the siding lasts.