



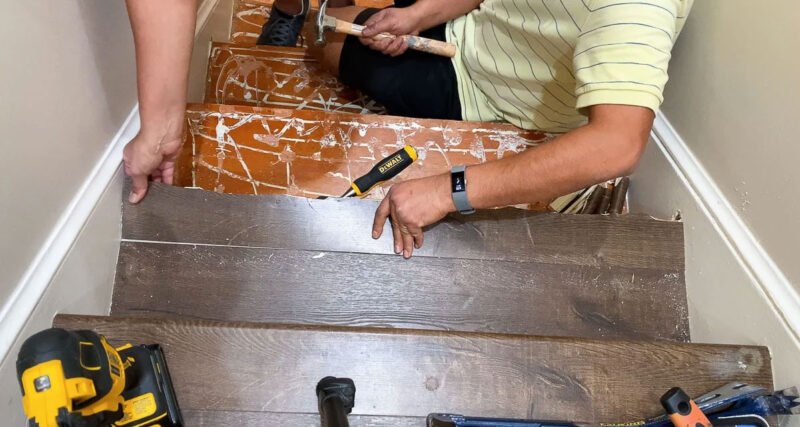
Cladding a staircase in laminate comes down to four moves: clean and repair each step, glue the risers, glue the treads, then fit the stair nosing along every front edge. The one rule that separates a job that lasts from one that peels: bond everything with construction adhesive, not nails, advises Wake County property management.
Stairs are the hardest place in a house to run laminate, which is exactly why learning how to install laminate flooring to stairs trips up so many first-timers: the overhang on the front of each step and the transition at the very top. Get those two details right and the rest is patient, repeatable work.
What You Need Before You Start
You need a saw that cuts clean (a miter or circular saw), a caulk gun for the adhesive, plus a tape measure, putty knife, pull bar, and wood filler. Materials come down to laminate treads and risers (or planks cut to size), stair nosing, and a tube of construction adhesive.
Buy stair nosing that matches your laminate line if you can. The flush-fit nose made for your specific plank locks the front edge in place and hides the cut end. According to a Lowe’s laminate installation document, any loose or damaged tread or riser should be repaired before a single piece goes down, and the stairs cleaned of all dust and debris first.
| Adhesive | Bond strength | Approx. price | Best for |
|---|---|---|---|
| Loctite PL Premium | ~400 psi (very high) | ~$8-10/tube | Treads, risers, nosing |
| SikaBond construction adhesive | High, flexible | ~$10-14/tube | Full staircase |
| Gorilla Construction Adhesive | High | ~$12.90/tube | Nosing and edges |
One tube of good adhesive runs about the price of a sandwich. That cheap tube is the single component holding your whole staircase together, so it is the last place to economize.
Step-by-Step Installation
Work from the top step down so you are never standing on fresh adhesive. The full order: prep, handle the overhang, measure and cut, set risers, set treads, fit nosing, then fill and finish.
- Prep and repair. Pry off old carpet, staples, and any worn tread. Screw down squeaky steps and vacuum every surface clean.
- Remove or level the overhang. Cut back the bullnose lip on the front of each existing tread so the step is square (covered below).
- Measure and cut. Measure each tread and riser individually. Stairs are rarely identical, so cut and label pieces one step at a time.
- Set the risers first. Apply a heavy bead of adhesive, press the riser into place, and check it sits flush against the tread above.
- Set the treads. Glue the tread so its front edge sits exactly where the nosing will cap it. Weight it down while it cures.
- Fit the stair nosing. Bond the nose over the front edge of each tread, covering the cut end and creating the safe rounded lip.
- Fill and finish. Fill any small gaps with matching wood filler and wipe away squeeze-out before it sets.
Dealing With the Stair Overhang
The existing bullnose overhang is the snag that stops most first-timers. Laminate cannot sit flat over a protruding lip, so the lip has to go. Cut it back flush with a saw, or build the step out level. For a fully proper job, some installers strip the staircase back further. As one renovation thread put it bluntly:
“The proper way to do it would be to dismantle the staircase and remove that wood piece. Then put a nosing on the edge and install the stairs again.”
— r/homerenovations, 2 upvotes, 6 comments (2024), source
That advice from a bystander to the project is the gold-standard finish. Most DIYers settle for cutting the lip flush, which holds up fine on a low-traffic flight. Oak Valley Designs, a stair-tread retailer, recommends removing or leveling the overhang first, then securing the planks with adhesive and capping with nosing.
Glue, Not Nails: Choosing the Adhesive
Use construction adhesive to bond laminate to stairs. Nails and screws leave holes that show on a finished face and loosen as the step flexes, so most professional installers skip them entirely on the visible surface. A polyurethane construction adhesive like PL Premium or SikaBond grips hard, stays hidden, and flexes with the wood.
Technique matters more than brand. Lay a thick, continuous bead, not a thin smear, and run it in a tight S-pattern so the glue spreads under pressure. A flooring regular described the trade-off directly:
“PL premium works well but you must put a huge bead to get good coverage. A tight S pattern looks like it could work. It bonds at almost 400 psi.”
— r/HomeImprovement (2023), source
That ~400 psi bond is far stronger than any finishing nail, and it pulls the whole tread tight to the substrate instead of pinning it at a few points. Nobody walking your stairs will ever notice the adhesive. They will only notice the tread that never lifts or squeaks. Weight each piece down or clamp it while the adhesive cures, usually overnight.
Installing the Stair Nosing
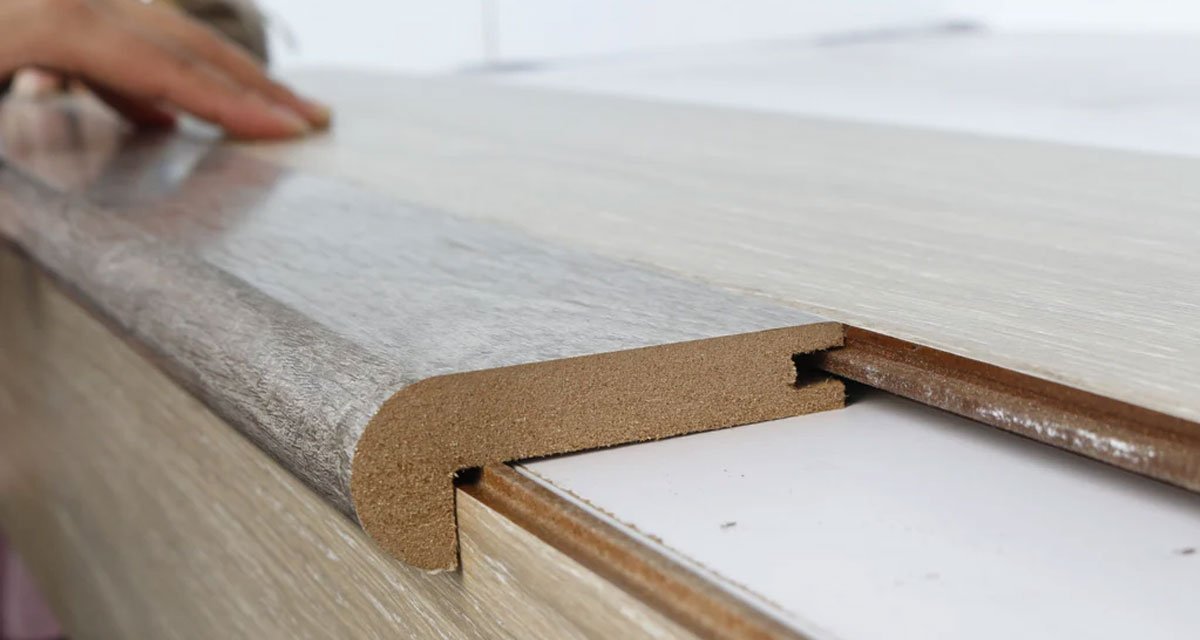
Stair nosing is the rounded strip that caps the front edge of each tread. It is not optional: it covers the raw cut end of the laminate, protects the most-walked edge from chipping, and creates the safe lip your foot lands on. A textured or matte nose adds grip, which matters because hard laminate can be slick. You do not notice good nosing. You notice the chipped, bare edge six months after someone skipped it.
| Nosing type | Look | Grip / safety | Cost |
|---|---|---|---|
| Flush laminate nose (matched) | Seamless, matches plank | Good with matte finish | Higher |
| Metal stair nose | Industrial, contrasting edge | Excellent, durable | Low, easy to fit |
Oak Valley Designs notes that the extra grip from a proper nosing significantly reduces slipping on hard surfaces like laminate. If safety is the priority, a metal nose is cheap, tough, and quick to install.
The Transition at the Top Step
Where your hallway laminate meets the top of the staircase, finish with a nosing trim rather than a flat transition strip. The nose creates a clean rounded edge over the top step and hides the gap between the floor run and the first riser. A plain transition strip there looks awkward and lifts underfoot. Trim color can match the treads or contrast deliberately with painted risers.
Is Laminate Actually Good for Stairs?
Laminate works on stairs, but it is thinner and more edge-prone than the floor it came from, so heavily used staircases punish it. Luxury vinyl plank is more forgiving and easier to cut, which is why many installers steer beginners toward it. For a short, low-traffic flight, laminate looks great and wears fine. The disagreement among people who have actually done it is real:
“Laminate really isn’t made for stairs. It is thinner and the finished face won’t hold up on the edges under repeated abuse.”
— r/HomeImprovement, 2 upvotes, 11 comments (2021), source
“It was only about five stairs and no issues with it being slippery or anything. It looked fine and wore well.”
— r/DIYUK, 1 upvote, 75 comments (2023), source
The split is telling. Retailers sell the dream of a flawless staircase; the people who installed five steps in their own house land somewhere more honest. Choose laminate if you want the matching look and your stairs see light use. Lean to LVP if the flight is busy or you want a tougher edge.
What It Costs to Laminate a Staircase
A DIY laminate staircase is one of the cheaper remodels, since the main expense is the planks or pre-cut treads you already chose for the floor. The hardware around them is modest.
| Item | Approx. cost | Notes |
|---|---|---|
| Laminate treads / risers | Varies by line | Often offcuts from floor run |
| Stair nosing (per step) | ~$10-25 each | Flush nose costs more than metal |
| Construction adhesive | ~$12.90/tube | One tube covers several steps |
| Wood filler + shims | ~$10-15 | One-time |
| Tools (if buying) | One-time | Saw, caulk gun, pull bar |
For a typical flight, the consumables beyond the laminate itself often land under the cost of a single restaurant meal per step. Hiring a pro multiplies that several times over, which is why stairs are such a popular DIY target.
Frequently Asked Questions
Do you glue or nail laminate to stairs?
Glue it with construction adhesive, not nails. Nails leave visible holes in the finished face and loosen over time, while a polyurethane adhesive like PL Premium bonds the full surface and stays hidden. Use a heavy bead and weight each piece down while it cures.
Do you need underlayment on laminate stairs?
No, you do not use underlayment on stairs. The foam padding that goes under a floating floor would let the steps flex and shift dangerously. Laminate treads and risers are bonded directly to the existing step with adhesive instead.
Is laminate slippery on stairs?
Laminate can be slick, but proper stair nosing solves most of it. A textured or matte-finish nose, or a metal stair nose, gives your foot a defined, grippy edge to land on. Anti-slip strips add extra traction on busy staircases.
Can a beginner install laminate stairs?
Yes, a careful beginner can do it, though it is slower and fussier than a flat floor. You need to be comfortable with a power saw and patient about cutting each step individually. Many first-timers find LVP more forgiving than laminate for a first attempt.
How do you finish the top step where the floor meets the stairs?
Use a stair nosing trim at the top step rather than a flat transition strip. The nose caps the edge of the top riser, hides the seam between the hallway floor and the staircase, and gives a safe rounded lip. It looks cleaner and holds up better than a plain transition.
The Bottom Line
Once you strip away the jargon, knowing how to install laminate flooring to stairs comes down to two decisions: the overhang and the adhesive. Cut the old bullnose flush, bond every piece with a heavy bead of construction adhesive, cap each tread with grippy nosing, and work top to bottom. Do that on a short flight and your laminate stairs will look bought-in and wear for years.