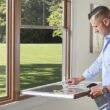




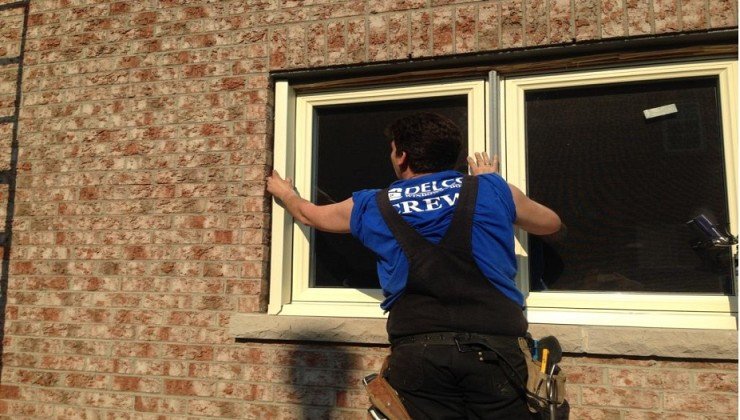
Installing replacement windows in a brick house follows the same insert window method covered in the general replacement window guide, with specific considerations for the brick veneer exterior. The replacement window slides into the existing window frame from the inside. The brick, the exterior caulk joint, and the steel lintel above the window are left untouched. The installation is an interior job. The only work done from the outside is inspecting the existing seal between the frame and the brick, and touching up any cracked or missing caulk after the new window is in. The insert method preserves the original water management system between the window and the masonry, adds Best Areas Invest Bethesda.
The previous guide on replacing windows in a brick house covered the decision between insert and full-frame replacement. This guide covers the step-by-step installation of an insert replacement window in a brick house, from measuring to final trim. The process is the same whether you are replacing one window or every window in the house. The technique does not change. The view from the outside does not change either. When the installation is complete, the house looks the same from the street. The only visible difference is the new glass and the new window frame, both cleaner and crisper than the old one.
ENERGY STAR recommends that homeowners address air leaks as a primary energy-saving measure. Replacement windows installed with proper air sealing around the frame reduce drafts and improve indoor comfort, especially in older brick homes where the original windows may have been leaking for decades.
Step 1: Measure the Existing Frame and Order the Window
Remove the interior trim and casing around the old window. This exposes the gap between the window frame and the rough opening, and gives you access to measure the frame accurately. Do not remove the old window at this stage. You need the old window in place to measure from.
Measure the width of the existing frame from inside edge to inside edge. Measure at the top, middle, and bottom. Measure the height from the sill to the underside of the head jamb. Measure at the left, middle, and right. Use the smallest measurement in each direction. The replacement window will be manufactured to be slightly smaller than the smallest opening measurement, typically a quarter to half an inch smaller in both width and height. This clearance allows the new window to be shimmed level and square inside the old frame.
Measure the depth of the existing frame from the interior face to the exterior face. The depth determines the jamb width of the replacement window. The new window frame must be deep enough to span from the interior wall surface to the exterior brickmold or to the brick opening. If the existing frame depth is non-standard, the replacement window may require an extension jamb to bring the interior face flush with the wall surface.
Order the replacement window from a window manufacturer or retailer. Provide the exact measurements. Specify the frame material, vinyl, wood, or aluminum, the glass type, and the grid pattern if desired. The lead time for a custom-sized insert window is typically four to eight weeks. Order early. The old window will be in place until the new one arrives.
Step 2: Remove the Old Window Sashes and Tracks
Remove the interior stops, the thin strips of wood that hold the sashes in place. With the stops removed, the lower sash can be lifted out of the frame. Remove the parting bead, the vertical strip between the upper and lower sash tracks. The upper sash can then be removed. If the window is a single-hung or a casement, remove the sashes according to the window type. The sashes are the moving glass panels. The frame and the tracks stay in place for now.
Remove the tracks or the sash guides if they are separate from the frame. The goal is to leave the old frame as a clean, empty box. Clean out any debris, old caulk, loose paint, and insect nests. Vacuum the sill. The old frame is the opening that the new window will slide into. It must be clean and free of obstructions.
Inspect the old frame for rot. Probe the wood with an awl, particularly at the bottom corners and along the sill. If the frame is solid, proceed with the insert installation. If sections of the frame are rotted, the rotted wood must be cut out and replaced before the new window is installed. A partial frame repair in a brick house is challenging because access to the exterior side of the frame is limited by the brick. If the rot is extensive, a full-frame replacement, covered in the previous brick house window guide, may be necessary.
Step 3: Install the New Window
Dry-fit the new window. Slide it into the old frame without fasteners to confirm it fits. The window should slide in with a small gap on all sides. If the window binds, find the high spot and plane or sand the old frame slightly. Do not force the window. The vinyl or wood frame can be permanently distorted by forcing it into an opening that is too small.
Remove the new window. Apply a bead of caulk or sealant to the exterior stop or the blind stop, the recessed face inside the old frame where the new window will seat. The caulk seals the exterior side of the joint between the new window and the old frame. Set the new window into the opening. Center it in the frame.
Shim the new window level and plumb. Place shims under the sill at the corners and at the midpoint. Place shims between the side jambs and the old frame at the top, middle, and bottom. Check level and plumb with a four-foot level. Check that the sashes open and close smoothly. Adjust the shims until the window operates correctly and the gaps around the sashes are even.
Fasten the new window through the side jambs into the old frame. Use the pre-drilled mounting holes in the new window frame. The screws must penetrate into the old frame and ideally into the rough opening framing behind it. Do not overtighten. The screws should be snug. Overtightening bows the frame inward and causes the sashes to bind.
Fill the gap between the new window frame and the old frame with low-expansion window and door foam. The foam insulates and air-seals the gap. Let it cure. Trim the excess.
From the exterior, if accessible, inspect the caulk joint between the old frame and the brick. If the joint is cracked or missing, clean out the old caulk and apply fresh polyurethane sealant. The seal between the frame and the brick is the exterior water barrier. The new window relies on the old frame and the old seal to keep water out. If the old seal is compromised, the new window will leak.
Step 4: Install Interior Trim and Finish
Install new interior casing and trim. The old casing may be reusable if it was removed carefully. New casing is an opportunity to update the appearance of the window. The casing covers the gap between the new window frame and the rough opening. Caulk the interior joints between the casing and the wall, and between the casing and the window frame. Paint the casing.
If the new window frame is narrower than the wall thickness, install extension jambs to bring the interior face flush with the wall surface. The extension jamb is a strip of wood the thickness of the gap, nailed to the window frame. The casing is then nailed to the extension jamb.
Frequently Asked Questions
Do I need to remove the interior stool to install a replacement window?
Yes, in most cases. The stool is the horizontal shelf at the bottom of the window on the interior. It must be removed to access the old frame for measuring and to slide the new window into place. The stool can often be reused if it is removed carefully. If the stool is damaged during removal, a new one can be cut to fit and installed after the window is in.
Can I install replacement windows in a brick house in one day?
Yes, for a single window. An experienced installer can replace a window in about an hour. A homeowner doing it for the first time should budget two to three hours per window. Multiple windows can be done in a day if they are all on the ground floor and accessible from the inside. Second-story windows require ladder work for the exterior inspection and sealant touch-up, which adds time.
Can replacement windows be installed in a brick house during winter?
Yes, because the installation is primarily from the inside. The exterior work is limited to inspecting and touching up the sealant, which must be done when the temperature is above the sealant manufacturer’s minimum application temperature, typically 40 degrees Fahrenheit for polyurethane. The interior work is unaffected by weather. Winter installations are common for brick houses because the exterior is largely undisturbed.
The Bottom Line
Replacement windows in a brick house are installed by the insert method from the inside. The old sashes are removed. The old frame is measured, cleaned, and inspected for rot. The new window slides into the old frame, is shimmed level and plumb, fastened through the side jambs, insulated with foam, and trimmed on the interior. The brick exterior is untouched except for a sealant inspection and touch-up. The insert method preserves the original water management system between the frame and the brick. The installation takes a few hours per window and produces a result that looks original from the outside and performs like new from the inside.