



Installing replacement double hung windows is the most common window replacement project in American houses. The double hung window has two sashes, an upper and a lower, that slide vertically in tracks. Both sashes can be opened. The sashes tilt inward for cleaning. The original windows in most older homes are double hung wood windows with sash cords and weights hidden in the wall pockets. The replacement windows are vinyl, wood, or composite double hung units with spring or block-and-tackle balance systems that eliminate the cords and weights. The old sashes are removed. The new window slides into the old frame. The installation is an insert replacement, the same method covered in the general window guide. The double hung specific details are the balance system, the tilt-in mechanism, and the sash removal from the old frame.
The insert method preserves the existing window frame, interior trim, and exterior brickmold or siding. The new window is ordered to fit inside the old frame. The sashes are pre-hung in the new frame at the factory. The balance system is installed and adjusted. The new window slides into the old frame, is shimmed level and plumb, fastened through the side jambs, insulated, and trimmed. The exterior is untouched. The installation takes about an hour per window for an experienced installer and two to three hours for a first-timer.
ENERGY STAR notes that replacing old, drafty windows with energy-efficient models can reduce household energy bills. Double hung windows are the most common window type in American homes, and replacing them with ENERGY STAR certified units is one of the most impactful energy upgrades a homeowner can make.
Step 1: Remove the Old Sashes and Prepare the Frame
Remove the interior stops, the thin strips of wood that hold the lower sash in place. Pry them off carefully with a flat pry bar. The stops may be reusable if they come off intact. Set them aside. With the stops removed, lift the lower sash out of the frame. If the sash is connected to sash cords, cut the cords. The weights inside the wall pockets will fall. That is fine. They will remain in the wall, permanently retired.
Remove the parting bead, the vertical strip of wood between the upper and lower sash tracks. The parting bead is typically friction-fit into a groove in the frame. Pry it out. With the parting bead removed, the upper sash can be lowered and lifted out the same way as the lower sash. Cut the sash cords for the upper sash as well.
Remove the sash cord pulleys from the frame if they are present. The pulleys are mounted in the side jambs near the top. Remove the screws and the pulleys. The access holes for the weight pockets can be left open. They will be covered by the new window frame and the insulation.
Clean the old frame. Remove any debris, old caulk, loose paint, and insect nests. The old frame must be clean and free of obstructions for the new window to slide in smoothly. Fill the weight pocket access holes with fiberglass insulation. The insulation prevents air from flowing through the weight pockets into the wall cavity.
Step 2: Measure and Install the Replacement Window
Measure the width of the old frame from the inside of one side jamb to the inside of the other. Measure at the top, middle, and bottom. Measure the height from the sill to the underside of the head jamb at the left, middle, and right. Use the smallest measurements. The replacement window is ordered to be slightly smaller, roughly a quarter to half an inch, to fit inside the opening with room for shims.
Dry-fit the new window. Slide it into the old frame. It should fit with a small gap on all sides. If the window binds, find the high spot and plane or sand the old frame slightly. Remove the new window.
Apply a bead of caulk to the exterior stop, the recessed face inside the old frame where the new window will seat. The caulk seals the exterior joint. Set the new window into the opening. Center it. Shim under the sill at the corners and midpoint. Shim between the side jambs and the old frame at the top, middle, and bottom. Check level and plumb. Check that the sashes open, close, and tilt smoothly. Adjust the shims until the operation is correct.
Fasten the new window through the side jambs into the old frame. Use the pre-drilled mounting holes. The screws must penetrate into the old frame and ideally into the rough opening framing. Do not overtighten. Fill the gap between the new frame and the old frame with low-expansion foam. Replace the interior stops or install new casing to cover the gap.
Step 3: Adjust the Tilt Mechanism and Balance System
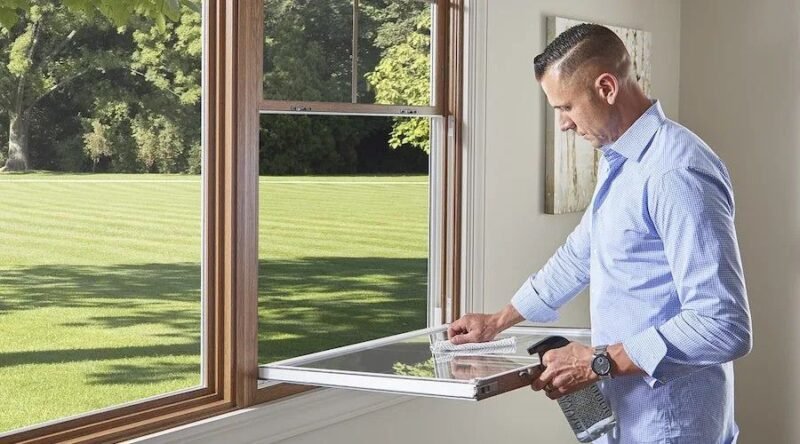
The tilt-in feature on double hung windows allows the sashes to pivot inward for cleaning. The tilt mechanism consists of latches at the top of each sash that disengage from the balance system. To tilt a sash, raise it slightly, press the latches inward, and pull the top of the sash toward you. The sash pivots on the pivot pins at the bottom corners.
If the sash does not tilt smoothly, check that the pivot pins are fully seated in the balance shoes at the bottom of the track. The pivot pin must engage the shoe for the tilt mechanism to work. If the sash binds when tilting, the balance shoes may be misaligned. Remove the sash and inspect the shoes. They should slide freely in the track.
The balance system supports the weight of the sash so it stays in position when raised. If a sash drifts downward, the balance tension is too low. If a sash is hard to raise, the tension is too high. The tension is adjusted by turning an adjustment screw on the balance shoe or on the balance spring with a screwdriver. Turn clockwise to increase tension. Turn counterclockwise to decrease. Adjust both sides equally. The sash should stay in any position without drifting and should raise and lower with even resistance.
Frequently Asked Questions
What happens to the old sash weights in the wall?
They stay in the wall. The sash cords are cut during sash removal. The weights drop into the bottom of the weight pockets. They are inaccessible without opening the wall and serve no further purpose. The weight pockets should be filled with fiberglass insulation before the new window is installed to prevent air movement through the open pockets.
What is the difference between single hung and double hung windows?
A single hung window has a movable lower sash and a fixed upper sash. A double hung window has two movable sashes. Both sashes can open. Double hung windows provide better ventilation because warm air can escape through the upper sash while cooler air enters through the lower sash. The replacement process is the same for both. The upper sash of a single hung window is removed the same way as a double hung upper sash.
Do all replacement double hung windows tilt in for cleaning?
Most modern replacement double hung windows have tilt-in sashes. The tilt feature is standard on mid-range and premium windows. Basic economy windows may not have tilt-in sashes. If cleaning the exterior of second-story windows from the inside is important, verify that the windows you are ordering have the tilt-in feature.
The Bottom Line
Replacement double hung windows are installed by the insert method. The old sashes are removed. The sash cords are cut. The weight pockets are insulated. The new window slides into the old frame, is shimmed level and plumb, fastened, insulated, and trimmed. The tilt mechanism and balance system are adjusted for smooth operation. The exterior of the house is not disturbed. The installation takes a few hours per window and produces a result that looks original from the outside and operates like new from the inside.