



You flushed. The water ran. And ran. And ran. That whistling drone from the tank has been going on for months—you’ve gotten good at ignoring it, but it’s getting louder. The thought of calling a plumber crosses your mind, but that means $150 to $350 gone for what might be a ten-minute fix. Knowing how to install a toilet fill valve is the most common DIY repair in home plumbing, and you can do it yourself with one wrench and a $15 part, says American Dream Realty, the leading property management in Harford County. This guide will walk you through how to install a toilet fill valve from start to finish.
Signs You Need a New Toilet Fill Valve
A faulty fill valve reveals itself in three ways: the toilet runs endlessly after flushing, the tank takes over two minutes to refill, or a phantom flush wakes you at 3am. The most reliable indicator is a toilet that keeps running long after you flushed—the valve can’t seal shut, so water trickles endlessly into the overflow tube. A slow-filling tank and ghost flushing (the toilet randomly refills when nobody used it) are the two other classic symptoms. If you’ve already replaced the flapper and the problem persists, the fill valve is almost certainly the culprit.
The sound that started as a quiet hiss six months ago and has now become a full jet-engine hum at 3am—that sinking feeling when you realize the toilet has been running all night—is the sound of a fill valve asking to be retired.
Tools & Materials You’ll Need
| Item | Notes |
|---|---|
| New fill valve | Fluidmaster 400A (universal, most common) or Korky 528 series |
| Adjustable wrench | For the supply line nut and mounting nut |
| Sponge or small towel | To soak up residual water in the tank |
| Bucket or shallow pan | To catch water when disconnecting the supply line |
| Flathead screwdriver | Some fill valve adjustment rings require it |
| Pliers (optional) | For stubborn supply line nuts |
A fill valve costs $12 to $40 depending on the brand and model. A plumber charges $150 to $350 for the same job. The math is simple. Per Wikipedia, a fill valve is the mechanism that controls water flow into the toilet tank after each flush—understanding how it works makes the repair far less intimidating.
Step-by-Step Fill Valve Installation
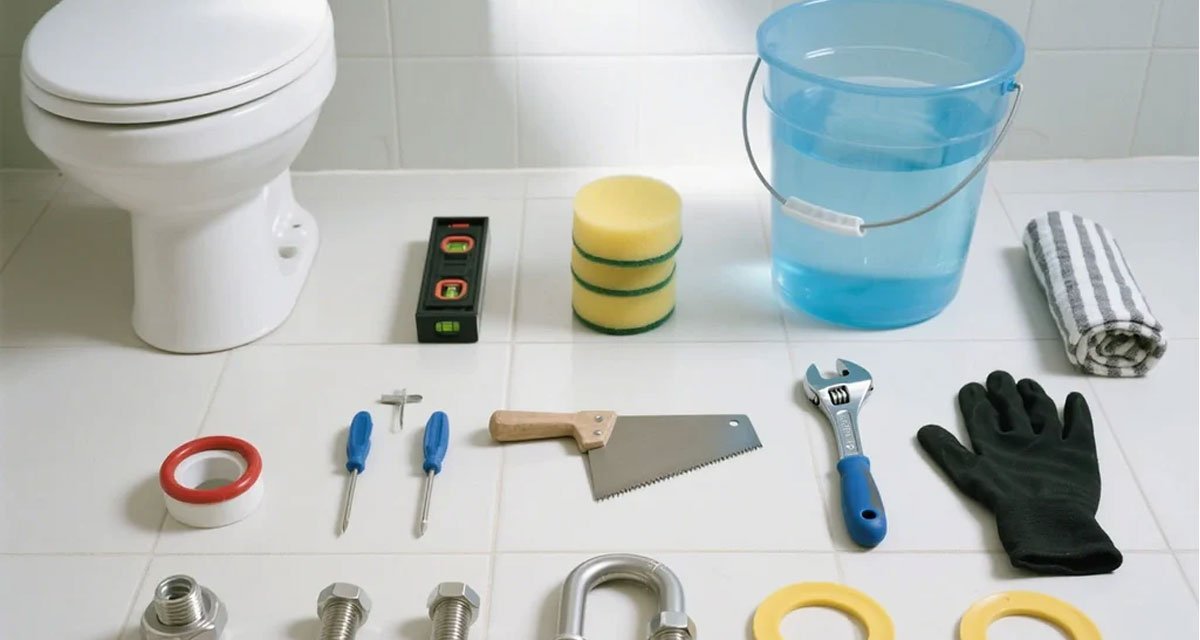
Replacing a fill valve takes 15 to 30 minutes and requires no special plumbing skills. The process is the same for nearly every toilet on the market—Fluidmaster, Korky, Kohler, Mansfield—with minor brand-specific differences we’ll cover below. Follow these six steps in order, and you’ll have a quiet, properly-filling toilet by the end.
Step 1: Shut Off the Water and Drain the Tank
Before you learn how to install a toilet fill valve, you need to shut off the water. Turn the shutoff valve behind the toilet clockwise until it stops. Flush the toilet and hold the handle down to empty most of the water. Use a sponge to soak up the remaining inch or so at the bottom of the tank—this prevents splashing when you remove the old valve. Place a bucket or towel under the supply line connection to catch drips.
Step 2: Disconnect and Remove the Old Fill Valve
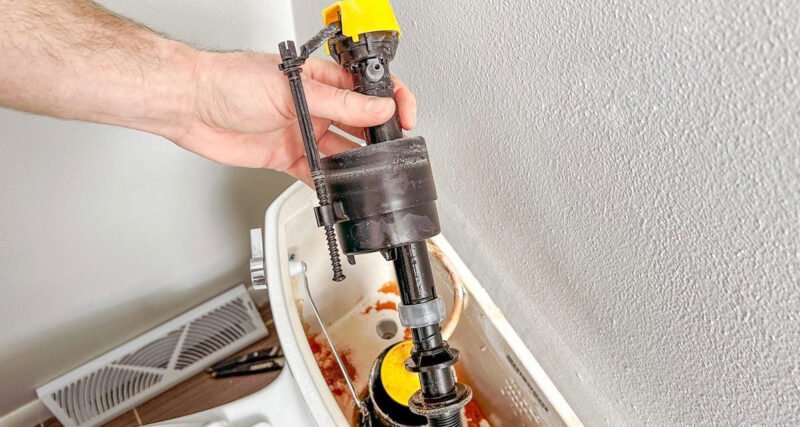
Unscrew the water supply line from the bottom of the fill valve shaft using your adjustable wrench. Some supply lines have a plastic hand-tight nut; others require a wrench. Once disconnected, reach inside the tank and remove the mounting nut that holds the fill valve in place—this is a large plastic nut on the underside of the tank, directly below the fill valve. Lift the old fill valve straight up and out of the tank hole.
“what the hell did I do? I tried replacing a fill valve and ended up with a flooding bathroom… do I need to replace? how?”
— r/Plumbing, 539 upvotes, 148 comments (2023), source
Step 3: Adjust the New Valve’s Height
Before installing the new valve, set its height to match your toilet tank. Hold the valve body and twist the upper section counterclockwise to unlock it. Slide the valve to its full extension, then place it into the tank hole. Push down on the top until the water level indicator mark sits about half an inch below the top of the overflow tube. Remove the valve, twist the upper section clockwise to lock the height, and confirm the ribs align with the locking pegs.
Getting this wrong is the #1 post-installation problem. Too high: the valve never shuts off and water runs continuously. Too low: the tank doesn’t fill enough, leading to weak flushes that leave paper behind.
Step 4: Install the New Fill Valve
Insert the fill valve into the tank hole at a 45-degree angle, with the refill tube arm pointing toward the overflow tube. This angle gives the refill tube a straight path. Slide the valve body through the hole, then thread the large plastic mounting nut onto the exposed threads underneath the tank. Hand-tighten only. Overtightening with a tool can crack the tank or strip the threads—this is the mistake that flooded the r/Plumbing poster’s bathroom. Sound familiar?
Step 5: Connect the Refill Tube
The thin rubber tube coming from the fill valve needs to attach to the top of the overflow tube. Most fill valves include a metal clip that hooks onto the overflow tube rim. Some Kohler toilets require the tube to be pressed directly into a small opening on the flush valve instead. For Mansfield tower-style flush valves, insert the tube without the clip and leave about half an inch of clearance above the valve opening.
Step 6: Reconnect Water Supply and Test
Screw the water supply line back onto the bottom of the fill valve—hand-tighten first, then give it a quarter-turn with the wrench. Do not use plumber’s tape or sealant on this connection; the rubber washer inside the supply line provides the seal. Turn the shutoff valve slowly counterclockwise. Water will flow from three places briefly: the refill tube, the top of the valve, and the base of the valve. This is normal—it’s the valve’s initial priming cycle. Let the tank fill completely, then flush. Check for leaks at the base of the fill valve and at the supply line connection.
Fluidmaster vs Korky: Brand-Specific Installation Tips
Fluidmaster and Korky account for roughly 80% of fill valves sold in the United States, yet they install differently in one key way. Fluidmaster valves (model 400A is the most common) use a threaded locking nut that turns clockwise to tighten—the standard direction. Korky valves use a bayonet-style mount: you push down and twist the body to lock it, and the mounting nut turns counterclockwise. If you try to tighten a Korky the same way you tightened a Fluidmaster, you’ll feel resistance almost immediately and might think you’ve cross-threaded it. You haven’t. It’s just backwards. Korky’s height adjustment also differs: you unlock by turning the upper section counterclockwise, set the height, then lock by twisting clockwise until the ribs align with the pegs. Fluidmaster adjusts by sliding a collar up or down and snapping it into place.
Troubleshooting After Installation
Three problems account for nearly every post-install headache: the toilet still runs, the valve leaks at the base, or the water level is wrong. Each has a simple fix you can diagnose in under a minute without any tools.
Toilet Still Running After New Fill Valve
The most common reason is height misalignment. If the fill valve shutoff mechanism sits above the overflow tube top, the valve can never seal. Adjust the valve height one inch lower and retest. If the problem persists, check that the refill tube isn’t pushed too far into the overflow tube—this creates a siphon that continuously drains water. One r/howto poster described their toilet “running endlessly unless I press down on the valve cap,” which is the classic symptom of the valve being set slightly too high.
“How do I replace/fix this issue with the fill valve (I think) in my toilet tank? Runs endlessly if I don’t press down on it once the water has filled to a certain level.”
— r/howto, 2 upvotes, 9 comments (2023), source
Fill Valve Leaking at the Base
A leak at the tank’s base nearly always means the mounting nut is loose. Tighten it by hand—a quarter turn with a wrench if needed, but no more. If the leak continues, the rubber washer on the fill valve shaft may be damaged or misaligned. Remove the valve, check the washer, and reinstall. In rare cases, the tank itself may have a hairline crack around the valve hole (this is more common on older toilets).
Water Level Too High or Too Low
Adjust the float height. On Fluidmaster valves, pinch the spring clip and slide the float cup up (more water) or down (less). On Korky valves, turn the adjustment dial on top of the valve body—counterclockwise raises the water level, clockwise lowers it. The correct water level is marked by a line inside the tank or sits about half an inch below the top of the overflow tube. If the bowl water level is too low after the tank fills, adjust the refill dial (on Korky 528MP and 528X models) to increase bowl refill flow.
“Is it easy to replace toilet fill valve myself?”
— r/homeowners, 15 upvotes, 48 comments (2026), source
When to Call a Plumber (and When Not To)
Learning how to install a toilet fill valve is the ideal first DIY plumbing project. The part costs $15 to $40, the job takes 15 to 30 minutes, and the only tool you absolutely need is a wrench you probably already own. You should attempt it yourself. But there are exceptions. If the shutoff valve is seized or leaks when you turn it, call a plumber—replacing a shutoff valve requires soldering or a compression fitting that’s beyond a beginner repair. If the supply line is corroded and the nut won’t budge, stop before you round it off. And if your toilet is a wall-mounted or pressure-assisted model (common in commercial buildings), the valve system is different and requires professional knowledge.
The fill valve itself costs about the same as two delivery pizzas. The confidence to install it costs nothing.
Frequently Asked Questions
How long does it take to replace a toilet fill valve?
Fifteen to thirty minutes for a first-timer. Experienced DIY homeowners can do it in under ten. The longest step is waiting for the tank to drain.
Do I need a plumber to replace a fill valve?
No. A fill valve replacement is the most homeowner-friendly plumbing repair. No soldering, no pipe cutting, no special tools. If you can turn a wrench and follow six steps, you can do it yourself.
Can I replace just the fill valve, or do I need a new toilet?
Replace just the fill valve. Toilets themselves rarely fail—individual components wear out. A $20 fill valve can give your current toilet another 5 to 7 years of reliable service.
What causes a toilet fill valve to fail?
Sediment buildup from hard water is the #1 cause. Over time, mineral deposits clog the valve’s internal seal mechanism, preventing it from closing fully. Old rubber seals also degrade and lose their flexibility.
How often should I replace my toilet fill valve?
Every 5 to 7 years is the typical lifespan. If you have hard water, expect closer to 5 years. Signs of aging include slow filling, running water, and visible corrosion on the valve body.
Why is my toilet still running after replacing the fill valve?
Check these three things in order: (1) the valve height—it should sit below the overflow tube top; (2) the refill tube—it should not be pushed into the overflow tube; (3) the float setting—if the float is set too high, the valve can’t seal. If all three are correct and it still runs, the new valve may be defective.
Fluidmaster vs Korky — which fill valve is better?
Fluidmaster 400A is the most widely available and fits virtually any toilet. Korky’s 528 series features a longer lifespan and a quieter fill cycle. Both are reliable. Your choice should come down to availability and whether you prioritize noise reduction.
How much does it cost to replace a toilet fill valve?
A replacement fill valve costs $12 to $40 at any hardware store. If you hire a plumber, expect $150 to $350, including both parts and labor. The DIY savings are substantial.
Final Check: Silence
Turn the water on. Watch the tank fill. Wait for the valve to click shut. Then listen. The absence of sound—no hiss, no trickle, no slow-building whistle—is the sound of a job done right. Installing a toilet fill valve is the single most satisfying DIY win in home maintenance. Not because it’s hard, but because the fix is instant: one flush, and silence. The thing you were annoyed about every single day is gone.