Installing house siding is a sequence of layers, not a single material. The siding itself is the last layer. Before it goes on, the old siding comes off, the sheathing is inspected and repaired, the house wrap is stapled up, the windows and doors are flashed, and the trim is installed. Skipping any of these steps means the siding is covering a problem that will reveal itself years later as rot, mold, or a draft that cannot be located. The siding is the visible layer. The layers underneath keep the house dry and insulated. This guide covers the full sequence from tear-off to finish paint, applicable to every siding material.
The Complete Installation Sequence
The order of operations in a siding installation is non-negotiable. Each step prepares the surface for the step that follows. A step done out of order creates a problem that the next step cannot fix.
Step one: tear off the old siding. Remove existing siding, trim, and any deteriorated building paper or house wrap down to the bare sheathing. Work from the top down so debris falls onto the already-stripped wall rather than onto siding you have not removed yet. Rent a dumpster. Old siding produces more waste than you expect, especially if it is wood clapboard or fiber cement that cannot be compacted. The dumpster cost is roughly $300 to $500 for a 20-yard bin and is included in the budget before the first nail is pulled.
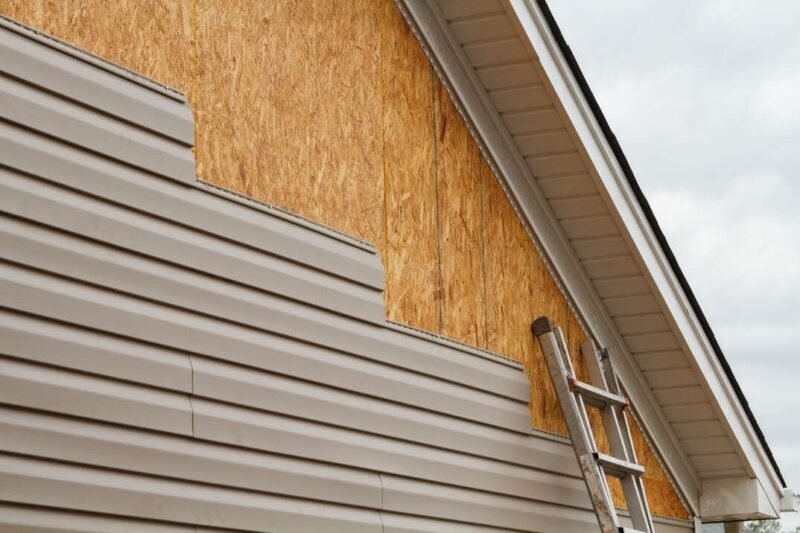
Step two: inspect and repair the sheathing. Look for rot, water stains, delamination, and holes. Rotted sheathing must be cut out and replaced. The rot is almost always around windows, at the base of walls where splashback has been hitting, and at corners where flashing was inadequate. Probe suspicious areas with an awl or screwdriver. Soft sheathing means rot. Replace it with plywood or OSB of the same thickness. Install new sheathing with the stamped grade facing outward.
Step three: install the water-resistive barrier. House wrap or building paper is stapled to the sheathing, starting at the bottom and working up. Each course overlaps the course below by at least six inches horizontally and 12 inches at vertical seams. The overlaps must be shingled so water running down the wall stays on the outside of the layer below. Tape all seams with house wrap tape. Tape the house wrap to the window and door flanges. The house wrap is the last line of defense against water that gets behind the siding. A tear or gap in the house wrap is a direct path for water to reach the sheathing.
Step four: flash the windows and doors. Self-adhering flashing tape or metal flashing is installed around every opening. The sequence is bottom first, sides overlapping the bottom, top overlapping the sides. The flashing directs water that gets behind the siding out over the face of the wall. The bottom flashing must be wide enough to extend past the J-channel or trim that will be installed later. The top flashing must have a drip edge that directs water outward.
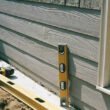
Step five: install trim. Corner boards, window and door trim, fascia, and any horizontal trim bands go on before the siding. The trim defines the edges of every wall section. The siding panels fill the space between the trim. Trim must be level, plumb, and securely fastened. The siding will highlight any trim that is out of alignment because the gap between the siding and the trim will be uneven.
Step six: install the siding. Start at the bottom and work up. The first course is the most important because every course above it references the course below. If the first course is out of level, the entire wall will be out of level. The installation varies by material: vinyl snaps together with loose nails, wood is face-nailed or blind-nailed with stainless fasteners, fiber cement is blind-nailed with galvanized nails, and engineered wood installs similarly to fiber cement. The universal rule is that each course must overlap the course below to shed water and each panel must be able to move independently to accommodate expansion.
Step seven: caulk, paint, and finish. Caulk all joints between siding and trim with a high-quality exterior caulk appropriate for the siding material. Paint or stain wood and fiber cement siding after installation. Vinyl and engineered wood siding with factory finishes do not require painting. Install any remaining accessories: light fixtures, hose bibs, dryer vents, and address numbers that were removed during tear-off.
Tools, Safety, and Working Around Obstacles
The minimum tool set for a siding installation includes: a hammer or nail gun, a circular saw with blades appropriate for the siding material, a four-foot level, a chalk line, tin snips, a utility knife, a tape measure, and a ladder or scaffolding. Scaffolding is safer and faster than a ladder for installing siding above the first story. Two sections of scaffolding with a walkboard cost $100 to $200 to rent for a week. The rental cost is less than an emergency room copay.
Working around obstacles is part of every siding job. Exterior lights, hose bibs, meter boxes, dryer vents, and cable lines all penetrate the siding. Each penetration requires a hole cut in the siding panel and a mounting block or trim ring that fits around the fixture and receives the J-channel or trim. Cut the hole slightly larger than the fixture to allow for expansion. Install the mounting block before the siding. The siding butts into the mounting block the same way it butts into window trim.
Electrical meters and service entrance cables are the most intimidating obstacles. The siding must be cut to fit around the meter base and the conduit. If the meter base is surface-mounted on the existing siding, it must be removed and remounted on the new siding by a licensed electrician. Do not attempt to remove or relocate an electrical meter yourself. The power company or an electrician handles the meter. You handle the siding that goes around it after it is reinstalled.
Frequently Asked Questions
Can I install new siding over old siding instead of tearing it off?
It depends on the material and the condition of the old siding. Vinyl can be installed over flat, sound wood siding. Fiber cement and engineered wood should be installed over sheathing, not over old siding. Installing over old siding adds weight to the wall, buries any problems in the old siding where they will continue to deteriorate, and makes future repairs more complicated because there are now two layers of siding to work through. The best practice is to tear off the old siding, inspect and repair the sheathing, and install the new siding over a clean surface. The tear-off adds a day or two to the project. The peace of mind is permanent.
Do I need a permit to install house siding?
Most municipalities do not require a permit for a like-for-like siding replacement, replacing old siding with new siding of the same type. Replacing siding with a different material, especially a heavier material like fiber cement replacing vinyl, may require a permit. Changing the exterior appearance in a historic district almost always requires approval. Check with your local building department before ordering materials. The phone call takes five minutes.
What is the best time of year to install house siding?
Spring and fall offer the most comfortable working temperatures and the most stable weather. Summer is hot but workable if you start early in the morning. Winter installations are possible but complicated by cold temperatures that make vinyl brittle, prevent caulk and paint from curing properly, and make working on scaffolding unpleasant. If you must install siding in cold weather, use cold-weather caulk and paint. Store vinyl siding in a heated space before installation so it is not contracted to its minimum length when it goes on the wall.
The Bottom Line
House siding is installed in a sequence that starts with tear-off and ends with caulk. The sheathing is inspected and repaired. The house wrap is stapled up, shingled from bottom to top. The windows and doors are flashed. The trim goes on. The siding fills the space. The caulk and paint finish the job. The sequence is not complicated. It is a series of simple steps performed in the correct order. The siding is the step everyone sees. The steps before the siding are the ones that determine whether the walls stay dry for the next 30 years.