

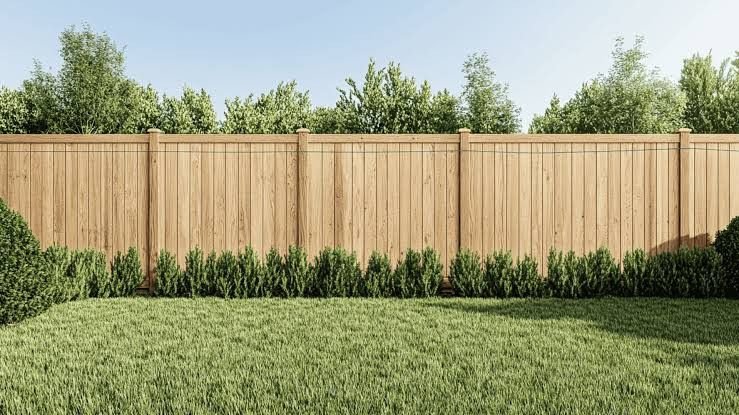
Installing a wood panel fence is the faster, cleaner alternative to building a fence picket by picket. The panels come pre-assembled from the lumberyard or home center, eight feet long and six feet tall, with the pickets already nailed to the horizontal rails. Your job is to set the posts in the right places at the right depth, lift the panels into position, and fasten them. The panels do the rest. The catch is that panels are unforgiving. A post that is off by an inch means a panel that does not fit. A post that is out of plumb means a panel that leans. The precision is in the posts. The panels are just the reward for getting the posts right.
Fence Armor (2025), a manufacturer of fence protection products, provides a detailed installation guide covering everything from material selection to post setting to gate installation. Pre-assembled wood panels are typically built from cedar, redwood, or pressure-treated pine. The posts are pressure-treated four-by-fours set in concrete. The rails attach with galvanized brackets or structural screws. The entire system relies on the posts being straight, plumb, and aligned. This guide covers the installation from marking the first post hole to hanging the gate, with the specific techniques that make panel installation different from stick-built fencing.
Step 1: Plan the Layout and Gather Materials
Before any digging, mark the fence line with stakes and mason’s line. Call 811 to locate underground utilities. Fence Armor (2025) emphasizes this step as non-negotiable: striking a gas or electrical line turns a weekend project into a disaster. Verify local zoning codes for fence height limits and setback requirements. Standard residential limits are six feet for backyard fences and four feet for front yards, but individual municipalities vary.
Pre-assembled wood fence panels are eight feet long. Post spacing must match the panel length exactly, measured from the center of one post to the center of the next. For an eight-foot panel, the posts go eight feet apart on center. Mark each post location with spray paint or a stake. The first and last posts are terminal posts. Gate posts are terminal posts set deeper than line posts. Walk the entire line and verify the layout before digging. A mistake in the layout that you catch after concrete is poured means breaking out concrete and starting over.
Materials for a standard six-foot privacy fence per eight-foot section: one pre-assembled wood panel, two pressure-treated four-by-four posts (eight-foot length for a six-foot fence), four bags of fast-setting concrete mix, galvanized panel brackets or three-inch exterior structural screws, and post caps. For a 50-foot fence, order seven panels, eight posts, 28 bags of concrete, and the corresponding hardware. Add ten percent for waste and mistakes. Running short on a Saturday afternoon when the lumberyard closes at noon is the most expensive way to save money on materials.
Step 2: Set the Posts — The Step That Determines Everything
Post holes for a six-foot wood fence must be at least 24 inches deep and 10 to 12 inches in diameter. Fence Armor (2025) specifies digging to at least one-third the length of the post. An eight-foot post set 24 inches deep leaves six feet above ground for a standard privacy fence. In areas with frost heave, dig below the frost line, typically 36 to 42 inches in northern climates. A post that heaves in the spring shifts the entire panel with it, cracking the concrete footing and throwing the top of the fence out of level.
Set the first terminal post. Place it in the hole, check plumb on two adjacent sides with a four-foot post level, and brace it in position with scrap two-by-fours staked into the ground. Pour the dry concrete mix into the hole around the post, then add water per the bag instructions. Fast-setting mix eliminates the need for pre-mixing in a wheelbarrow and sets in 20 to 40 minutes instead of 24 hours. Taper the top of the concrete away from the post so water drains off rather than pooling against the wood.
Set the second post at the far end of the first panel. Run a string line between the two posts at the height of the top rail to keep them aligned. The string is your reference for every post in between. Set each intermediate post, checking plumb on both axes, aligning the face with the string line, and verifying the eight-foot center-to-center spacing with a tape measure. Fence Armor recommends bracing each post while the concrete cures. A post that shifts during curing is permanently out of position. Allow fast-setting concrete at least four hours, and standard concrete at least 24 hours, before attaching panels.
Step 3: Attach the Panels — Lift, Shim, and Fasten
Pre-assembled wood panels weigh 40 to 70 pounds each depending on wood type and moisture content. Two people can lift and position a panel without equipment. Position the panel between two posts, resting it on shims or blocks to hold it at the correct height. The bottom of the panel should clear the ground by two to three inches to prevent ground contact and rot. Fence Armor specifies a three-rail system with the bottom rail 12 inches from the ground, the middle rail centered, and the top rail 12 inches from the top of the panel.
Attach the panel to the posts using galvanized panel brackets or by toe-screwing through the rails into the posts with three-inch exterior structural screws. Panel brackets mount to the post first, then the panel drops into the bracket and is secured with screws. This method is faster and allows for minor height adjustments. Toe-screwing requires driving screws at an angle through the face of the rail into the post. It is stronger but less forgiving of post alignment errors. Use four screws per rail per side, two into each post. Eight screws per panel side, 16 total per panel.
Check level on every panel before fastening. Shim under the low end with a composite shim or a scrap of pressure-treated wood. A panel that is off-level by a quarter inch at the first post will be off by two inches by the sixth panel. The error compounds. Fix it at the panel where it appears, not at the end of the fence line. Once the panel is level and plumb, drive all fasteners home and move to the next section. Work your way down the line one panel at a time.
Step 4: Install the Gate and Apply Finishing Touches
Gate posts carry more weight and movement than line posts. Fence Armor specifies setting gate posts deeper, typically 30 inches or more, and using a larger diameter hole. A sagging gate is almost always a post problem, not a hinge problem. Set gate posts with the same care as terminal posts: plumb, braced, and cured before attaching hardware.
Hang the gate using heavy-duty galvanized hinges rated for the gate weight. A standard four-foot walk gate weighs 30 to 50 pounds. A six-foot drive gate weighs 60 to 100 pounds and requires three hinges. Install a cross-brace on the gate frame running diagonally from the bottom hinge corner to the top latch corner. The brace transfers the gate’s weight to the hinge post instead of letting the frame rack out of square. Attach the latch hardware and test the swing. The gate should clear the ground by two to four inches and close without scraping the latch post. Adjust the hinges or shim the latch plate until the gate operates smoothly.
Finish the fence by installing post caps on every post. Caps prevent water from soaking into the end grain of the post, which is the primary entry point for rot. Fence Armor recommends sealing or staining pressure-treated wood after allowing it to dry for two to four weeks. Fresh pressure-treated lumber is saturated with preservative and will not absorb stain until the moisture content drops. Apply a penetrating sealant or UV-blocking exterior stain with a brush, roller, or sprayer. Reapply every one to two years depending on sun exposure.
Frequently Asked Questions
Should I set wood fence posts in concrete or gravel?
Concrete is the standard for panel fences because the posts carry the weight of the panels and resist wind loads. Gravel alone does not provide enough lateral support for an eight-foot panel catching wind. Fence Armor (2025) recommends concrete for all fence posts. The exception is in extremely well-drained sandy soil with very low wind exposure, where tamped gravel may be sufficient for lightweight decorative fencing. For a six-foot privacy fence in any climate, set the posts in concrete. The cost difference is roughly $4 per post. The cost of resetting a leaning post is a Saturday you will never get back.
Are pre-assembled panels better than building a fence picket by picket?
Pre-assembled panels save about half the installation time. A stick-built fence requires nailing roughly 15 to 18 pickets per eight-foot section, 30 to 36 per section for a board-on-board privacy design. A panel installs in minutes. The trade-off is that panels are harder to adjust on uneven ground because the bottom of the panel is fixed. On a sloped yard, a stepped installation with panels requires cutting post heights precisely. A stick-built fence can be racked to follow the contour of the ground. For flat yards, panels are the faster, cleaner choice. For sloped yards, stick-built may produce a better-looking result.
How long does it take to install a wood panel fence?
A two-person team installing 50 feet of pre-assembled wood panel fencing on flat ground can complete the project in a weekend. Day one: layout, dig post holes, set posts in concrete, let cure. Day two: attach panels, hang gate, install post caps. A 100-foot fence with a gate takes three to four days including concrete cure time. The digging is the bottleneck. Rocky soil, tree roots, or clay can double the time per hole. Rent a gas-powered auger for runs longer than 50 feet or for soil with heavy clay. The auger rental costs $50 to $80 and saves hours of manual digging.
The Bottom Line
A wood panel fence is a system where the posts do all the work and the panels take all the credit. Spend the time on the layout, the post depth, and the alignment. Check plumb on every post in two directions. Check the spacing with a tape measure, not by holding the panel up and guessing. Let the concrete cure before attaching anything. When the posts are right, the panels slide into place and the fence looks like it was installed by someone who measures twice. When the posts are wrong, every panel fights you and the finished fence has a wave in it that you will notice every time you pull into the driveway. The difference is patience at the post hole.