

Installing a paver patio is the same process as installing a paver walkway, scaled up to a larger area with one critical difference: the slope. A walkway slopes across its width to shed water. A patio slopes across its entire surface to shed water away from the house, and getting that slope right across a 200-square-foot surface is harder than getting it right across a three-foot-wide path. The base is deeper. The excavation is bigger. The number of cuts is higher. The edge restraints run around four sides instead of two. But the principles are identical: compacted gravel base, sand bedding, pavers locked with polymeric sand. The patio is just a walkway that grew up and got wider.
A 12-by-16-foot paver patio is 192 square feet. At $15 to $30 per square foot for professional installation, that patio costs $2,900 to $5,800. The materials for the same patio cost $800 to $1,500 at retail prices. The difference is labor, equipment, and the fact that installing pavers involves being on your hands and knees for two days. The DIY savings are real. The physical toll is also real. A plate compactor and a masonry saw are rental items. A strong back and a willingness to spend a weekend moving gravel by wheelbarrow are not.
Step 1: Plan the Patio — Location, Size, and Slope
The patio must slope away from the house. This is the rule that causes more patio problems than any other. Water that pools against the foundation finds its way into the basement. The standard slope is one-quarter inch per foot, or roughly two percent. A patio that extends 12 feet from the house must drop three inches from the house to the far edge. That is enough slope to move water without being noticeable underfoot. A slope of one-eighth inch per foot is the absolute minimum and only works with perfectly screeded sand and pavers that are exactly the same thickness. A slope of more than one-half inch per foot feels like you are sitting on a hill and chairs wobble.
Mark the patio outline with stakes and mason’s line. The string lines should be set at the finished height of the pavers and sloped correctly. Check the slope with a line level and a tape measure. The string lines are your reference for the entire project. Every measurement for excavation depth, gravel height, sand thickness, and paver elevation ties back to the strings. Set them carefully. Protect them from being bumped. If a string gets moved and you do not notice until the pavers are down, the patio will have a hump or a dip that catches water and your eye every time you walk outside.
Size the patio to minimize cuts. Pavers come in modular dimensions. Standard four-by-eight-inch pavers laid with a quarter-inch joint cover eight and a quarter inches per paver including the joint. A patio that is a multiple of eight and a quarter inches in both directions requires almost no cuts along the edges. A patio that is 12 feet 3 inches wide requires cutting every paver along one edge. The extra three inches cost hours of saw time. Design the patio dimensions around the paver module if possible. If not, accept the cuts and move on.
Step 2: Excavate and Build the Gravel Base
Excavate the patio area to a depth of seven to nine inches below the finished paver surface. The depth equals four to six inches of compacted gravel base, one inch of sand bedding, and the paver thickness. For a patio, use a six-inch gravel base. The patio will support furniture, a grill, and groups of people. The extra two inches of gravel over the four-inch walkway standard adds roughly $100 to a 200-square-foot patio and prevents settlement under concentrated loads. Excavate six to eight inches beyond the patio edges on all sides. The extra width provides room for edge restraints, allows the gravel base to extend beyond the pavers for stability, and gives you space to kneel while laying the edge pavers.
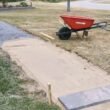
The excavation for a 200-square-foot patio at eight inches deep produces roughly five cubic yards of soil. That is a full-size pickup truck load. Have a plan for where it goes before you start digging. Spread it in a low area of the yard, build a raised planting bed, or rent a disposal bin. Do not pile it next to the patio where it will wash back into the excavation during the first rain.
Compact the exposed soil with a plate compactor. Fill the excavation with angular gravel in two- to three-inch lifts, compacting each lift before adding the next. The top of the compacted gravel should follow the slope of the finished patio, roughly one-quarter inch per foot. Check the slope with a straightedge and a level. The gravel base is the structural layer. Every paver on the patio depends on the gravel below it being fully compacted and correctly sloped. The time to fix a low spot in the gravel is before the sand goes down.
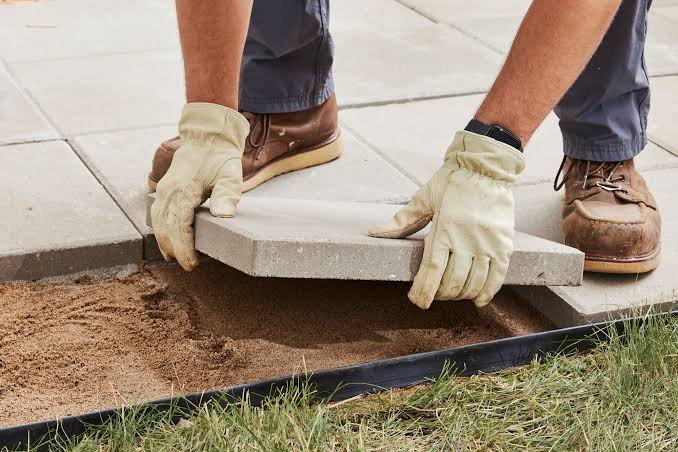
Step 3: Screed the Sand and Lay the Pavers
Set one-inch-diameter screed pipes on top of the compacted gravel. The pipes run parallel to each other across the patio, spaced so that a straight two-by-four screed board spans between them. For a 12-foot-wide patio, run two sets of pipes: the first pair for the half of the patio closest to the house, the second pair shifted over for the far half. The pipes set the thickness of the sand layer. They must follow the slope of the finished patio exactly. Spread concrete sand and screed it flat. Remove the pipes and fill the voids with sand.
Start laying pavers at the house, at a doorway, or along the straightest edge. Snap a chalk line for the first row and follow it exactly. The first row sets the alignment for the entire patio. If it is off by a quarter inch, every row after it is off by the same quarter inch, and the error becomes visible where the patio meets the edge on the far side. Lay pavers in the chosen pattern. Herringbone is the strongest pattern for a patio because it interlocks in two directions and resists the twisting forces of furniture and foot traffic better than running bond. It also requires twice as many cuts at the edges. Running bond is simpler, faster, and strong enough for a patio that will not see vehicle traffic. The choice is between strength and simplicity.
Work from the laid pavers outward so you are always standing on pavers, not sand. Footprints in the screeded sand become low spots in the finished patio. Check level frequently across multiple pavers. Tap high pavers down with a rubber mallet. Lift low pavers and add a pinch of sand. The adjustments are small. For curved edges or borders, lay the field pavers first and cut the edge pavers last. Install a border course of a contrasting color or a soldier course of pavers set perpendicular to the field for a finished edge. The border frames the patio and hides the cut edges of the field pavers.
Step 4: Install Edge Restraints, Polymeric Sand, and Compact
Edge restraints hold the patio together. Plastic or metal paver edging runs around all four sides, tight against the pavers, spiked into the gravel base every 12 inches. The edging prevents the pavers from shifting outward over time. A patio without edging will spread at the edges within a few seasons as freeze-thaw cycles and foot traffic work the outer pavers loose. The edging is the difference between a patio that still has tight joints in ten years and one that has gaps wide enough to grow weeds.
Sweep polymeric sand into the joints. Use a push broom and sweep in multiple directions until every joint is completely filled. The sand should sit just below the paver surface. Run a plate compactor over the pavers with a rubber mat or carpet between the plate and the pavers. The compactor vibrates the sand deeper into the joints and settles the pavers into the sand bed. Sweep additional sand into any joints that are no longer full. Repeat until the joints stay full after compaction.
Remove every grain of excess sand from the paver surface with a leaf blower. This step is not optional. Polymeric sand left on the surface bonds to the pavers when wet and leaves a permanent cloudy haze. The blower is the tool that makes the patio look like pavers instead of pavers covered in dried adhesive. After the surface is clean, mist the patio lightly with a garden hose. A fine mist activates the polymer without washing the sand out of the joints. Keep foot traffic off the patio for 24 hours while the sand cures. The patio is ready for furniture on day two.
Frequently Asked Questions
How much slope does a paver patio need for drainage?
Slope the patio one-quarter inch per foot away from the house, or roughly two percent. A patio extending 12 feet from the house drops three inches from the foundation to the far edge. The minimum acceptable slope is one-eighth inch per foot and only works with perfectly flat pavers and precisely screeded sand. The maximum slope that feels comfortable underfoot is one-half inch per foot. Steeper than that and chairs wobble and tables need shims. The slope must be established in the gravel base, maintained in the sand screed, and reflected in the finished paver surface. A patio that is level at the base and sloped at the sand layer will revert to level as the sand compresses.
How deep should the gravel base be for a paver patio?
Six inches of compacted angular gravel is the standard for a patio. This is two inches deeper than the four-inch base used for walkways because patios support heavier loads: furniture, grills, planters, and groups of people. If the patio will occasionally support a vehicle, such as a patio that connects to a driveway, use an eight-inch gravel base compacted in three lifts. The extra depth distributes the concentrated load of car tires across more gravel and prevents the pavers from sinking into ruts over time.
What is the best paver pattern for a patio?
Herringbone at a 45-degree angle is the strongest pattern because the pavers interlock in two directions, resisting both lateral and rotational forces. It is the standard pattern for driveways and patios that will bear heavy loads. The trade-off is that herringbone requires roughly twice as many edge cuts as running bond and the 45-degree orientation makes every edge an angled cut. Running bond is strong enough for a residential patio, requires fewer cuts, and is faster to install. For a patio that will never see vehicle traffic, running bond is the simpler choice. Use a border course around the perimeter in either case. The border frames the patio and covers the cut edges of the field pavers.
The Bottom Line
A paver patio is a gravel base, a sand bed, a layer of pavers, and polymeric sand in the joints, all sloping away from the house at a quarter inch per foot. The slope is set in the gravel. The sand follows the gravel. The pavers follow the sand. If the gravel is flat, the patio is flat, and water pools against the foundation. The string lines set the slope. The screed pipes maintain it. The level confirms it. Build the base correctly and the pavers are just the surface. Rush the base and the patio will remind you of it every time it rains for the next 20 years.