



Why Commercial Painting Requires Careful Planning
A commercial painting project affects far more than walls and ceilings. It can influence employee productivity, customer comfort, tenant access, delivery schedules, safety routes, and the business’s appearance. Property managers and business owners who want a smoother process can visit this page to better understand the planning involved in professional commercial painting services.
Unlike a small residential paint job, commercial work often takes place in active offices, retail stores, warehouses, schools, restaurants, and multi-tenant properties. A successful project keeps the building functional while crews prepare surfaces, apply coatings, ventilate work areas, and complete cleanup. The paint is important, but scheduling and communication are just as important.
Poor planning can lead to blocked hallways, unexpected odor concerns, delayed openings, damaged equipment, frustrated tenants, and incomplete areas that stay out of service longer than expected. A practical plan identifies those risks before work begins and gives everyone a clear path through the project.
Step 1: Walk Through the Property Before Work Begins
A complete site walkthrough establishes the real scope of the job. Review every room, wall, ceiling, door, trim section, exterior elevation, and specialty surface that needs attention. Look closely for peeling coatings, cracks, stains, moisture damage, rust, corrosion, loose drywall, and surfaces that may need additional preparation.
- Identify high-traffic areas that need durable, washable finishes.
- Mark entrances, elevators, stairwells, loading areas, restrooms, exits, and fire equipment.
- Note the furniture, inventory, computers, machinery, and fixtures that require protection.
- Determine which spaces must stay open throughout the project.
- Flag access limits, security procedures, parking restrictions, and delivery schedules.
Step 2: Create a Clear Scope of Work
A written scope prevents uncertainty after crews arrive. It should state which surfaces will be painted, repair and preparation included, primers and coatings, colors, and sheen levels. It should also define work hours, access rules, cleanup responsibilities, labor estimates, and final inspection. Clear details reduce last-minute decisions, such as whether drywall will be patched, if doors and frames are included, whether furniture must be moved, and how unexpected repairs are approved. This protects the schedule and clarifies completion expectations.
Step 3: Choose Phased or Full-Site Work
Phased Painting
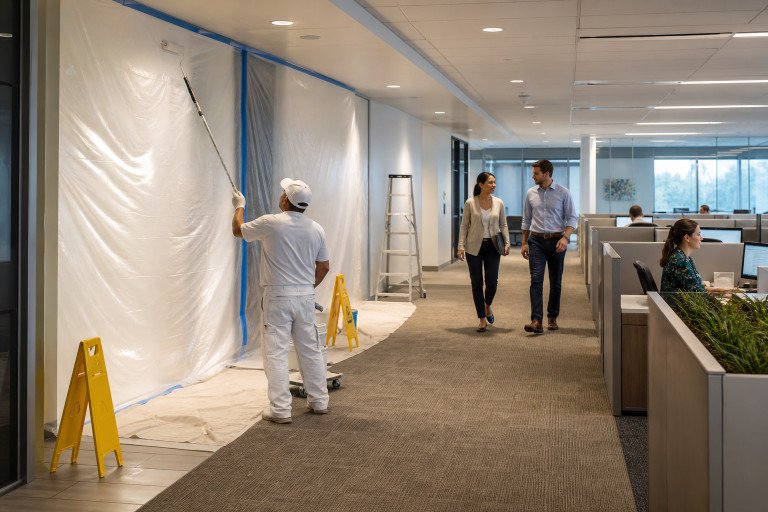
Phased painting divides the building into manageable zones, such as floors, departments, wings, offices, corridors, or exterior sections. Crews complete one area while the rest of the property remains available. This approach is often the best fit for occupied offices, retail locations, schools, medical spaces, apartment common areas, and buildings with multiple tenants.
Full-Site Painting
A full closure can shorten the overall project duration, but it may disrupt revenue and normal operations. It is usually more practical for vacant properties, tenant turnovers, holiday shutdowns, major renovations, or facilities with a planned closure period. The right choice depends on project size, public traffic, staffing, building access, and the cost of downtime.
Step 4: Match the Schedule to Business Activity
Build the work plan around how the property operates each day. Record peak customer hours, staff shifts, tenant needs, school calendars, deliveries, and times when noisy preparation work would cause the least disruption. Customer-facing rooms may need evening or weekend work, while a warehouse may allow crews to paint one aisle at a time between shipments.
- Schedule sanding, scraping, and repairs during lower-traffic periods.
- Keep reception areas, checkout zones, emergency routes, and loading access open whenever possible.
- Allow time for each coat to dry, the space to ventilate, and the area to be cleaned.
- Add a buffer for hidden repairs, weather delays on exterior work, or changes in access.
Step 5: Select Coatings Based on the Space
One product rarely fits every surface. Offices often benefit from low-odor coatings that are easy to touch up. Hallways and lobbies need scuff resistance and easy cleaning. Restaurants and service areas may require washable finishes that withstand moisture and grease. Warehouses and industrial spaces may require systems designed for abrasion, impact, chemical exposure, or corrosion.
Exterior coatings should account for sun exposure, rain, temperature shifts, and substrate movement. Steel, concrete, block, wood, drywall, and specialty surfaces may need different preparation methods and primers. Selecting the correct system early avoids premature failure and unnecessary maintenance.
Step 6: Plan for Indoor Air Quality and Ventilation
Paints, solvents, cleaning products, and surface preparation can affect indoor spaces occupied by people. The volatile organic compounds released by paints and related products make product selection and fresh-air planning important for occupied projects. Choose low-VOC or low-odor products when appropriate, follow label instructions, and keep materials out of active work areas.
Use barriers, fans, and exhaust arrangements to direct air away from employees, customers, and tenants. Do not reopen a space simply because the paint feels dry. The coating may need additional time to cure, and the area may need ventilation and cleaning before normal activity resumes.
Step 7: Protect People, Equipment, and Access Routes
Set up protected work zones with floor coverings, wall barriers, warning signs, and controlled entry points. Keep exits, fire extinguishers, electrical panels, and accessible routes clear at all times. Painting and paint removal can involve vapors, particles, and flammable materials, so effective controls for spray and painting hazards should be reviewed before specialized work begins.
- Cover furniture, inventory, technology, machinery, and sensitive equipment.
- Post wet-paint signs and route visitors around restricted areas.
- Review ladder, lift, scaffold, and spray-equipment requirements before work starts.
- Confirm that deliveries and emergency access remain available.
Step 8: Communicate Throughout the Project
Share the schedule with employees, tenants, vendors, and building users before work starts. Explain where crews will work, what areas will be temporarily unavailable, when noise may occur, and who should receive questions or urgent access requests. During the project, provide prompt updates when weather, repairs, or site conditions affect the timeline.
Before moving to the next zone, review the completed area with the appropriate manager. Confirm that it is clean, safe to reopen, and free of unfinished touch-ups. Consistent communication reduces complaints and prevents small issues from becoming operational disruptions.
Final Inspection and Ongoing Care
At completion, walk through every painted zone and inspect coverage, color consistency, edges, trim, repaired surfaces, and cleanup. Document touch-ups before the crew leaves. Keep paint names, color codes, sheen information, and records of leftover product for future maintenance. With careful preparation, appropriate coatings, phased scheduling, and consistent communication, a commercial painting project can enhance the property without disrupting daily operations.