



Replacing a window pane is the repair you make when the glass is broken but the wood window sash is still sound, shares KRS Charlottesville management. A baseball, a rock from the lawn mower, a branch in a storm. The glass shatters. The wood frame is fine. The repair removes the broken glass, scrapes out the old putty, and sets a new pane in fresh glazing compound. The process is called reglazing, and it is the same technique that has been used to repair wood windows for over a century. The tools are simple: a putty knife, a heat gun, glazing points, and a can of glazing compound. The skill is in tooling the putty to a smooth, angled bead that sheds water and looks like it was done by someone who has done it before.
This guide covers single-pane wood window reglazing. Insulated glass unit replacement in modern windows was covered in the previous guide on replacing glass. A single-pane wood window is a different project with different materials and a different technique. The glass is a single sheet. The seal is traditional linseed oil putty. The holding clips are metal glazing points pressed into the wood frame. The result is a window that looks original, operates the same as it always did, and will last another 30 years before the putty needs to be replaced again.
ENERGY STAR advises that improving the efficiency of windows is one of the most impactful home energy upgrades. A single-pane window with a storm window can approach the efficiency of a double-pane window at a fraction of the replacement cost. Replacing a broken pane and maintaining the storm window preserves the original window while improving its thermal performance.
Step 1: Remove the Broken Glass and Old Putty
Remove the window sash from the frame if possible. Most wood double-hung windows allow the sash to be removed by taking out the interior stops. If the sash cannot be removed, work on the window in place. Protect the area below the window with a drop cloth. Broken glass will fall.
Wear heavy leather gloves and eye protection. Remove the large pieces of broken glass by hand, working from the top down. Tap stubborn pieces gently with a hammer to break them into smaller, removable pieces. Remove the remaining small fragments with pliers. Do not use your fingers to pull glass splinters.
Remove the old glazing putty. Old putty is hard, brittle, and adheres strongly to the wood. Soften it with a heat gun on a low to medium setting. Hold the heat gun several inches from the putty and move it back and forth. The putty will soften and can be scraped out with a putty knife. Do not overheat the glass that remains in the frame. Thermal stress can crack it. If a heat gun is not available, chip the old putty out with a putty knife and a hammer. Work carefully. Gouging the wood frame creates channels that must be filled before the new putty is applied.
Remove the old glazing points. They are small metal triangles pressed into the wood rabbet. Pry them out with a putty knife or needle-nose pliers. They may be rusted and break off. Dig out any broken points. The new points need a clean surface to grip.
Step 2: Prepare the Frame and Order the Glass
Clean the rabbet, the recessed L-shaped shelf in the wood frame where the glass sits. Scrape out all debris, old putty fragments, and loose paint. Sand the rabbet lightly to smooth the surface. Vacuum the dust. The wood must be clean and smooth for the new putty to adhere properly.
Prime bare wood. If the rabbet has been scraped down to raw wood, apply a thin coat of oil-based primer or boiled linseed oil. The primer seals the wood so it does not absorb the oil from the glazing putty. Putty that loses its oil to dry wood becomes brittle, cracks, and falls out within a few years. The primer is the bond between the wood and the putty. Do not skip it.
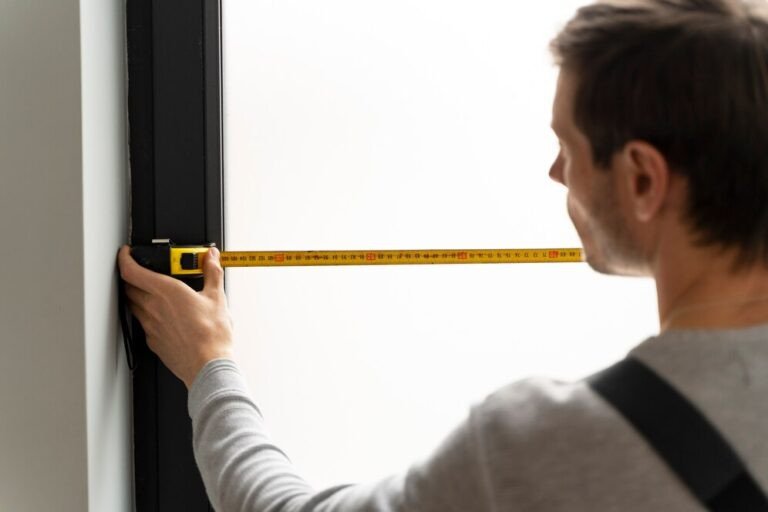
Measure the opening for the new glass. Measure the width and height of the rabbet at multiple points. Subtract an eighth of an inch from the smallest measurement in each direction. The glass must be slightly smaller than the opening. Glass that fits too tightly will crack when the wood frame expands. Glass that is too small leaves a gap that the putty must bridge, and a thick bead of putty is weaker than a thin bead.
Order the glass from a hardware store or glass shop. Specify the thickness. Single-strength glass is three-thirty-seconds of an inch thick and is used for small panes up to roughly 24 by 30 inches. Double-strength glass is one-eighth of an inch thick and is used for larger panes. If the old glass is available, measure its thickness with a caliper or take a fragment to the store for matching. The glass shop will cut the glass to your exact dimensions.
Step 3: Set the Glass and Apply the Glazing Putty
Apply a thin bed of glazing compound or latex caulk to the back of the rabbet. This bed putty provides a cushion for the glass and seals the exterior side. Press the new glass firmly into the bed. The glass should seat against the putty with even pressure all around.
Install glazing points. Press the points into the wood frame every six to eight inches around the perimeter of the glass. Use the flat edge of a putty knife to push each point into the wood. The point slides along the glass surface, then bites into the wood at a slight angle. Do not use a hammer directly on the glass. The vibration can crack it. The points hold the glass in place while the putty cures.
Knead the glazing compound in your hands until it is warm and pliable. Roll it into a rope roughly the diameter of a pencil. Press the rope into the gap between the glass and the frame all the way around. The rope should fill the gap completely with a small excess above the surface.
Tool the putty with a putty knife. Hold the knife at a 45-degree angle to the glass. Draw it along the glass and the frame in one continuous, smooth motion. The putty should form a flat, angled surface that extends from the glass to the edge of the wood rabbet. The angle sheds water. A putty bead that is rounded or convex holds water. The putty should be smooth, with no gaps, air bubbles, or tool marks. The intersection between the putty and the glass should be a clean line. Any putty that extends onto the visible glass area should be trimmed away with the putty knife.
Let the putty cure. It will skin over in three to seven days, depending on temperature and humidity. It will fully harden in two to four weeks. Do not paint the putty until it skins over. Paint applied to uncured putty will not adhere and will peel. Once the putty has skinned, paint it with exterior paint that matches the window frame. Extend the paint slightly onto the glass, roughly a sixteenth of an inch, to seal the putty-to-glass joint. The paint protects the putty from UV degradation and extends its life by years.
Frequently Asked Questions
What is the difference between DAP 33 and traditional linseed oil putty?
DAP 33 is the most common brand of glazing compound, a linseed oil-based putty that comes ready to use in a can. Traditional linseed oil putty is mixed from whiting, a calcium carbonate powder, and boiled linseed oil, and must be kneaded to the right consistency. DAP 33 is easier to use and adequate for most repairs. Traditional putty can be mixed to a stiffer consistency for deeper rabbets and is preferred by restoration contractors. Both cure by oxidation and take several weeks to harden fully.
Should I replace a single pane with double-pane glass?
No. A wood window sash designed for single-strength glass cannot accommodate the thickness and weight of a double-pane IGU. The rabbet is too shallow. The frame is not strong enough to support the additional weight. The better approach for energy efficiency is to reglaze the single pane and install or maintain a good storm window. The combination of a single-pane primary window and a tight storm window provides roughly the same thermal performance as a double-pane window.
Can I use latex glazing compound instead of oil-based putty?
Yes. Latex glazing compound is easier to work with, cleans up with water, and cures faster than oil-based putty. It can be painted sooner. It is less durable over the long term and may fail sooner in extreme climates. Oil-based putty remains the standard for restoration work because it lasts longer and develops a harder, more weather-resistant surface. For a quick repair on a window that will be replaced in a few years, latex is adequate. For a window you want to last another 30 years, use oil-based putty.
The Bottom Line
Replacing a window pane removes the broken glass and old putty, primes the bare wood, sets a new pane in a bed of putty, secures it with glazing points, and tools fresh putty to a smooth angled bead. The glass is cut to size at the hardware store. The putty cures for a few days before painting. The repair takes an hour per pane, most of which is scraping out the old putty. A reglazed wood window with a good storm window will keep out the weather for another generation before it needs to be done again.