

The garage wall in front of you is open studs. Bare 2×4 framing, exposed insulation if you were smart enough to install it before this moment, and the back side of the exterior siding visible through the stud cavities. Drywalling this wall is the step that turns the garage from a utilitarian shell into a room with finished surfaces. The work is physically demanding but technically straightforward. The sheets are heavy. The cuts must be accurate. The screw pattern must be consistent. The taping and mudding require patience and a willingness to sand. None of these things are difficult. They are just methodical.
According to wikiHow’s wall finishing guide, co-authored by home improvement specialist Ryaan Tuttle with over 17 years of experience, proper drywall installation requires a flat, stable framing surface and the correct screw spacing to prevent sagging and cracking. The same principles apply to a garage wall. This guide covers hanging and finishing drywall on a single garage wall, from the first sheet to the final sanding.
Tools and Materials for One Garage Wall
You do not need a truckload of specialized tools to drywall a wall. The essential list is short, and everything on it is reusable for the next wall, the next room, or the next house. Buy the tools once. They last for decades of occasional use.
- Drywall T-square: a 48-inch T-shaped ruler that spans the full width of a drywall sheet. This is the only tool that makes straight, square cuts reliably. A standard tape measure and a straightedge can work, but the T-square is faster and more accurate. It costs $15 and is worth every cent.
- Utility knife: with a pack of replacement blades. Drywall paper dulls blades quickly. A sharp blade scores cleanly. A dull blade tears the paper and leaves a ragged edge.
- Drywall saw or rotary cut-out tool: for cutting openings around electrical boxes, pipes, and other obstructions. A keyhole saw costs $8. A rotary tool costs $40 and is faster for multiple cutouts.
- Cordless drill or drywall screw gun: a standard drill works. A drywall screw gun has a depth-sensitive clutch that sets each screw to the correct depth automatically. For one wall, a drill is fine. For an entire garage, rent or borrow a screw gun.
- 4-foot and 2-foot levels: for checking that studs are plumb before hanging and for pressing sheets flat during installation.
- Drywall hammer or a standard hammer: for nailing corner bead.
- Mud pan and taping knives: a 6-inch knife for taping, a 10-inch knife for feathering, and a 12-inch knife for final coats. The wider the knife, the smoother the finish.
- Sandpaper or sanding sponge: 120-grit for between-coat sanding, 220-grit for final sanding.
- Dust mask, safety glasses, work gloves.
Step 1: Prep the Wall Before the First Sheet Goes Up
The drywall can only be as flat as the framing behind it. Run a 4-foot level across the studs horizontally and vertically. If any stud protrudes past its neighbors, shave it down with a planer or a belt sander. If any stud is recessed, shim it out with cardboard drywall shims or thin strips of wood. A stud that is 1/8 inch proud of the adjacent studs creates a visible bump in the finished wall. The bump cannot be mudded out. It must be fixed before the drywall goes up.
Check that electrical boxes are mounted at the correct depth. The front edge of the box should be flush with the finished drywall surface, which is 1/2 inch or 5/8 inch proud of the stud face, depending on drywall thickness. Boxes that are recessed too deep require box extenders. Boxes that protrude beyond the drywall surface prevent the outlet cover from sitting flush against the wall. Adjust them now. The time to fix a box depth problem is before the drywall covers the studs.
Install blocking between studs anywhere that a drywall edge will not land on a stud. The most common location is at the top of the wall where the drywall meets the ceiling, if the ceiling is not being drywalled and there is no horizontal framing at the top. A 2×4 block nailed between the studs provides a nailing surface for the top edge of the drywall. An unsupported edge sags over time and the joint compound cracks.
Step 2: Hang the Drywall Horizontally
Drywall is hung horizontally on walls, not vertically. Horizontal hanging puts the long seams at a comfortable working height, roughly 4 feet off the floor. It reduces the number of butt joints, which are the hardest seams to finish smoothly. It also staggers the vertical joints so that no seam runs uninterrupted from floor to ceiling, which improves fire resistance and structural rigidity.
Start with the top sheet. Lift it into position against the studs with the factory-tapered edge against the ceiling or top plate. The tapered edge along the top is for the joint with the ceiling drywall or the top plate. The tapered edge along the bottom will join the tapered edge of the lower sheet.
Drive screws every 8 inches along the edges of the sheet and every 12 inches in the field, which is the interior area of the sheet away from the edges. The screws should be driven just below the surface of the paper without breaking through it. The screw head creates a slight dimple that the joint compound fills. A screw driven too deep tears the paper and loses its holding power. A screw that stands proud of the surface will catch the taping knife and prevent a smooth finish. Run your hand over each screw after driving it. If you can feel the screw head above the paper, drive it slightly deeper. If the paper is torn around the screw, add another screw an inch away and leave the damaged one in place.
Hang the lower sheet below the top sheet, butting the tapered edges together. The gap between sheets should be roughly 1/8 inch, which is the thickness of the tapered edge. Do not force the sheets tightly together. A tight joint has no room for joint compound and creates a raised seam. The gap provides space for the compound to fill.
Step 3: Cut Openings Around Obstacles
Measure the location of each electrical box, pipe, or other obstruction from the nearest edge of the last hung sheet. Transfer the measurements to the sheet that will cover the obstruction. Mark the outline of the opening on the face of the drywall. Cut the opening with a drywall saw or a rotary cut-out tool.
The opening should be slightly larger than the obstruction it surrounds. A 1/8-inch gap around an electrical box is normal and is covered by the outlet cover plate. A tight opening that requires forcing the drywall over the box will crack the drywall around the box. An opening that is too large leaves a gap that the cover plate cannot hide. The outlet cover plate has roughly 1/2 inch of overlap around the box opening. The drywall cutout must be within that overlap.
For pipes that penetrate the wall, such as a gas line for a garage heater or a water line for a sink, cut the opening slightly larger than the pipe diameter. The gap around the pipe is filled with fire-rated caulk or covered with an escutcheon plate. Do not notch the drywall around a pipe and expect the escutcheon to cover a ragged cut. Cut a clean hole. The escutcheon covers a 1/4-inch gap around the pipe.
Step 4: Tape and Mud the Seams
Taping and mudding is a three-coat process. Each coat must dry completely before the next is applied. The drying time is the schedule constraint. The active working time per coat is 15 to 30 minutes for a single garage wall. The drying time between coats is 12 to 24 hours, depending on temperature and humidity.
Coat 1 — Tape coat. Fill the seam between the sheets with joint compound using a 6-inch taping knife. Press paper tape into the wet compound along the entire length of the seam. Pull the knife over the tape at a 45-degree angle to squeeze excess compound from behind the tape and embed it in the seam. The tape should be flat and smooth with no bubbles or wrinkles. A bubble under the tape creates a raised seam that cannot be sanded flat. If a bubble appears, lift the tape, apply more compound, and re-embed.
Coat 2 — Fill coat. After the tape coat is completely dry, usually the next day, apply a second coat of compound over the tape with a 10-inch knife. This coat fills the tapered edge of the drywall and brings the seam roughly level with the surface of the sheet. Feather the edges of the compound outward so the seam blends into the surrounding drywall. The goal is to make the seam wider and flatter so it is less visible. A narrow seam that sits proud of the surface is more visible than a wide seam that tapers gradually.
Coat 3 — Finish coat. After the fill coat is dry, apply the final coat with a 12-inch knife. This coat feathers the seam out to roughly 12 to 18 inches wide. The seam should be smooth and level with the surrounding drywall. Lightly sand with 220-grit sandpaper or a sanding sponge between coats to remove ridges and high spots. Do not sand through the tape. The tape must remain fully covered by compound.
Cover all screw heads with three coats of compound, applied with each seam coat. The first coat fills the dimple. The second fills the shrinkage of the first coat. The third brings the dimple flush with the surface.
Step 5: Install and Finish Corner Bead
Outside corners, such as the edge where the garage wall ends at the garage door opening, need corner bead to protect the drywall edge from impact and to create a straight, crisp corner. Corner bead is a metal or vinyl strip that is nailed or screwed over the corner. Metal corner bead is more durable. Vinyl corner bead resists rust in damp conditions, which makes it the better choice for an unconditioned garage.
Cut the corner bead to length with tin snips. Position it so it is centered on the corner. Nail or screw it every 8 inches along both flanges. The corner bead must be straight and tight against the drywall. A corner bead that is wavy or loose creates a wavy corner that cannot be fixed with compound.
Apply three coats of compound over the corner bead, feathering each coat outward from the corner. The corner should be crisp and straight. The compound on each side should blend smoothly into the drywall surface. The corner bead is the most vulnerable part of the drywall. It takes impacts from ladders, tools, and anything carried through the garage door opening. The compound must fully cover the metal or vinyl to protect it.
Common Mistakes on Garage Walls
- Hanging drywall vertically instead of horizontally. Vertical hanging creates long butt joints from floor to ceiling that are difficult to finish and structurally weaker. Hang horizontally.
- Not checking studs for flatness before hanging. A 1/8-inch proud stud creates a visible bump. Fix the framing before the drywall goes up.
- Using standard drywall where moisture-resistant is needed. The bottom 4 feet of a garage wall should be moisture-resistant drywall. Snow melt, rain splash, and floor-level humidity concentrate at the bottom of the wall. Standard drywall in this zone peels and molds within a few years.
- Skipping the primer before painting. Joint compound and drywall paper absorb paint differently. Unprimed drywall shows every seam and screw head as a different sheen. A coat of PVA primer seals the surface and makes the paint finish uniform.
Frequently Asked Questions
Do I need to drywall both sides of a garage wall?
For an exterior garage wall, drywalling the interior side is sufficient. The exterior sheathing and siding are on the other side. For an interior wall that separates the garage from the house, code requires 5/8-inch Type X fire-rated drywall on the garage side. The house side of that same wall is typically already drywalled as part of the house interior. The garage side needs the fire-rated drywall. You do not need to drywall both sides of the same stud cavity unless code requires a specific fire separation.
Should I leave a gap at the top and bottom of the wall?
Leave a 1/2-inch gap at the floor. The gap prevents the drywall from wicking moisture from the concrete slab. The gap is covered by baseboard later. At the ceiling, if the ceiling is not being drywalled, but the drywall against the top plate or blocking. If the ceiling will be drywalled later, leave a 1/2-inch gap as well. The ceiling drywall covers the gap. If neither gap will be covered by trim or ceiling drywall, fill the gap with joint compound and tape.
The Wall That Was Once Studs
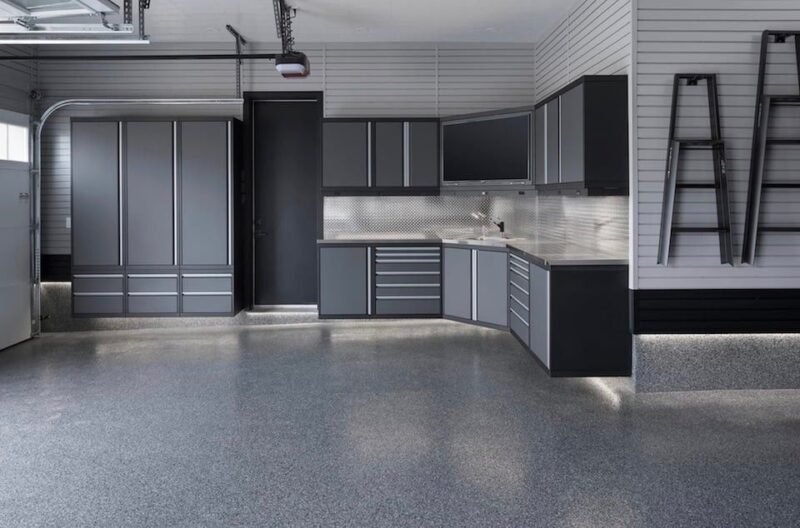
A single drywalled garage wall transforms the feel of the entire space. The exposed framing that defined the garage as unfinished disappears behind a smooth, white surface. The wall reflects light instead of absorbing it. The insulation behind the drywall quiets the garage and keeps it warmer. The wall is now a surface that can be painted, hung with shelves, or left clean and white. The work took a weekend: one day to hang, then three short sessions over the following days to tape, fill, and finish. The wall was always there. Now it looks like it.