

Drywalling a garage ceiling is the most physically demanding part of finishing a garage. A 4-foot by 8-foot sheet of 1/2-inch drywall weighs 55 pounds. A sheet of 5/8-inch Type X fire-rated drywall, which is required on the ceiling of an attached garage that has living space above it, weighs 75 pounds. Holding either one overhead while driving screws is not possible for one person for more than about 30 seconds. A drywall lift is not a convenience. It is the tool that makes the job possible for a homeowner working alone or with one helper.
The ceiling is the first surface to drywall in any room, and the garage is no exception. The wall sheets support the edges of the ceiling sheets, so the ceiling goes up first. The job takes a full day for two people to hang the drywall on a standard two-car garage ceiling of approximately 400 square feet. Taping and mudding takes two to three additional days with drying time between coats. Here is how to hang garage ceiling drywall so it stays flat, does not sag, and meets the fire-rating requirements for an attached garage.
Fire Rating: The Code Requirement for Attached Garage Ceilings
The International Residential Code requires 1/2-inch drywall on the ceiling of an attached garage. If there is living space above the garage, the code requires 5/8-inch Type X fire-rated drywall on the ceiling. The thicker drywall provides a one-hour fire rating, which means it will resist the spread of fire from the garage into the living space above for at least one hour. This is not a suggestion. The building inspector will check the drywall thickness on the garage ceiling if the garage is attached to the house and there is habitable space above it.
For a detached garage with no living space above, 1/2-inch standard drywall is sufficient. For an attached garage with an unconditioned attic above that is not living space, 1/2-inch drywall is also sufficient, though many contractors install 5/8-inch on all attached garage ceilings as a best practice regardless of what is above. The cost difference between 1/2-inch and 5/8-inch drywall for a 400-square-foot ceiling is $50 to $80 in materials. The weight difference is the real cost in labor.
Joist Spacing and Sag Prevention
Garage ceiling joists are spaced either 16 inches or 24 inches on center. If the joists are 24 inches on center, which is common in garages built with trusses, 1/2-inch drywall will sag over time. The weight of the drywall, combined with the weight of insulation laid on top of it in the attic, causes the drywall to bow downward between the joists. The sag is visible as a gentle wave in the ceiling, and it cannot be fixed without replacing the drywall or adding furring strips underneath to support it.
If the garage ceiling joists are spaced 24 inches on center, use 5/8-inch drywall, which is stiffer and resists sagging over wider spans. Alternatively, install 1-by-3 furring strips perpendicular to the joists at 16 inches on center, and attach 1/2-inch drywall to the furring strips. The furring strips provide the 16-inch support spacing that 1/2-inch drywall requires. The furring strips add $30 to $50 in materials and an hour of labor, but they prevent a sagging ceiling that will be visible every time you look up.
Tools and Preparation
Rent a drywall lift. A standard drywall lift raises a sheet to the ceiling and holds it in position while you drive screws. The lift rental costs $40 to $60 per day. Reserve it for the weekend. Do not try to hang ceiling drywall without a lift. The alternative is building a T-brace from 2-by-4 lumber, which props one end of the sheet while two people hold the other end. A T-brace works for a small room. It does not work well for a 400-square-foot garage ceiling with 12 to 14 sheets to hang.
You will also need a drywall screw gun or a drill with a drywall dimpler bit, which sets each screw to the correct depth without breaking the paper face. A utility knife with a fresh blade for scoring and cutting. A drywall T-square for marking straight cut lines. A drywall saw or a rotary tool for cutting openings around electrical boxes and the attic access hatch. And dust masks, eye protection, and a hard hat or a bump cap. Ceiling work puts your head directly under the sheet you are installing. Drywall screws that miss the joist fall straight down. Dust from cutting and sanding falls straight down into your face.
Before hanging drywall, mark the location of every joist on the top plate of the walls with a pencil. The marks tell you where to drive screws when the joists are hidden behind the drywall. Mark the joist centers, not the edges. A screw driven into the edge of a joist has less holding power than a screw in the center. Run the marks onto the face of the drywall as each sheet is lifted into position so you can see the screw line from below.
Hanging the Ceiling Sheets
Hang the ceiling sheets perpendicular to the joists. The long edge of the sheet runs across the joists, not parallel to them. Perpendicular orientation reduces sagging and aligns the tapered edges for taping. If the joists run east-west, the sheets run north-south. Stagger the end joints by at least one joist bay. Four corners should never meet at a single point, which creates a weak joint that cracks.
Start in a corner and work across the room. Load a sheet onto the lift, roll it into position, and crank it up to the ceiling. Align the edges with the joists. The ends of the sheet must land on the center of a joist. A sheet that falls short of a joist has an unsupported end that will crack at the joint. A sheet that overhangs a joist has an edge that cannot be screwed down. Drive screws every 8 inches along the edges and every 12 inches in the field. Ceiling screws are spaced slightly closer than wall screws to compensate for the additional load of the drywall hanging from the ceiling rather than leaning against the wall.
Cutouts for electrical boxes on the ceiling, such as a junction box for a garage door opener or a ceiling light fixture, are measured and cut before the sheet is lifted. Measure the location of the box from two perpendicular walls. Transfer the measurements to the sheet. Cut the opening with a drywall saw or a spiral cutout tool. The opening should be slightly larger than the box, with no more than 1/8 inch of gap around the box. The gap is covered by the fixture canopy or the cover plate.
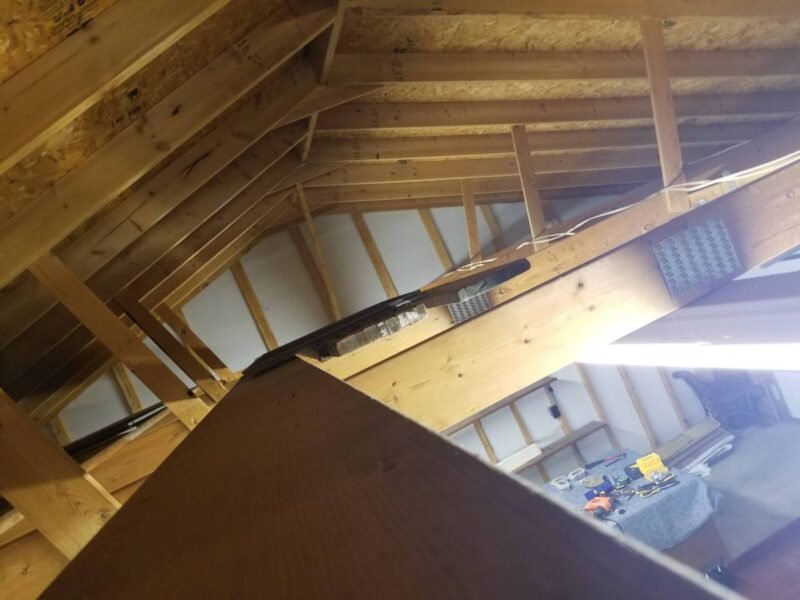
If the garage has an attic access hatch, frame the opening before hanging the drywall. The access hatch is typically 22 inches by 30 inches, framed with 2-by-4 lumber between the joists. The drywall is cut to fit around the hatch opening. The attic access cover is a piece of drywall cut to fit the opening, edged with wood trim or metal J-bead, and set into the framed opening. The cover is not screwed in place. It lifts out for attic access.
The drywall joint compound used for taping and finishing also emits volatile organic compounds during application and drying. The EPA recommends increasing ventilation when using products that emit VOCs and allowing the space to air out before extended occupancy. For a garage, opening the overhead door during and after mudding provides more than adequate ventilation.
Taping and Mudding a Ceiling
Ceiling taping is harder than wall taping for the same reason ceiling drywall hanging is harder: you are working overhead. Joint compound drips. It falls on you, on the floor, and on anything you have not covered with a drop cloth. Wear a hat you do not care about.
Apply a thin bed of joint compound over each joint with a 5-inch taping knife. Embed paper drywall tape into the wet compound, centering it over the joint. Press the tape flat with the knife, squeezing excess compound from behind. The tape must be smooth with no bubbles or wrinkles. Wrinkled tape cannot be hidden by subsequent coats. Let the first coat dry for 24 hours.
Apply a second coat with an 8-inch or 10-inch knife, feathering the edges outward. The ceiling has more butt joints than walls because the sheets are typically 8 feet long and the garage is deeper than 8 feet, meaning every row has at least one butt joint where the square ends of two sheets meet. Butt joints are the hardest to finish because there is no tapered edge to recess the tape and compound. The butt joint compound must be feathered outward 12 to 18 inches on each side to create the illusion of a flat surface. This is the skill test of ceiling drywall finishing.
Sand between coats with 120-grit sandpaper or a sanding sponge on a pole. A pole sander allows you to sand the ceiling from the floor, which is faster and keeps the dust out of your face. Wear a dust mask regardless. Drywall dust is fine and pervasive. It will settle on every surface in the garage and on everything stored in it. Cover or remove items you care about before sanding.
A level 3 finish, which is tape plus two coats of compound, is standard for a garage ceiling. The ceiling is not at eye level, and the imperfections that are visible on a wall at standing height are far less noticeable on a ceiling. A level 4 finish with a third coat on all joints and fasteners is appropriate if the garage ceiling will be painted and the lighting will highlight surface irregularities. Flat white ceiling paint is the most forgiving. It hides the small imperfections that gloss or semi-gloss paint would highlight.
Frequently Asked Questions
Should I insulate before or after drywalling the ceiling?
Insulate before drywalling. The insulation goes into the joist cavities between the garage ceiling and the attic above. If the ceiling is drywalled first, the insulation must be installed from above, which means crawling through the attic and laying batts between the joists. This is physically possible but far more difficult than installing the insulation from below before the drywall goes up. If the garage has attic trusses with a floor above, the insulation is in the attic floor and the garage ceiling does not need insulation because it is not a thermal boundary.
How much should I stagger the end joints on a ceiling?
At least one full joist bay, which is 16 or 24 inches depending on the joist spacing. The end joints of adjacent rows should not align. Two end joints that fall on the same joist create a continuous crack line across the ceiling. Staggering the joints by one or two joist bays distributes the movement and prevents a single crack from spreading across the entire ceiling. The stagger also eliminates the four-corner intersection where four sheets meet at one point, which is the weakest possible drywall joint configuration.
Can one person drywall a garage ceiling?
Yes, with a drywall lift. Without a lift, no. The lift holds the sheet in position against the joists while you drive the screws. A single person loads the sheet onto the lift, cranks it into position, aligns the edges, and drives the screws. The process is slower than with a helper, but it is physically achievable. The lift is the helper. The rental cost of $40 to $60 for a day is the best money spent on the entire project. The alternative is recruiting a friend, buying pizza, and hoping they are available next weekend to help with the second coat of mud.