


The bill shows up and you stare at the number for an extra few seconds, running the math again. Last month was manageable. This month is not. The weather did not change that much. Nobody left a window open for three weeks. Something is wrong with the heating or cooling system, and you need to figure out what before the next billing cycle makes the same damage, notes property management San Antonio TX.
Nearly half of the energy used in the average American home goes to heating and cooling, per ENERGY STAR (2025). When that half suddenly costs twice as much, the cause is almost never one catastrophic failure. It is two or three smaller problems layering on top of each other, each one making the others worse. A dirty filter forces the system to run longer. Longer runtime pulls more debris onto the coils. Dirty coils reduce heat transfer, so the system runs even longer. The bill climbs, and nobody notices until it hits a number that feels like a mistake.
Here are the most common causes of high HVAC bills and what to check first, in diagnostic order. Start with number one and work down. Most people find the problem before they get to number four. Each step includes what to check, what it costs to fix, and whether you can do it yourself or need to pick up the phone.
1: Check the Air Filter — The Two-Minute Fix That Costs $8
A clogged air filter is the single most common reason an HVAC bill spikes, and it is also the easiest to fix. ENERGY STAR recommends checking the filter every month during heavy-use seasons and replacing it at least every three months. A dirty filter restricts airflow across the evaporator coil, forcing the blower motor to work against higher static pressure and the system to run longer cycles to satisfy the thermostat. The energy penalty adds up fast. A severely clogged filter can increase HVAC energy consumption by up to 15%, according to the Department of Energy (2024). On a $300 summer cooling bill, that is $45 attributable to the filter alone.
Sound familiar? The filter that was “changed recently” has a way of being eight months old when you actually read the date written on the frame. I pulled mine once in August and the Sharpie said January. The filter looked like a grey carpet sample. The system had been running 45-minute cycles instead of the usual 20, and I had somehow not connected longer runtime to a higher bill. Filters degrade gradually, the system compensates, and you do not notice until the number forces you to look.
Pet owners should check the filter monthly regardless of what the packaging says. Pet dander loads a filter roughly twice as fast as a pet-free home. Homes with multiple shedding animals may need a filter change every four weeks during peak cooling season. The MERV rating matters too. A MERV 8 filter catches most household dust and pollen without excessive airflow restriction. Jumping to MERV 13 for allergy reasons can increase static pressure enough that an older system struggles to pull air through. Check the manufacturer’s manual for the maximum MERV rating your system was designed to handle.
The filter costs eight dollars. The extra hundred on your bill cost more than that. A filter left too long does not just waste energy. Restricted airflow causes the evaporator coil to run colder than designed, which can lead to ice formation and, eventually, liquid refrigerant returning to the compressor. Compressors are not built to compress liquid. An $8 filter, ignored for a year, can destroy a $2,000 compressor.
2: Thermostat Settings Most People Get Wrong
Thermostat problems fall into three categories: the settings are wrong, the placement is wrong, or the thermostat itself is failing. All three produce the same symptom: the HVAC system runs when it does not need to, or refuses to run when it should.
The setting mistake that costs the most money is the fan switch. If the fan is set to “On” instead of “Auto,” the blower runs continuously regardless of whether the system is actively heating or cooling. A typical central air handler blower draws 400 to 600 watts. Running 24 hours a day, that is 288 to 432 kilowatt-hours per month. At the U.S. Energy Information Administration (2025) national average residential rate of roughly 16 cents per kWh, the math lands at an extra $46 to $69 on the monthly bill. Pure fan switch. Walk over to the thermostat and verify it says “Auto.” The difference between the two switch positions is roughly fifty dollars a month that buys you nothing but a higher bill and a blower motor that wears out years early.
Placement is the second issue and harder to spot. A thermostat mounted on a wall that catches direct afternoon sun reads five to eight degrees higher than the actual room temperature. The AC runs and runs while the rest of the house freezes. The same problem happens when the thermostat sits above a lamp, a television, or a supply vent blowing directly on it. The thermostat belongs on an interior wall, away from windows, vents, and heat-generating appliances. Moving one costs a few hundred dollars. Leaving a badly placed one where it is costs that much in wasted energy over a single summer.
An aging thermostat with a failing temperature sensor drifts. A mechanical thermostat with a mercury bulb, the round dial type, can drift three to five degrees as the bimetal strip ages. If your thermostat has been on the wall since the 1990s, replacing it with even a basic digital model pays for itself in under a year. An ENERGY STAR certified smart thermostat saves roughly $100 annually by learning occupancy patterns and automatically setting back temperatures, per ENERGY STAR (2025), though the payback assumes the house is empty for significant portions of the day.
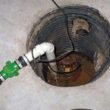
3: Duct Leaks — The Invisible Bill Inflator
Ducts running through unconditioned spaces (attics, crawlspaces, unfinished basements) leak conditioned air into places nobody lives. The EPA estimates that 20% to 30% of heated and cooled air is lost through duct leaks in the average home. Sealing and insulating ducts in those spaces can improve HVAC system efficiency by as much as 20%, according to ENERGY STAR (2025). If your summer cooling bill is $300 a month, you are spending $60 of it to cool the attic. The math is not complicated. You just do not see it happening.
Attic ducts are the worst offenders because the temperature differential is highest. Supply ducts carrying 55-degree air through a 130-degree attic lose cooling capacity through every gap and uninsulated seam. Return ducts in the same attic pull 130-degree air into the system, raising the temperature of the air hitting the evaporator coil and making the AC work harder. The Department of Energy (2024) identifies duct leakage as one of the most common and most overlooked causes of high energy bills in forced-air systems.
Check for accessible leaks yourself with an hour and a roll of foil tape. Not duct tape. Duct tape is the grey fabric stuff that dries out and falls off after two summers. Use foil-backed HVAC tape or brush-on duct mastic. Go into the attic early in the morning before the sun turns it into an oven. Run your hand along every seam, joint, and connection you can reach. Cold air escaping means you found a leak. Seal it, then wrap the duct in insulation. The insulation sleeve matters almost as much as the seal. An uninsulated duct in a 130-degree attic gains roughly 30% of the cooling load back through conduction alone before the air ever reaches a register. You are paying to cool the attic. Seal the ducts and stop.
Ducts buried inside walls and finished ceilings need a professional duct leakage test. The test uses a blower door and pressure gauge to measure total system leakage and typically costs $200 to $500. If the accessible ducts are sealed and the bills are still high, this is the next diagnostic step.
4: Dirty Coils and Blocked Airflow — The Slow Creep
The evaporator coil inside the air handler and the condenser coil outside both depend on clean surfaces to transfer heat. Dirt on either coil acts as an insulating blanket on a heat exchanger, which is exactly what you do not want. The Department of Energy (2024) notes that even with a clean filter, the evaporator coil accumulates dirt over time and should be inspected and cleaned by a qualified contractor during annual maintenance.
The outdoor condenser coil is easier to check yourself. Walk outside and look at the unit. If the fins are packed with cottonwood fluff, grass clippings, dryer lint, or a layer of grey fuzz, the coil cannot reject heat effectively. The compressor runs hotter and longer trying to compensate. Trim vegetation back to at least two feet on all sides. The condenser does not care about your landscaping. It cares about airflow. Shrubs planted too close for appearance have been raising HVAC bills in suburban neighborhoods for decades.
The real problem with dirty coils is the timeline. A coil does not get dirty overnight. It accumulates over months, and the efficiency loss is gradual enough that you never notice the performance drop. You only notice the bill. By the time the condenser coil is visibly caked, the system has been running at reduced efficiency for most of the season. The first warm day of spring, before you need the AC, is the right time to clean the outdoor coil. Use a garden hose on low pressure, spraying straight through the fins from the inside out if you can safely remove the top and fan assembly. Do not use a pressure washer. A pressure washer bends the aluminum fins flat and creates a problem that costs more than the one you were trying to solve. A professional coil cleaning during annual maintenance runs $100 to $200 and typically pays for itself in the first month of cooling season.
5: Low Refrigerant — When the AC Works Harder for Less Cooling
An air conditioner does not consume refrigerant the way a car consumes oil. The refrigerant circulates in a closed loop. If the level is low, there is a leak. Adding refrigerant without fixing the leak is like airing up a tire with a nail in it. It works for a while, and then you are right back where you started, minus the cost of the refrigerant you paid for twice.
A system low on refrigerant loses cooling capacity. The compressor runs longer cycles trying to reach the set point. The evaporator coil may ice over as the refrigerant pressure drops too low, and ice on the coil further insulates it from the air that needs cooling. The Department of Energy (2024) identifies improper refrigerant charge, whether from undercharging at installation or a slow leak, as a primary cause of progressively declining AC efficiency over weeks or months.
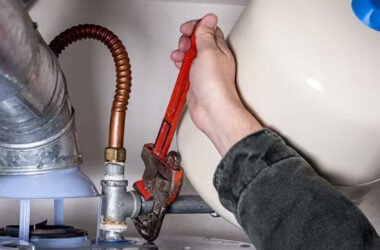
The symptoms: air from the registers feels cool but not cold, the outdoor unit runs continuously on hot days, the indoor coil has visible ice, and there is a hissing or bubbling sound from the indoor unit. That sound is refrigerant escaping as gas from the leak point. Turn the system off and call a technician. Running a system with a known refrigerant leak releases refrigerant into the atmosphere, which is illegal under EPA Section 608 regulations. The technician must capture remaining refrigerant, repair the leak, pressure-test the repair, and recharge to specification. The repair runs $300 to $1,500 depending on leak location and severity. When the leak is in the evaporator coil and the system is more than ten years old, full replacement often makes more economic sense than repair.
6: The Emergency Heat Trap (Heat Pumps Only)
If your home uses a heat pump, there is a specific failure mode that can triple your bill in a single month and goes completely unnoticed unless you know to check for it. Emergency heat, also called auxiliary heat or heat strips, is a set of electric resistance coils inside the air handler that activate when the heat pump cannot extract enough heat from the outdoor air, typically when outdoor temperatures drop below about 35°F. The heat strips are wildly inefficient compared to the heat pump’s normal operation. A heat pump moving heat delivers roughly three units of heat per unit of electricity consumed. Electric resistance strips deliver exactly one. When the strips run, the meter spins three times faster for the same amount of heat.
The emergency heat system should activate only during defrost cycles, during the brief period when the thermostat set point is raised by more than two degrees, or when the outdoor temperature genuinely drops below the heat pump’s effective operating range. The problem happens when a failed thermostat relay, a stuck contactor, or a misconfigured system runs the heat strips continuously alongside the heat pump. The system still heats the house. You do not feel a difference. But the electric bill doubles or triples because the strips are pulling 10 to 20 kilowatts every time the system runs.
Check the thermostat display. Most digital thermostats show an indicator when auxiliary heat or emergency heat is active. It might say “AUX,” “EM Heat,” or show a flame icon. If that indicator is on during mild weather or stays on for hours at a time, the heat strips are running when they should not be. Turn the system off and call a technician. The fix might be a thermostat setting, a failed relay, or a miswired control board. All three are cheaper than another month of heat-strip-level electric bills.
| Symptom | Likely Cause | DIY? | Approximate Fix Cost |
| Bill suddenly 50%+ higher | Dirty filter + duct leak combination | Filter: yes / Duct: sometimes | $8–$500 |
| System runs constantly, house not comfortable | Low refrigerant or dirty coils | Coils: yes / Refrigerant: no | $0–$1,500 |
| Fan runs 24/7, bill creeps up | Thermostat fan set to “On” | Yes — flip switch to “Auto” | $0 |
| Some rooms hot, some cold | Duct leaks or closed vents | Check vents first | $0–$500 |
| Heat pump: bill doubled, AUX light on | Emergency heat stuck on | Check thermostat, then call pro | $0–$400 |
| Ice on indoor coil or outdoor unit | Low refrigerant or blocked airflow | No, call pro | $300–$1,500 |
| System >10 years old, bills climbing yearly | Declining efficiency, aging components | No, evaluate replacement | $150–$250 (new pump) to $5K+ (full system) |
Frequently Asked Questions
Why is my electric bill so high in the summer even when I have not changed anything?
Start with the air filter. A dirty filter is the most common cause and the easiest to fix. After that, check the thermostat fan switch: “On” instead of “Auto” costs roughly $50 to $70 per month in blower electricity alone. If both are fine, the next suspects are duct leaks in the attic or crawlspace (wasting 20% to 30% of conditioned air per EPA estimates), a slow refrigerant leak reducing cooling capacity week by week, or an outdoor condenser coil packed with debris. Work through the list in that order. Each problem you fix reduces the load on the ones that remain.
How much does a dirty air filter actually increase my electric bill?
A severely clogged filter can increase HVAC energy consumption by up to 15%, according to the Department of Energy. On a $300 summer cooling bill, that is roughly $45 attributable to the filter alone. The bigger risk is long-term. Restricted airflow causes the evaporator coil to run too cold, leading to ice formation and potential liquid refrigerant returning to the compressor. Compressors are not designed to compress liquid. An $8 filter left too long can eventually destroy a $2,000 compressor.
Should I close supply vents in unused rooms to save money?
No, and in most homes it makes the problem worse. Residential HVAC systems are designed for a specific total static pressure across the ductwork. Closing vents increases pressure in the remaining open ducts, forcing more air through existing leaks and pushing the blower motor outside its designed efficiency curve. The Department of Energy specifically identifies closed-off rooms as a cause of disrupted airflow that reduces system efficiency. If you want to zone your house, the right approach is a professionally installed zoning system with motorized dampers, not closing registers by hand.
My electric bill spiked right after a new AC was installed. Is that normal?
It is not normal, and it points to an installation problem. ENERGY STAR (2025) notes that improper installation can reduce system efficiency by up to 30%. The most common installation errors that cause high bills are: incorrect refrigerant charge (too much or too little), duct connections that were not properly sealed during the swap, a thermostat that was not correctly configured for the new system, or the new unit being a different size than the old one and not matched to the existing ductwork. Call the installer back. A reputable contractor will send a technician to diagnose installation-related issues under warranty.
What temperature should I set the thermostat to keep my bill down?
ENERGY STAR recommends 78°F when home and awake during cooling season, and 85°F or higher when the house is empty. For heating season, 68°F when awake and home, lower while asleep or away. Each degree you raise the set point in summer reduces cooling energy use by roughly 3% to 5%. The savings add up fastest with a programmable or smart thermostat that automatically adjusts based on time of day and occupancy. A temperature setback of at least seven degrees during an eight-hour vacancy produces the most noticeable reduction.
How do I know if my HVAC system needs to be replaced rather than repaired?
ENERGY STAR suggests evaluating replacement when the system is more than ten years old and no longer keeping the house comfortable. The financial threshold used by most contractors: multiply the repair cost by the age of the system in years. If the result exceeds the cost of a new system, replace. A $1,200 repair on a 12-year-old unit equals $14,400, which is in the range of a new mid-efficiency central air system. Other signals: the system uses R-22 refrigerant (phased out of new production in 2020, now extremely expensive per pound), the compressor has failed, a furnace heat exchanger is cracked, or bills have been climbing year over year despite regular maintenance. Replacing old equipment with an ENERGY STAR certified unit cuts the annual energy bill by roughly $140 on average, per ENERGY STAR (2025), with larger savings in extreme climates.
The Bottom Line
Most high HVAC bills are not the result of one dramatic failure. They happen when a dirty filter raises runtime by 10%, a small duct leak adds another 15%, and a condenser coil packed with debris drops efficiency by another 5%. Individually, none of these feels urgent. Together, they turn a $200 bill into a $350 bill, month after month. The order matters. Start with the filter because it takes two minutes and costs eight dollars. Check the thermostat fan switch while you are standing there. Walk outside and look at the condenser. Run your hand along accessible ductwork before the attic turns into an oven. If your thermostat shows an AUX or EM Heat light during mild weather, turn the system off and call someone.
The people whose HVAC bills stay reasonable year after year are not the ones with the newest equipment. They are the ones who change the filter on the first of the month whether it looks dirty or not and who schedule the spring maintenance visit in February when the contractor’s calendar is wide open. Consistency beats everything.