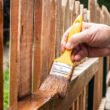


A fence post installed correctly stands for 20 years. A fence post installed incorrectly leans within the first winter. The difference is a hole that is deep enough, concrete that is mixed correctly, and a post that is braced plumb while the concrete cures. The fence type does not matter. Wood, vinyl, and metal posts all follow the same principles: dig below the frost line, set the post in concrete or compacted gravel, and do not attach the fence panels or the fabric until the concrete has cured.
The terminal posts, the ones at the ends, corners, and gates, do the structural work. The line posts between them just hold the fence up. The terminal posts must be set deeper, with more concrete, and braced more carefully. A gate post that leans closes the gate for you the first year and prevents the gate from closing at all the second year. Here is how deep to dig, how to mix concrete, and how to brace a post so it stays where you put it.
How Deep to Set a Fence Post
A fence post must be set below the frost line so it does not heave out of the ground during freeze-thaw cycles. The frost line is the depth to which the ground freezes in winter. Water in the soil expands when it freezes, lifting everything above it. A post that ends above the frost line is lifted by the expanding ice and does not settle back to its original depth when the ice melts. After a few winters, the post is visibly higher than its neighbors or leaning outward.
The frost line varies by region. In Florida and the Gulf Coast, the frost line is effectively zero: 12 inches of depth is sufficient for a stable post. In the Mid-Atlantic and Midwest, the frost line is 30 to 36 inches. In New England and the upper Midwest, it is 42 to 60 inches. The hole must extend at least 6 inches below the frost line. The post should be set on a 6-inch bed of gravel at the bottom of the hole for drainage, with the concrete filling the rest of the hole around the post. The total hole depth is the frost line depth plus 6 inches of gravel. The post itself does not need to reach the full hole depth. It sits on the gravel bed, and the concrete extends below the bottom of the post.
| Post Type | Hole Diameter | Hole Depth (Moderate Climate) |
| Line post (wood, 4×4) | 8–10 inches | 24–30 inches |
| Terminal/corner post (wood, 4×4 or 6×6) | 10–12 inches | 30–36 inches |
| Gate post (wood, 6×6) | 12–14 inches | 36–42 inches |
| Metal terminal post (chain link, 2½”) | 8–10 inches | 30–36 inches |
| Metal gate post (chain link, 3″) | 10–12 inches | 36–42 inches |
The hole diameter should be approximately three times the width of the post. A 4-by-4 post is 3-1/2 inches wide. The hole should be 10 to 12 inches in diameter. A hole that is too narrow does not provide enough concrete around the post to resist lateral forces from wind on the fence panels. A hole that is too wide uses more concrete than necessary but is not structurally harmful. The depth matters more than the width. A shallow hole in a wide column of concrete is still a shallow hole.
Call 811 Before You Dig
The national Call Before You Dig number connects to your state’s utility locating service. Call at least 48 hours before you plan to dig. Utility companies send technicians to mark underground lines with colored flags or spray paint. The service is free. The locate is valid for 30 to 60 days depending on the state. Digging without a locate is illegal in most jurisdictions. A post hole digger through a buried electric line can kill the person holding it. A post hole through a gas line is an explosion hazard that requires an evacuation.
For properties built before 1978, be aware that lead paint residue may have accumulated in soil near the foundation over decades. The EPA recommends containing excavated soil and keeping children and pets away from the work area during outdoor projects near older homes.
Digging the Hole
A two-person gas-powered auger is the fastest tool for digging multiple post holes. It rents for $60 to $100 per day. A one-person auger is lighter and cheaper to rent but harder to control when it hits a rock or a root. For one to three holes, a manual post hole digger, which is a clamshell-style digger with two long handles, costs $30 to $50 to buy and produces clean, vertical holes. A shovel alone is the worst option. Shovel-dug holes are wide at the top, narrow at the bottom, and require twice as much concrete as a properly dug hole.
Dig the hole to the full depth. The sides of the hole should be as vertical as possible. A bell-shaped hole that is narrower at the top than at the bottom provides a mechanical lock that resists frost heave better than a straight-sided hole, but this shape is difficult to achieve with a manual post hole digger. A straight-sided hole is sufficient for most residential fence posts when the post extends below the frost line.
Pour 6 inches of gravel into the bottom of the hole. The gravel provides drainage below the post so water does not pool at the base and rot the wood or rust the metal. Tamp the gravel with the end of the post or a scrap piece of lumber. Set the post on the gravel bed. The gravel layer is most important for wood posts because wood rots when it sits in standing water. For metal posts, the gravel is still recommended but the post can be set directly in concrete without a gravel base if the concrete drains adequately.
Mixing and Pouring Concrete
Use fast-setting concrete mix designed for fence posts. The bag says fast-setting or post-setting on the label. Fast-setting concrete cures in 20 to 40 minutes, which means you can continue working on the fence the same day instead of waiting 24 hours for standard concrete to cure. The trade-off is a shorter working time. Mix only as much as you can pour and work in 10 to 15 minutes.
Pour the dry concrete mix directly into the hole around the post. There is no need to premix fast-setting concrete in a wheelbarrow. Pour the dry mix into the hole, add water from a garden hose, and let it set. The water percolates through the dry mix and activates the cement. This method is faster than premixing and produces a stronger bond because the concrete cures in direct contact with the soil and the post. Fill the hole to within 4 inches of the top. The concrete should slope away from the post at the surface to shed rainwater. A flat concrete surface around the post collects water, which freezes in winter and accelerates frost heave.
For gate posts and terminal posts, premixing the concrete in a wheelbarrow and pouring it around the post provides a denser, stronger set than the dry-pour method. The extra labor is worth it for the posts that carry the most load. Mix one 60-pound bag of concrete with approximately 2-1/2 quarts of water. The consistency should be like thick oatmeal, not soup. Concrete that is too wet is weak. Concrete that is too dry does not flow around the post and leaves voids.
Bracing the Post
A post set in wet concrete will lean in the direction of the prevailing wind, the slope of the ground, or whichever direction the fence fabric pulls on it. Brace the post plumb in both directions while the concrete cures. For fast-setting concrete, brace for at least 1 hour. For standard concrete, brace for 24 hours.
The standard brace is a 2-by-4 stake driven into the ground approximately 3 feet from the post, with a second 2-by-4 screwed between the stake and the post at a 45-degree angle. One brace in each of two perpendicular directions holds the post plumb in both planes. For gate posts, brace in three directions: two perpendicular to the fence line and one parallel behind the post to resist the pull of the gate.
Check the post with a level after bracing. Adjust the braces until the post is plumb in both directions. Do not assume the post is plumb because you held it while pouring the concrete. Concrete exerts hydraulic pressure as it is poured, and a post that was plumb before the pour can be pushed out of plumb during the pour. Recheck after the concrete is in and the braces are tightened.
Setting Posts Without Concrete
Fence posts can be set in compacted gravel instead of concrete in climates with minimal frost heave. The gravel allows water to drain away from the post and can be dug out and replaced more easily than concrete when the post eventually needs replacement. Drive the post 6 to 12 inches deeper than a concrete-set post to compensate for the reduced lateral resistance of gravel compared to concrete. Pour 6 inches of gravel into the hole. Set the post. Fill the hole with gravel in 6-inch lifts, tamping each lift firmly with a tamping bar or a 2-by-4 before adding the next lift. A properly tamped gravel-set post is nearly as stable as a concrete-set post for line posts and is adequate for lightweight fences in mild climates. Terminal posts and gate posts should always be set in concrete regardless of the climate.
Frequently Asked Questions
Is the “one-third in the ground” rule accurate?
Roughly. The rule says one-third of the total post length should be underground. For a 6-foot-tall fence, the posts should be 9 feet long with 3 feet in the ground. The rule produces a post depth that is sufficient in most climates but does not account for the frost line. In a cold climate where the frost line is 48 inches, a 3-foot-deep hole is 12 inches too shallow and the post will heave. The frost line depth overrides the one-third rule wherever the frost line is deeper than the one-third calculation.
Should I use a concrete form tube for fence posts?
Not for residential fences. Sonotubes and other concrete forms create a smooth, uniform concrete column that is stronger than the surrounding soil. When the soil expands and contracts with moisture and temperature, the smooth concrete column acts as a piston and is more likely to heave than rough concrete poured directly against the soil. The rough surface of concrete poured against the sides of an augered hole grips the soil and resists heave better than a smooth sonotube column. Sonotubes are appropriate for deck footings and structural piers where the load is downward. Fence posts need resistance to lateral and upward forces, which rough concrete provides better than smooth concrete.
How do I replace a single rotted fence post without removing the entire fence?
Dig out the old concrete plug. A post set in concrete leaves a concrete plug in the ground when the wood rots away. Break up the plug with a digging bar and a sledgehammer, or rent a jackhammer for multiple posts. Dig the hole to the correct depth. Set the new post. If the old post was set in a concrete plug that is still solid and the old post rotted because water pooled at the base rather than because the concrete failed, chip out the rotted wood from the center of the plug and set the new post in the existing hole with new concrete filling the gap. The old concrete plug acts as a permanent form and the new concrete bonds to it.