

Hanging drywall in a garage is the step between bare studs and a finished room. The hanging is the physically demanding part. The taping and mudding that follow are the skill part. This guide covers the hanging only. The goal is to get the drywall onto the walls and ceiling, screwed in place, with the joints aligned and the openings cut, so the surface is ready for tape and joint compound.
A standard two-car garage of approximately 400 square feet with an 8-foot ceiling requires 30 to 35 sheets of drywall. Hanging takes two people one full day for the ceiling and one full day for the walls, or one person two days with a drywall lift. The key to a good hanging job is getting the sheets tight to the studs, the screws set to the correct depth, and the joints staggered so the inevitable cracking is distributed across the widest possible area. Here is the sequence, the technique, and the tools that make the job possible for a homeowner.
Tools You Need to Hang Drywall
| Tool | Cost to Buy | Cost to Rent (per day) |
| Drywall lift | $200–$300 | $40–$60 |
| Drywall screw gun or drill with dimpler bit | $40–$80 | $20–$30 |
| Drywall T-square (4 ft) | $15–$25 | — |
| Utility knife with replacement blades | $8–$15 | — |
| Drywall saw or oscillating multi-tool | $10–$15 | — |
| Dust mask, eye protection, hard hat | $15–$25 | — |
The drywall lift is the one tool that transforms the job from nearly impossible to straightforward. It holds a 55-pound sheet of drywall against the ceiling joists while you drive screws. Without it, you are holding the sheet overhead with your arms and a T-brace while a helper drives the screws. The lift rental costs less than the pizza and beer you will owe the friend who helps you without one. Rent the lift. You will still need a helper to load the sheets onto the lift because lifting a full sheet from the floor to the lift cradle is a two-person move, but the lift handles the overhead work.
Step One: Hang the Ceiling First
The ceiling goes up before the walls. The wall sheets support the edges of the ceiling sheets along the perimeter, but only if the ceiling is installed first. If the walls go up first, the ceiling sheets must be cut to fit inside the wall perimeter, which is harder to measure and leaves a gap at every edge that must be taped.
Mark the location of every joist on the top plate of the walls with a pencil before any drywall goes up. The joists will be hidden once the ceiling sheets are in place. The marks tell you where to drive the screws. Mark the center of each joist, not the edges. A screw driven into the edge of a 1-1/2-inch-wide joist has less holding power than a screw in the center. When the ceiling sheet is lifted into position, transfer the joist marks onto the face of the drywall so you can see where to drive the screws from below.
Hang the ceiling sheets perpendicular to the joists. The long edge of the sheet runs across the joists, not parallel to them. Perpendicular orientation reduces sagging by distributing the weight of each sheet across more joists. If the joists run east-west, the sheets run north-south. The ends of every sheet must land on the center of a joist. A sheet end that falls between joists has no support and will crack at the joint.
Drive screws every 8 inches along the edges of the sheet and every 12 inches in the field. Ceiling screws are spaced closer than wall screws because the drywall is hanging from the ceiling rather than leaning against the wall, and the additional vibration from opening and closing the overhead door loosens screws over time. The screw head should dimple the paper surface of the drywall without breaking through it. A screw set too deep tears the paper and loses its grip. A screw set too shallow leaves a bump that joint compound cannot cover.
Stagger the end joints by at least one joist bay. If a joint between two sheets falls on joist number three, the joints in the adjacent rows should fall on joist number four or five, not on joist number three. Staggering prevents four corners from meeting at a single point, which creates the weakest possible drywall joint and a crack that will run in a straight line across the ceiling.
Step Two: Hang the Walls
Hang the wall sheets horizontally. A 4-foot-wide sheet laid horizontally covers 4 feet of wall height in a single piece, with the long tapered edge at a comfortable working height for taping. Horizontal hanging also reduces the number of butt joints, which are the joints between the square ends of sheets and are harder to finish smoothly than the tapered factory edges. Two sheets stacked horizontally cover an 8-foot wall. A single sheet hung vertically covers the same 8 feet but creates four times as many joints, most of them butt joints.
Start at the top of the wall. The top sheet butts against the ceiling drywall. Leave a 1/2-inch gap at the bottom of the wall where the drywall meets the concrete floor. The gap prevents the drywall from absorbing moisture from the slab through capillary action, which causes the bottom edge to crumble and grow mold. The gap is covered by baseboards or left exposed in a garage where baseboards are not installed.
Drive screws every 8 inches on the edges and every 12 inches in the field. The screw pattern is the same as for ceilings. The edges need more screws because that is where the joint compound and tape will be applied, and any movement at the edges cracks the tape.
Stagger the end joints between the top and bottom rows. If the top row ends on stud number four, the bottom row should end on stud number five or six. The stagger prevents a continuous vertical crack from the floor to the ceiling.
Step Three: Cut Openings for Doors, Windows, and Electrical Boxes
Electrical boxes on the ceiling and walls are measured and cut before the sheet is lifted into position. Measure the distance from the edge of the last installed sheet or from the nearest wall to the center of the box. Measure the distance from the ceiling or floor to the center of the box. Transfer both measurements to the new sheet and mark the opening. Cut the opening with a drywall saw or a rotary tool. The opening should be no more than 1/8 inch larger than the box on each side. The gap is covered by the outlet cover plate or the light fixture canopy. An opening that is slightly too small can be enlarged in place. An opening that is cut in the wrong location means the sheet is scrap.
For the overhead door opening, the drywall wraps around the door frame on the sides and above the door. The door opening is framed with the same stud spacing as the rest of the wall. The drywall on the sides of the door runs from the floor to the ceiling. The drywall above the door spans the width of the opening and is supported by a header. Cut the drywall to fit around the door track brackets and the door opener mounting bracket. These cuts are irregular and are easiest to make with an oscillating multi-tool or a drywall saw after the sheet is screwed in place around the opening.
For attic access hatches, frame the opening with 2-by-4 blocking between the joists before hanging the ceiling drywall. The opening is typically 22 by 30 inches. Cut the drywall to fit around the framed opening. The access cover is a separate piece of drywall cut to the exact opening dimensions and edged with wood trim or metal J-bead. The cover lifts out for access.
Screw Depth and Common Fastening Mistakes
A drywall screw set to the correct depth creates a small dimple in the paper surface without tearing it. The dimple holds the joint compound. If you can feel the screw head with your finger, it is not deep enough. If the paper is torn and the screw head is below the surface of the gypsum core, it is too deep. A drywall dimpler bit, which fits into a standard drill, sets every screw to the correct depth automatically. The bit costs $5 to $10 and eliminates the most common hanging mistake.
Do not drive screws into the gap between studs. If a screw misses the stud, remove it and drive a new screw 1 to 2 inches away into the stud. A screw in the gap with nothing behind it is a bump under the joint compound that will eventually work its way out. It also tells the building inspector that the person who hung the drywall was guessing.
Do not use nails. Drywall nails were the standard before screw guns became common, and they are still sold at hardware stores. They should not be used. Nails back out over time as the wood framing expands and contracts, creating a condition called nail pops where the nail head pushes through the joint compound and becomes visible as a small bump or crack. Screws do not back out. Use screws. Not nails.
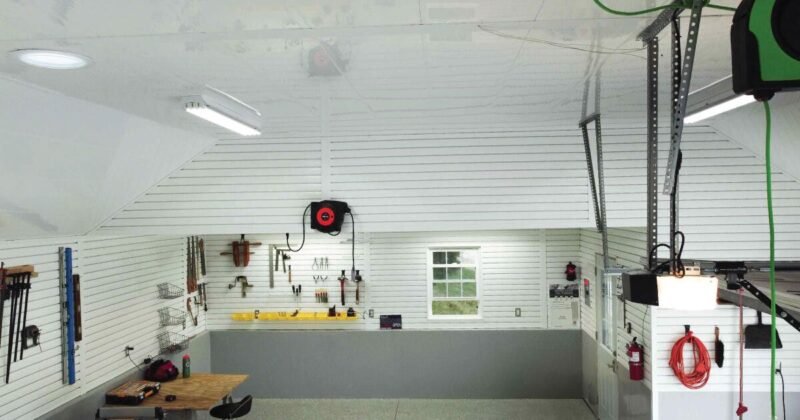
The drywall dust generated during cutting and sanding contains gypsum and silica. Joint compound emits volatile organic compounds during application. The EPA recommends increasing ventilation when working with products that emit VOCs and wearing appropriate respiratory protection. For a garage, opening the overhead door provides excellent cross-ventilation during the hanging and finishing process.
Frequently Asked Questions
Should garage drywall be hung horizontally or vertically?
Horizontally on the walls, perpendicular to the joists on the ceiling. Horizontal wall hanging puts the long tapered factory edge where the taping is easiest and reduces the number of butt joints. The only exception is if the wall studs are exactly 4 feet apart and the sheets fit perfectly without cutting, which is rare. Vertical hanging is acceptable in that specific case and eliminates vertical butt joints entirely, but for most garages, horizontal is the better method.
How big should the gap be between sheets?
The tapered factory edges should be butted together with no gap. The square ends at butt joints should have approximately 1/8 inch of gap to allow the joint compound to be pressed into the joint and bond to the gypsum core. A gap that is too tight prevents the compound from penetrating. A gap that is too wide, more than 1/4 inch, requires prefilling with a setting-type compound before taping.
Can one person hang drywall in a garage alone?
Yes, with a drywall lift for the ceiling. The lift holds each ceiling sheet in position while you drive the screws. Loading the sheets onto the lift is the only part that is physically difficult for one person. Tilt the sheet onto its edge, lean it against the lift cradle, and tip it into position. The wall sheets are manageable for one person because they start at the floor and are lifted only 4 feet at a time. The 12-foot sheets that some contractors use to cover a garage wall in a single sheet are not manageable for one person. Use standard 8-foot sheets if you are working alone.