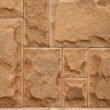


Building a fieldstone retaining wall is harder than building one with quarried stone. Fieldstone is the stone you find in the ground, dug out of fields and pastures by generations of farmers and piled at the edges of the property. It is rounded by glaciers, tumbled by rivers, and weathered by centuries of freeze and thaw. It does not have flat faces. It does not split into convenient layers. It is stubborn, heavy, and irregular in a way that quarried sandstone is not. That is also why it looks the way it looks. A fieldstone wall has a texture and a sense of permanence that no manufactured block or sawn stone can match. It looks like it was built a hundred years ago, even on the day the last stone goes in.
The technique for fieldstone is similar to sandstone but with more patience. The stones are rounder. The chinking is more important. The batter needs to be steeper. The wall is typically shorter because the rounded shapes become unstable at greater heights. A fieldstone wall is a wall you build because you have the stones, or because you want the look of the stones, or because you want the project of fitting a thousand-year-old rock into a gap that is exactly the right shape for it. It is not the fastest way to build a retaining wall. It is the way that produces the most beautiful one.
Step 1: Source and Sort the Stone
Fieldstone comes from three places: your own property if you are lucky enough to have rocky soil, a local stone yard that sells fieldstone by the ton, or a farmer who wants a rock pile gone and will let you haul it away for free. The free option costs only fuel, time, and your lower back. A ton of fieldstone covers roughly 25 to 30 square feet of wall face, less than sandstone’s 35 to 40 square feet, because the rounded shapes leave larger gaps that must be filled with smaller stones. For a wall three feet tall and 20 feet long, order or collect roughly five to six tons.
Sort the stone into five piles. The base stones are the largest and flattest stones you have. They may not be particularly flat. Fieldstone does not do flat. Pick the flattest ones you can find. The face stones are medium-sized stones with at least one reasonably presentable face that will be visible in the finished wall. The through-stones are the longest stones, 18 to 30 inches, that will extend back into the hillside. The chinking stones are small wedge-shaped pieces that fill gaps and lock larger stones in place. Chinking is more critical in a fieldstone wall than in a sandstone wall because the rounded stones have more gaps and more tendency to rock. The hearting stones are small, irregular pieces, roughly fist-sized, that are packed into the core of the wall between the face stones and the backfill. Hearting fills the void inside the wall so the face stones have something solid to bear against. A fieldstone wall that is only face stones with empty space behind them is a wall that will collapse inward as the face stones shift backward into the void.
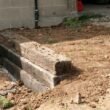
Step 2: Excavate and Set the Base Course
Dig a trench 24 to 30 inches wide, deep enough to bury the first course four to six inches below grade and to accommodate six inches of compacted angular gravel underneath. Fieldstone walls are wider than sandstone walls because the rounded stones create a thicker wall section. A three-foot fieldstone wall is typically 20 to 24 inches thick at the base, tapering to 14 to 16 inches at the top. The wider base resists overturning and provides enough depth for through-stones to anchor properly.
Compact six inches of angular gravel in the trench. Set the base stones on the gravel. Each base stone must be completely stable. No rocking. If a base stone rocks, chink under it with small stone wedges driven in with a hammer until the stone is solid. The base course is the only course where chinking under stones is acceptable. In the courses above the base, chinking goes in the joints between stones, not under them, because chinking under a stone in the middle of the wall creates a point load that can crack the stone above it under the weight of the wall.
Fieldstone walls need more batter than sandstone walls because the rounded shapes interlock less securely. Set the batter at roughly two inches per foot of height instead of the one inch per foot used for flat-bedded stone. A three-foot wall leans back six inches from bottom to top. The steeper batter keeps the center of gravity well behind the face of the wall and compensates for the reduced interlock between rounded stones. Set batter boards at both ends with a string at the correct angle. Every face stone must touch or be slightly behind the batter string.
Step 3: Stack With the One-Over-Two Rule
The fundamental rule of fieldstone stacking is one-over-two and two-over-one. Every stone in the wall should sit on two stones below it, and every gap between two stones below should be bridged by one stone above. This distributes weight across multiple stones and prevents continuous vertical seams that would split the wall. Applying this rule with irregular rounded stones is harder than it sounds. A stone that bridges two stones below it must be long enough to span the gap with enough bearing surface on each side that it does not tip. Test each stone by setting it in place without chinking. If it rocks, try a different stone. If it sits solid with contact on both sides, it is the right stone.
The face stones should be placed with their flattest face outward and the stone tilted slightly toward the back of the wall. Water that hits the face should drain into the wall core, not out through the front. Each face stone should have at least three points of contact with the stones below it and beside it. Two points of contact allow the stone to pivot. Three points make a stable tripod. This is why chinking is a structural technique, not a cosmetic one. A properly placed chinking stone creates the third point of contact that locks a stone in place.
Install through-stones every four feet and every other course. A through-stone in a fieldstone wall should extend at least 18 inches into the hillside behind the wall. The stone does not need to be beautiful. It is buried. Use the long, ugly stones for through-stones and save the flat-faced stones for the visible face. The through-stone ties the wall face to the earth behind it. The weight of the soil and backfill above the through-stone anchors it, and the through-stone anchors the wall.
Fill the core of the wall with hearting stones as you stack each course. Pack the fist-sized stones tightly into the space between the face stones and the gravel backfill. The hearting must be packed, not dumped. Dumped hearting settles and leaves voids. Packed hearting transfers load from the face stones to the backfill and creates a solid mass that behaves as a single structure. Backfill behind the wall with at least 12 inches of angular gravel, compacted in lifts. Install a perforated drain pipe at the base. The drainage principles are the same as for any retaining wall. The rounded stones of a fieldstone wall let more water through the face, so the backfill drainage carries a higher volume of water. Size the drain pipe and gravel column accordingly.
Step 4: Cap the Wall and Let It Settle
Fieldstone capstones are the hardest stones to find in the pile because they need to be relatively flat, wide enough to span the top of the wall, and heavy enough to stay put. Select the best candidates from the pile before you start building and set them aside. If you use the good capstones as face stones because you need them halfway through the build, you will reach the top course with a pile of round, lumpy stones that nobody would describe as cap material.
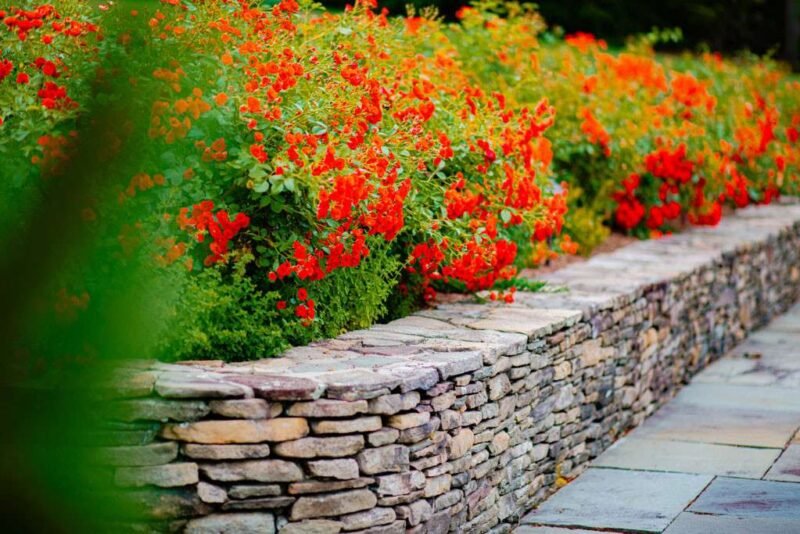
Set capstones in a thin bed of mortar or construction adhesive, the same approach as sandstone. The mortar holds the capstones in place through freeze-thaw cycles and prevents them from being dislodged. The joint between capstones can be mortared as well for a finished appearance, or left open for a more rustic look. A fieldstone wall with mortared cap joints looks intentional. A fieldstone wall with open cap joints looks older. Both are correct.
Fieldstone walls settle more than quarried stone walls because the round stones seat themselves more deeply under load. A newly built fieldstone wall will settle by a quarter to half an inch over the first year as the stones find their final positions and the chinking compresses slightly. This is normal. The wall should be inspected in the spring after its first winter. Tighten any loose chinking stones. Replace any capstones that have shifted. After the first year of settlement, the wall stabilizes and will not move further for decades.
Frequently Asked Questions
What is the difference between a fieldstone wall and a sandstone wall?
Fieldstone is rounded, dug from fields, and shaped by glaciers and rivers. Sandstone is quarried, layered, and splits into flat pieces. Fieldstone is harder to stack because the rounded surfaces have less contact area and require more chinking. Sandstone stacks more securely and can be built taller without mortar. Fieldstone produces a rustic, aged appearance. Sandstone produces a more structured, formal appearance. Both are built dry-stacked with gravel bases, through-stones, and drainage. The choice comes down to what stone is available locally and which look you prefer. In regions with glacial geology like New England and the Upper Midwest, fieldstone is the traditional material. In regions with sedimentary geology like the Southwest and the Appalachians, sandstone is more common.
How tall can I build a fieldstone retaining wall without mortar?
A dry-stacked fieldstone wall built by a homeowner should not exceed two to three feet. The rounded shapes create less interlock between stones, making the wall less stable at greater heights than a sandstone or segmental block wall of the same dimensions. For walls over three feet, either use mortar to bond the stones together, transition to a quarried stone with flatter surfaces, or hire an experienced dry-stone mason. The professional dry-stone walls you see in New England that are five feet tall and have stood for 200 years were built by farmers who stacked stone every spring for 40 years. The skill required at that height is not something a guide can teach.
Where can I find fieldstone for a retaining wall?
Stone yards and landscape supply companies sell fieldstone by the ton, typically $100 to $250 per ton depending on the region and the stone quality. Local farms and rural properties sometimes have old stone piles they want removed. Check classified ads and local social media groups in agricultural areas. Construction sites in rocky soil sometimes have excavated stone available for free if you haul it. Before collecting stone from any property that is not yours, get written permission. A farmer’s rock pile is still the farmer’s property. The free stone is free because someone already paid for it in broken plow blades and a sore back.
The Bottom Line
A fieldstone retaining wall is a pile of rounded glacial stones organized into a structure that leans backward into a hillside, held together by weight, friction, and chinking stones driven into the gaps. The stones are round. The wall is wide. The batter is steep. The through-stones are long and ugly. The hearting fills the core. The capstones are the flattest stones you saved from the pile before you started. The wall will settle over the first year and then stand for the rest of your life. It will look like it has been there since before the house was built, and that is the entire point of building it from fieldstone instead of from blocks that come on a pallet wrapped in plastic.